Hey guys, I have a fun project life tutorial to share with you today! Are you familiar with Becky Higgins project life system? I’m a big, big fan! Becky has created a wonderful memory keeping system that combines scrapbooking and photo albums into one. I had the opportunity to view all of the new releases back in January at CHA and have been anxiously waiting to play with them. The patterns and designs from each kit are so fun! I used the new Kraft and childhood wellington kit to create mini notebooks with a metal binding. This tutorial on how to make a notebook is perfect for making Summer journals and scavenger hunt notebooks.

This post contains affiliate links
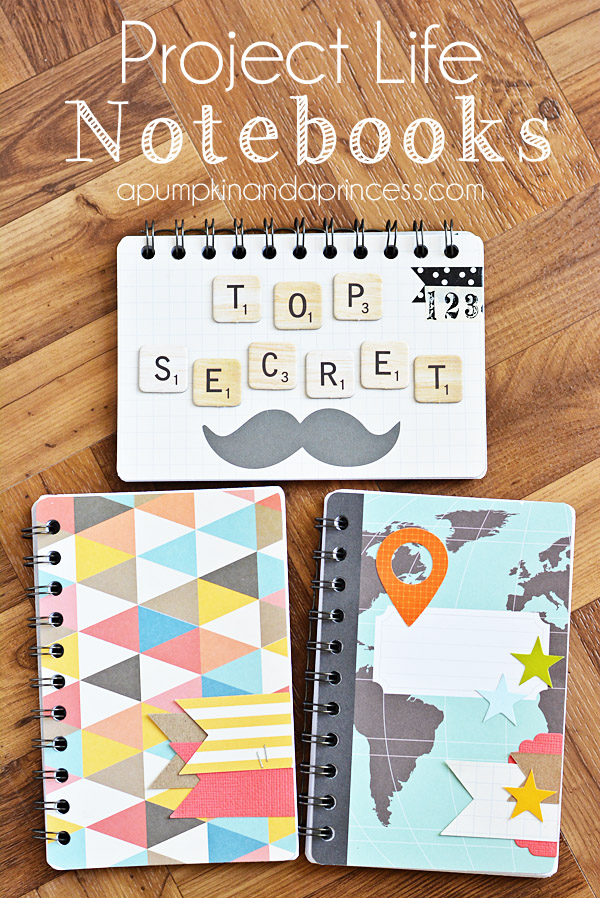
How to make a notebook tutorial
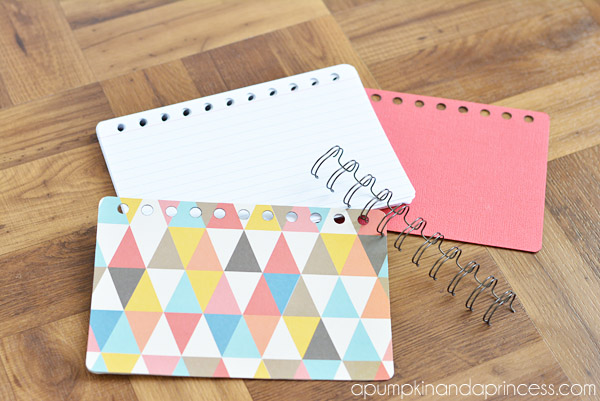
Supplies:
project life cards – Project Life Kraft Edition![]()
binding
chipboard
adhesive
note cards
corner rounder
Step one:
Trim chipboard to 4×6 inches (I used Silhouette chipboard). Round the corners of your note cards and chipboard so that they align with the project life cards.
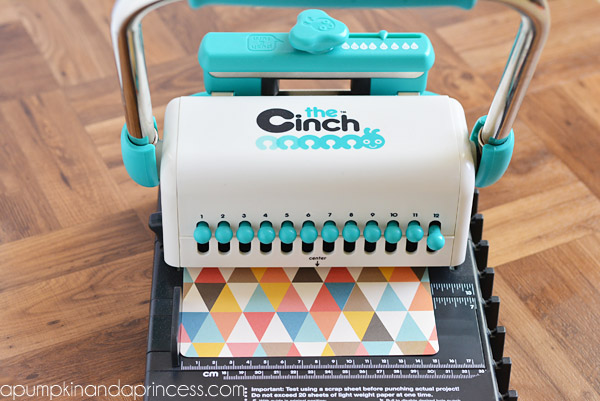
Step two:
Use the cinch tool to punch holes through the cards and chipboard. Glue the chipboard to the back of your first and last project life card. This will help make your covers sturdy.
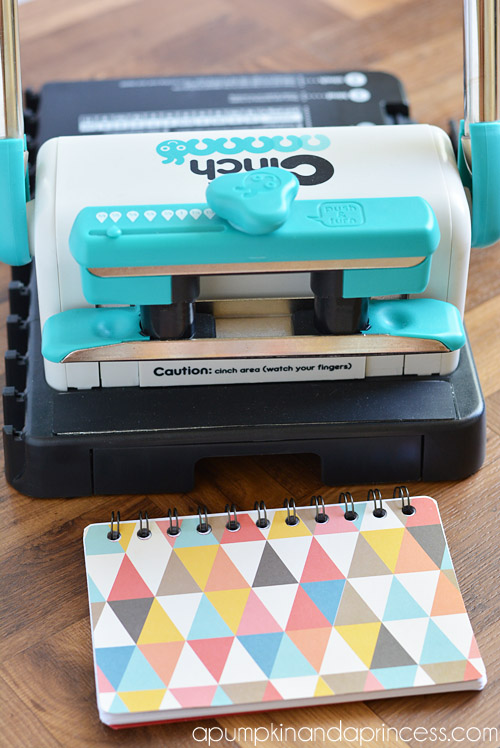
Step three:
Layer your cards in the binding in this order: note cards -> front cover -> back cover flipped over. Then use the back of the cinch to press the binding close. This tool is amazing! It makes creating your own notebooks, journals, and books easy peasy!
Step four:
Embellish your notebooks to your hearts desire! I used pieces from Studio Calico, Basic Grey, and washi tape. the project life cards are great as is so I don’t think you need to add much. I kept the funky colorful card from the Kraft kit simple to avoid hiding that awesome pattern.
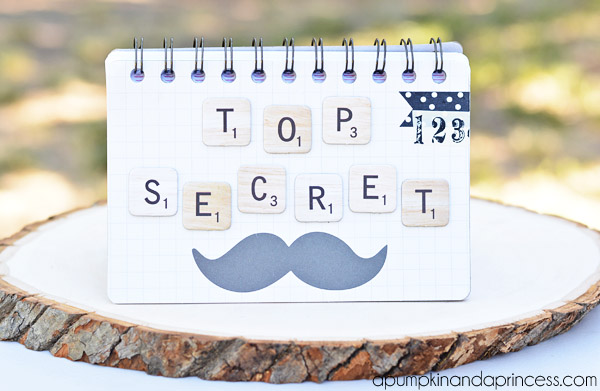
How awesome is this mustache project life card from the Kraft edition? The back of the card has a mustache as well so that you can use it vertically in your project life album. I plan to share with you some of my PL layouts soon!
By the way on my first notebook I planned on using computer paper for the notebooks but after trimming 15 pieces to 4×6 inches I knew I needed to rethink that haha! Luckily I had a stack of white ruled note cards sitting on my desk that were the perfect size. The vertical notebooks will need to be turned horizontally but I don’t think my kids will mind. :)
Are you SERIOUS??? These are SO awesome! My mind is officially blown. And now I need a Cinch. Thanks a lot! ;)
Remember how I told you at SNAP that I had just ordered it? Well this was my first project and I really, really like the cinch! Miss you! :)
These are adorable Crystal! You always think of the most creative ideas! Hope you have a great weekend… wish we lived close enough to hang out and have a girls night :)
You are so sweet, Holly! I miss you girls SO much! :)
I love these!! Super cute!! I always love your projects :)
Thank you Crystal! :)
Great idea Crystal! Love it! :)
What a great idea! I’m a big fan of project life also!!
Cute idea, You are invited to share this with Show Your Stuff:
I love project life (well any type of scrapbooking really) and this is a super cute idea! Thanks for sharing :)
Wow!! I’m so impressed. These are awesome! I’m a new follower and I would love for your to link up a few of your projects to my party
Suzie @ Dorothy Sue and Millie B’s too
CUTE!!! That is such a great idea! I want one of those little machines now!
I am seriously DYING over the cuteness of these! I am totally in agreement with Nat…I neeeed a Cinch now too! Love these!
WOW! Totally blown away! It looks so cute!!! A very nice idea for all the extra PL cards! LOVE IT!