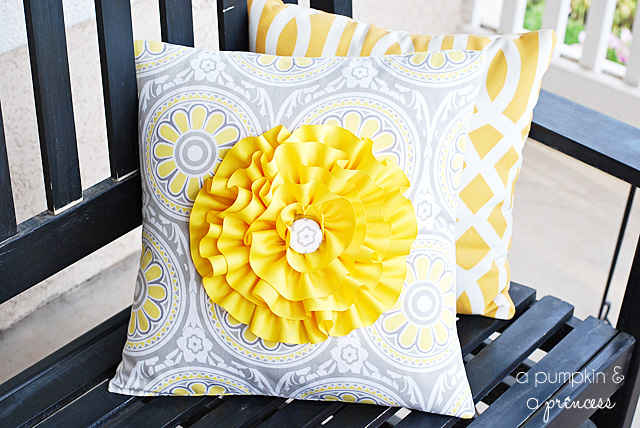
I recently received some of the new HGTV Fabric available at Jo-Ann to review and the first thing I thought of was how perfect the yellow and grey fabric matched my current home decor. Since I’m currently working on updating my front porch I knew adding bright, colorful pillow covers would be easy to do. With the grey and yellow fabric I made a flower pillow cover to coordinate with my porch makeover. It’s still a work in process but I hope to finish this weekend and show it to you next week! 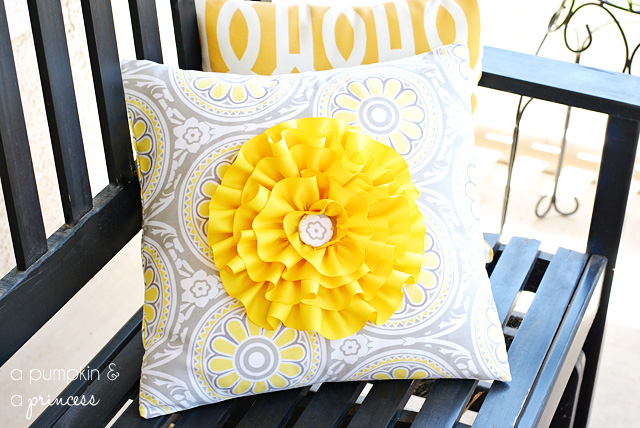
HGTV and Jo-Ann have partnered together to offer trendy indoor and outdoor home decor fabrics, available only at Jo-Ann stores. I received two different patterns of the HGTV fabric and coordinating trim. I have an idea for my son’s room with a geometric pattern fabric that I can’t wait to try. For my bench pillow I used the light grey floral print and I think it fits perfectly for what I had in mind.
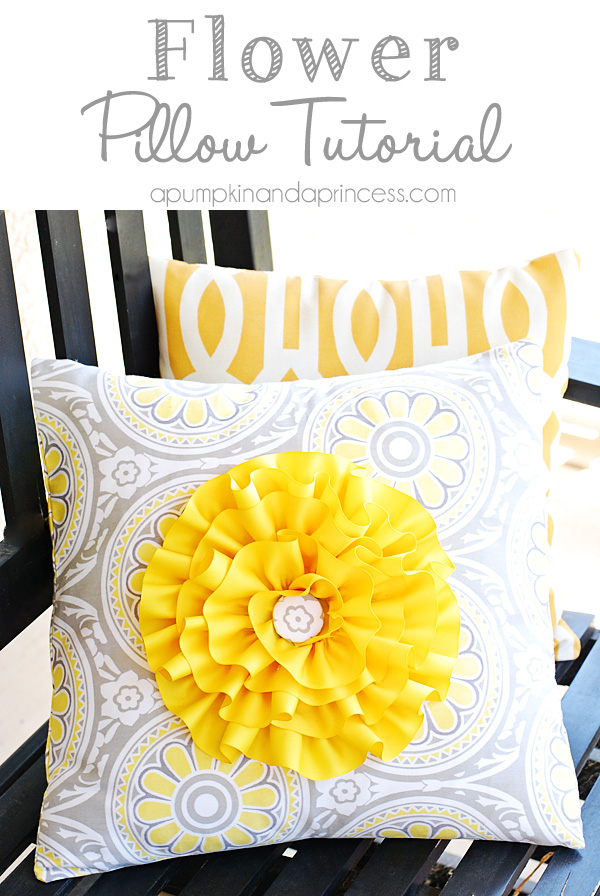
How to make an envelope pillow cover
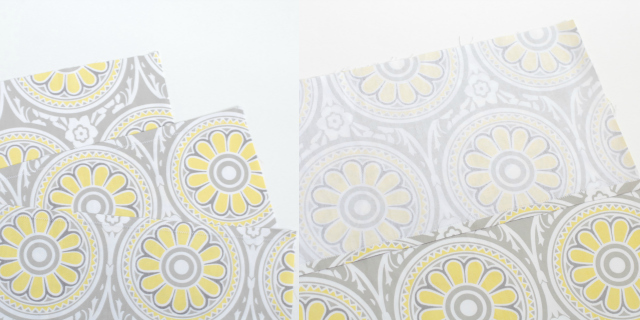
My pillow form is 17 inches so I cut a total of three pieces of fabric
-one 17 inches (the front of the pillow)
-one piece 21 inches cut in half
I was so excited to make make the pillow that I forgot to take pictures of every step. I hope I can explain this as easy as possible, please feel free to email me if I confuse you at all! :)
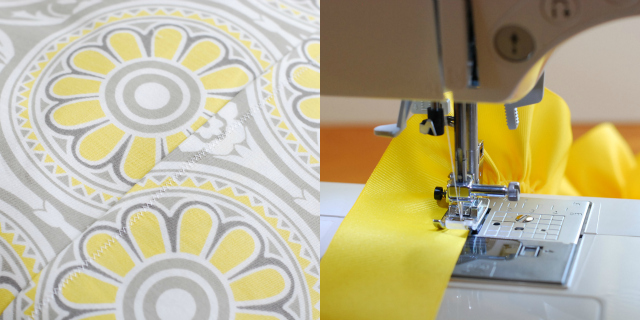
I took my long piece of fabric (the 21 inches) and cut it in half. I sewed a half inch seam where I cut the pieces in half on one side of each piece. This will be the seam on the envelope closure.
I then placed my 17 inch fabric right side up and my two smaller pieces right side down, overlapping each other by a few inches (the hemmed seams are in the middle of the pillow). The picture on the right above shows what it should look like before adding the third piece right side down, that will overlap the piece on the top. I pinned it together and sewed around the entire perimeter. This is really basic sewing here, all you need to do is sew a “square” and you’re done.
Since the “long piece” was cut into two and then aligned with the 17 inch piece, it creates an envelope closure on the back of the pillow case. This makes it easy to wash or replace your pillow covers.
So here’s a little secret about the ribbon flower on the front of the pillow…it’s removable!
To make the yellow ribbon flower I ruffled 4 yards of 2 inch wide ribbon. I then wrapped the ribbon around to create a flower design and hot glued onto a round piece of felt along the way. I made a button using the HGTV fabric and a button making kit you can find at Jo-Ann. So I bet you’re wondering how it’s removable, huh? Well I actually safety pinned the felt on the back of the flower to the front of my fabric cover. You’re probably thinking what? Why? Well, at first I wasn’t sure if I would like the flower on the front so I didn’t want to sew it straight onto the pillow cover. Then I ran out of ribbon and the store is out of stock in the color I need. I would like to add two more yards of ribbon to create a bigger flower. I figured it’ll be easy for me to add more felt and ribbon to it if I need to.
Thanks for stopping by!
I love this pillow. Its very cute
I love this pillow and you wanted to make the flower bigger but I think it’s just right any bigger and you wouldn’t get to see the pretty fabric! I;m making this one thanks for the easy to follow tut