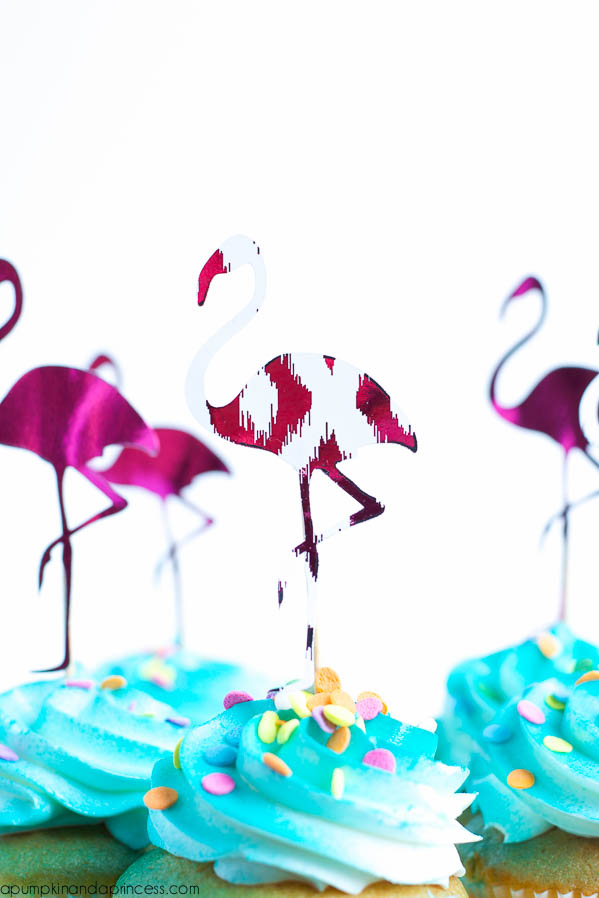
Hey crafty friends! I’m back with another Heidi Swapp Minc project. Over the last few months I’ve shared how much I love this machine. It works like a laminator by sealing colored foil on top of laser printed ink. You can create your own designs/printables or use one of the many premade kits from the Minc line. Today I’m going to share with you how I made pink foil flamingo cupcake toppers! My kids loved them and they were perfect for our luau style dinner a few nights ago.
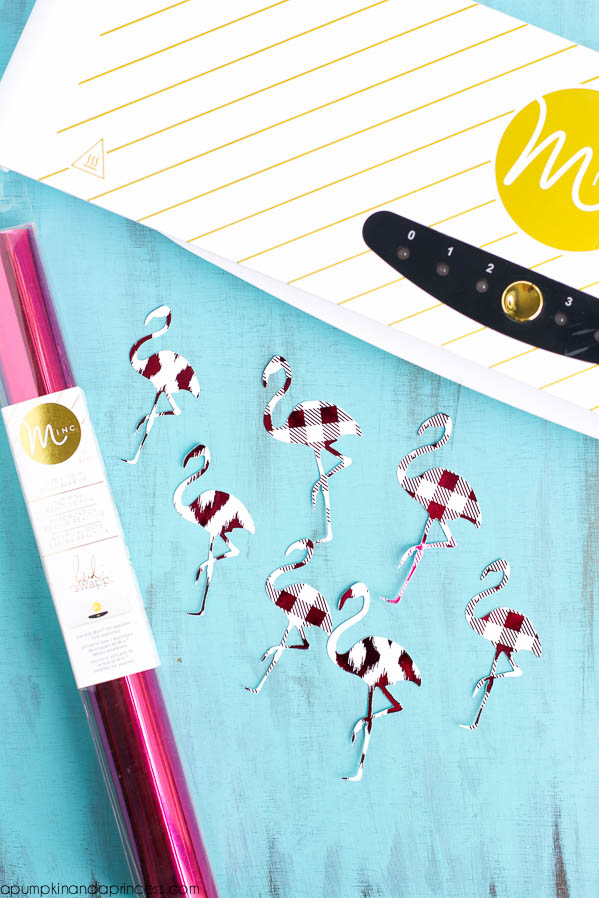
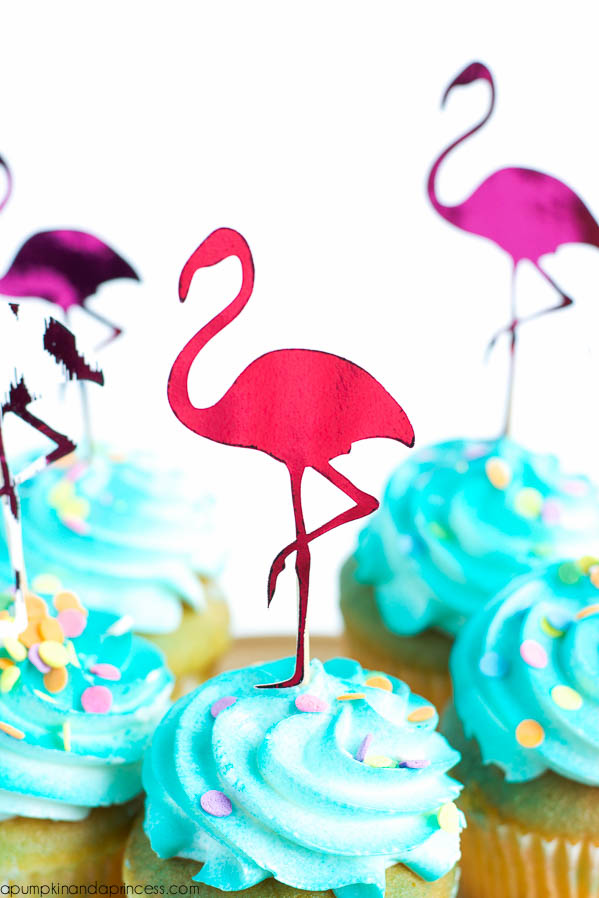 The flamingos were pretty easy to make with both printed designed paper and the solid black printed-paper. This product is new to me and I’m so excited about the possibilities of cutting out my own shapes for parties, scrapbooking, and gifts. It’s simply a thick cardstock with black ink. It allows you to create solid foil shapes without having to use up your printer ink. I found this flamingo shape in the Silhouette store, cut the shape first then ran it through the Minc machine. You can find the machine on Amazon (affiliate link below) or at your local craft retailer.
Supplies:
Heidi Swapp Minc![]()
Silhouette Portrait![]()
Heidi Swapp Minc Foil![]()
Step one: use your cutting machine to cut the flamingo shape. We kept ours fairly small since they were going to be cupcake toppers.
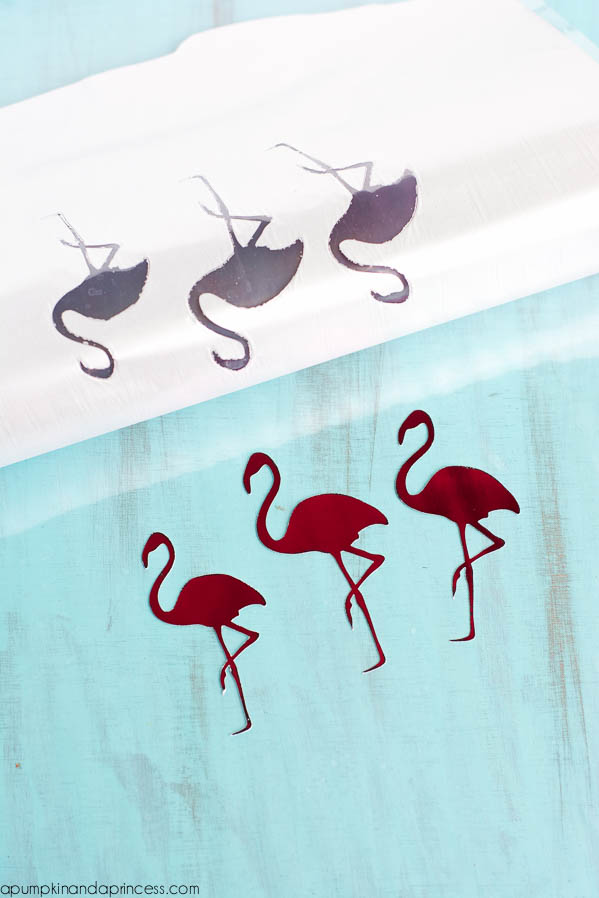
 Step two: place your flamingo shapes inside the clear folder, add your foil on top (shiny side up), and then close the folder. Just like I mentioned in my previous Minc tutorials – you’ll need to turn on your machine to the correct settings (most projects will be on setting 3). It only takes a minute or two to warm up and then you’re ready to insert your project. Once your foil has been applied, carefully remove the excess foil.
 Step three: glue the foil flamingoes to a toothpick.