• Skip to content
  • Skip to primary sidebar
  • Home
  • About
  • Project Index
  • Recipes
  • Crafts
  • Contact Me
    • Advertising
You are here: Home / DIY / DIY Chalkboard Menu

DIY Chalkboard Menu

April 20, 2012 by Crystal Owens 30 Comments

Hi guys! Sorry I haven’t been around all week. The weather has been absolutely beautiful and I couldn’t resist taking a little blogging break to enjoy it with the kids. I hope you’ll understand. :)

But today I’m finally showing you my new chalkboard menu. I’ve wanted to make one for nearly two years now and just got around to it this week. I got the idea from my crafty neighbor (hi Haeley!). She’s awesome and always has the cutest ideas. I wish you could see her house, it’s gorgeous! She has the best sense of style. But anyway she had this idea to make a chalkboard for her daughter using these laser cut wooden frames from Micheal’s. I thought it was brilliant!

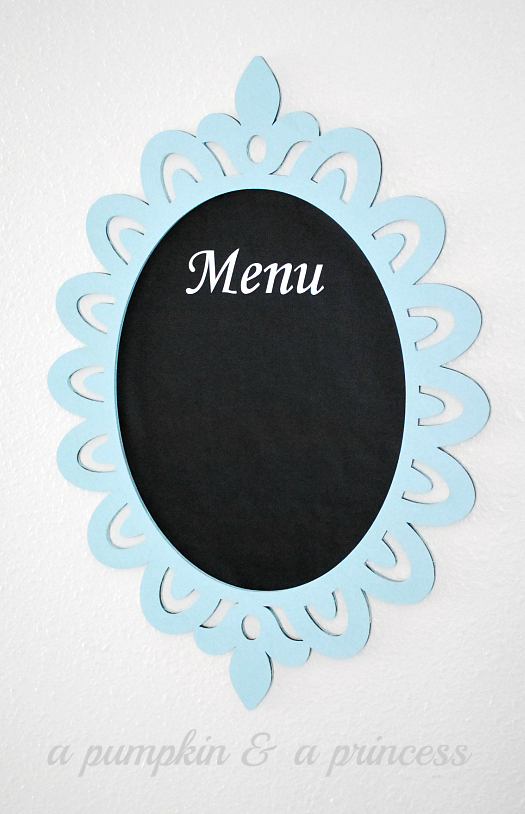
I made my chalkboard menu using chalkboard vinyl. I love love love this stuff! Have you used it? It’s quickly become my favorite craft product.

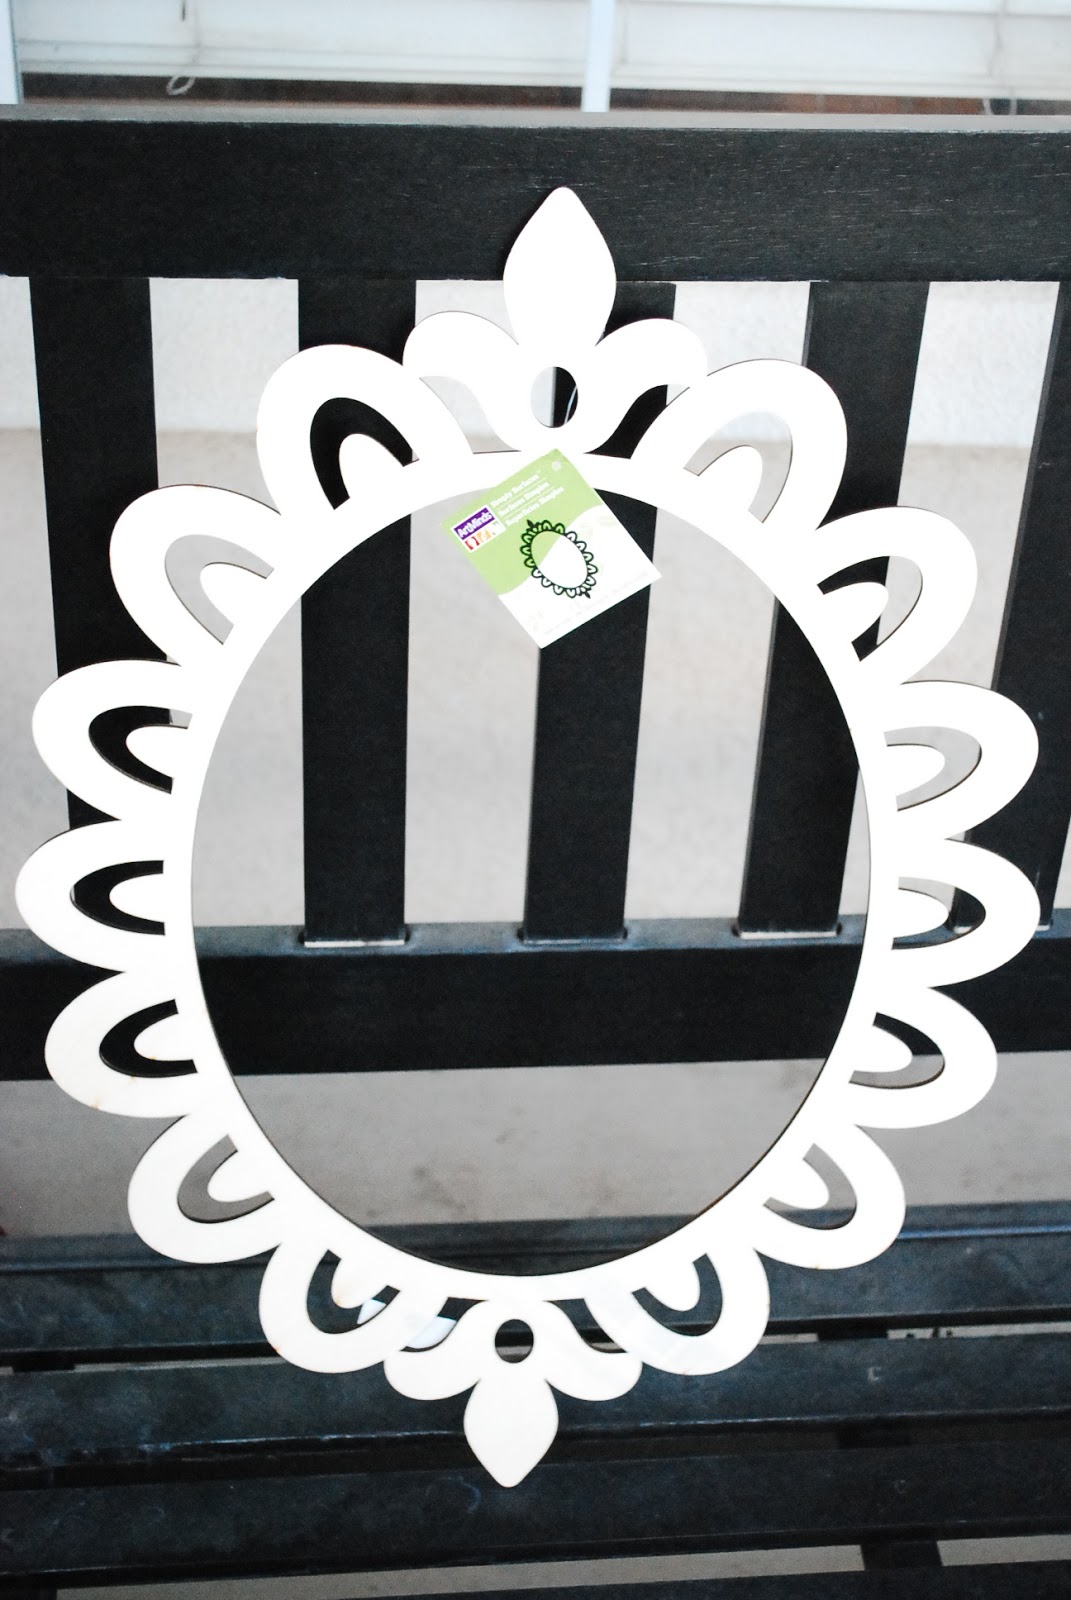
After giving it two coats of paint I traced the inner circle onto the back of the chalkboard vinyl. I then added about a half an inch and cut it out. I added a little more to ensure there weren’t any noticeable spaces between the chalkboard vinyl and frame.

MY LATEST VIDEOS
MY LATEST VIDEOS

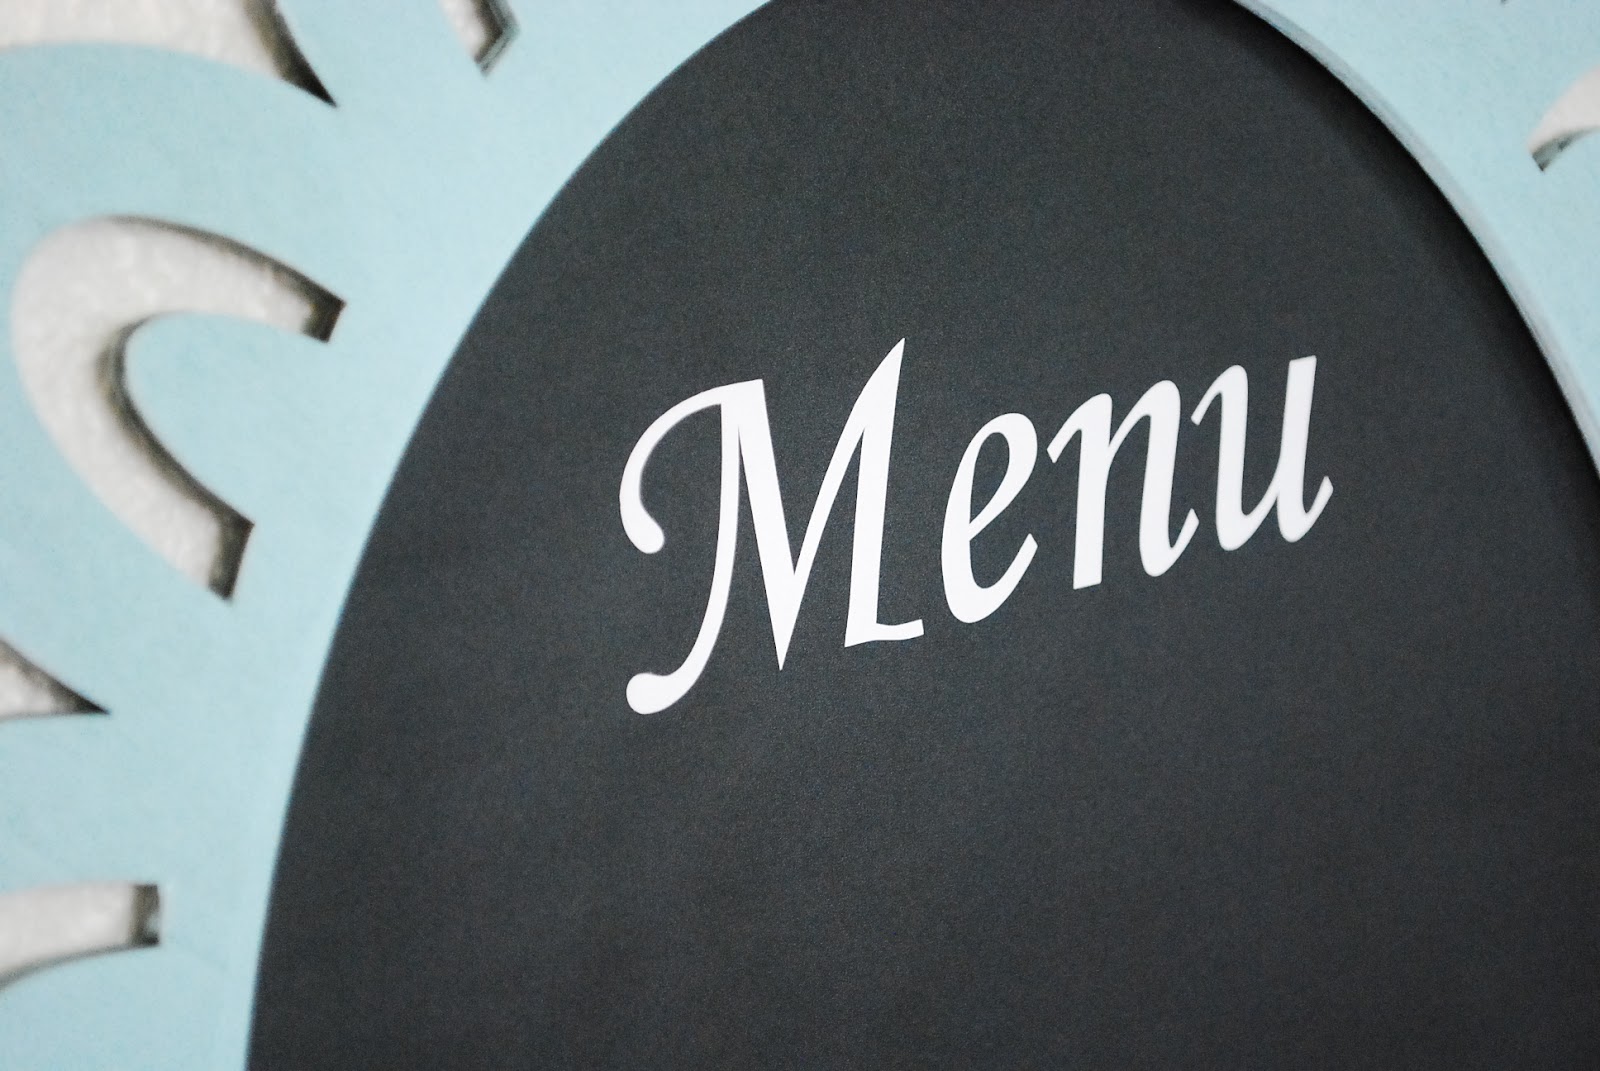
To finish it off I cut out some vinyl lettering with my Silhouette Cameo.

Now here’s where I would like to say everything went perfectly and my new chalkboard menu worked great…but my textured walls turned it into a craft fail! When I wrote on it the words looked hideous and the vinyl wouldn’t lay straight. So I put it on my refrigerator! I actually like it so much better now. I used double sided mounting squares to apply the frame. It’s not where I imagined having a chalkboard but it’s fun and different. :)

Share
Pin2
Tweet
Yum
2 Shares

Filed Under: DIY, Silhouette Cameo

Previous Post: « Washi tape mason jars
Next Post: Pretty Gift Boxes »

Reader Interactions

Comments

  1. Bonnie and Trish @ Uncommon

    April 20, 2012 at 5:38 pm

    Crystal, this is soooooo cute! I love those frames and this looks fab! hope you enjoyed your week, it’s good to take time away! ;)

    Reply
  2. susan m jensen

    April 20, 2012 at 8:04 pm

    Hi Crystal all rested? This a super crafty idea. Thanks

    Reply
  3. Tonia @The Gunny Sack

    April 20, 2012 at 8:09 pm

    I’m glad you took some time to be with your kids and enjoy the nice weather! This menu board is so cute! My kids are always wondering what is for dinner!

    Reply
  4. Liz @Simple Nests

    April 20, 2012 at 9:33 pm

    It is always nice to take a little break to spend time outside & re-energize! I am such a fan of this idea and have been seeing the Silhouette’s everywhere recently. I cannot think of a cooler gift for a blogger :) Thanks for another great idea Crystal.

    Reply
  5. Debra Kapellakis

    April 21, 2012 at 6:58 am

    COOL!

    Reply
  6. Lindsay

    April 21, 2012 at 7:40 am

    I need to go to Michaeals asap. :) This is so adorable! I love the color you chose!

    Reply
  7. kara

    April 21, 2012 at 11:38 am

    LOVE it! I havent worked with chalkboard vinyl yet but I so want to. Where did you purchase the frame of your menu from? It’s beautiful! I also LOVE the look of the blog…very nice :)

    Reply
  8. Just Winging It

    April 21, 2012 at 2:07 pm

    I am inviting you to come and be part of my blog hop:
    http://juliejewels1.blogspot.com/2012/04/show-your-stuff-20.html

    Reply
  9. Rachel

    April 21, 2012 at 2:31 pm

    I love this!!! So pretty. I need to look around Michaels more. I never find stuff like this!!!!

    Reply
  10. rebecca lopez

    April 22, 2012 at 9:04 am

    I’d love it if you could link this up to my party…
    http://thecraftedsparrow.blogspot.com/2012/04/crafted-sparrow-link-party-3.html
    Thanks.
    Rebecca

    Reply
  11. Jen

    April 22, 2012 at 7:20 pm

    Love this! and the color is perfect!

    Reply
  12. Megan

    April 23, 2012 at 4:25 am

    What a great idea! Love the color that you used. Megan

    Reply
  13. Taylor-Ann

    April 23, 2012 at 8:03 am

    What a great idea. I would love if you linked up to my link party “Show Off Mondays @ Kampen Lane Design”. Cant wait to see what you create next.

    kampenlane.com

    ~Taylor

    Reply
  14. Amber

    April 23, 2012 at 8:25 am

    Hi Crystal,
    I love your chalkboard! I have not used chalkboard vinyl yet but now I want some, today actually…lol. I love the frame and the colors you used as well.
    I also love that you told us it didn’t go perfectly and what you did about it. I don’t like everything I set out to do…in fact, I have one this week that is cute but not really up to the quality I would post. I am still trying to come up with a creative way to post it. lol. {I wouldn’t bother normally but I have promised in other posts that it is coming soon…haha!!! smooth huh? lol}
    Anyways, I am visiting from the craft-o-maniac linky party & I am a new fan :)
    Thank you for sharing!
    see you again soon :)
    amber

    Reply
  15. six sisters

    April 23, 2012 at 5:39 pm

    Looks so cute! Great find at Michael’s. We loved having you link up to our “Strut Your Stuff Saturday.” Please join us again next week! Thanks! -The Sisters

    Reply
  16. Tamsyn

    April 24, 2012 at 12:28 am

    Gorgeous! I love the color you used for the frame :)

    Reply
  17. Sarah

    April 24, 2012 at 5:10 am

    This is beautiful. I love the color you painted the frame. I bought one of those frames too from Michael’s I just love them! I would love for you to share this at my link party
    http://thewinthropchronicles.blogspot.com/2012/04/share-it-link-party-8.html

    Reply
  18. Amy Fountain

    April 24, 2012 at 6:46 am

    This is adorable! Great color choice!

    Reply
  19. Jill

    April 24, 2012 at 9:08 am

    I LOVE your menu chalkboard!!! I would love for you to share it at my party going on now at Jillify It!

    Have a wonderful day! I’m a new follower!
    Jill
    http://www.jillifyit.com

    Reply
  20. kristin

    April 25, 2012 at 12:45 pm

    This is fabulous, cute idea. Found you at someday crafts.

    Reply
  21. Mandy @ Sugar Bee Crafts

    April 25, 2012 at 3:09 pm

    Thanks for linking to Take-A-Look Tuesday – you were featured today!!
    –Mandy, http://www.SugarBeeCrafts.com

    Reply
  22. Katie

    April 26, 2012 at 5:12 pm

    LOVE the paint color you choose! Super sweet! Would love to have you share this at my link party :)
    http://www.pincushioncreations.com/2012/04/homemade-by-you-9.html

    Reply
  23. Haylee

    April 26, 2012 at 7:30 pm

    I love it, yours turned out great :) I can’t wait to get crafty with you this summer and thanks for mentioning me

    Reply
  24. Michelle@ Teagan's Travels

    April 26, 2012 at 11:36 pm

    I love this and am so wanting to make a menu board!! I just got a Cameo and it is sitting in it’s box…intimidating me! *LOL* Maybe this weekend I’ll be brave enough to give this project a try! Would love if you’d add it to my red, white and blue themed party called Stars and Stripes!

    Have a great weekend!
    Michelle
    http://teaganstravels.blogspot.com/2012/04/stars-and-stripes-party.html

    Reply
  25. Alison

    April 27, 2012 at 11:32 pm

    So smart to add it your refrigerator! I can’t tell you how many times my projects start great in my head and end up taking a whole new turn along the way! Thanks for sharing at oopsey daisy!

    Reply
  26. Becky

    April 28, 2012 at 4:18 pm

    Love this project…good job! I was wondering…if one wanted to put it on a “smooth” surface, why couldn’t one put it on masonite board, and then put the frame on top of the M. board….it’s pretty darned thin and very smooth…in fact I have just painted the chalk board paint on those boards and has worked out great…just a thought…also helpful for people like me that do not have a Cameo..just a Cricut…BTW…do you know of anyone on Etsy that you can order vinyl letters in whatever you want to say since I don’t have access to that?
    Blessings!
    Becky

    Reply
  27. Jennifer

    April 30, 2012 at 3:47 am

    I like this craft and I really like the idea of a masonite board. Will definitely put this on the list to do with the kiddos once school gets out in the next few weeks for us. Love the blog!
    Jennifer
    http://www.practicallyperfectprincess.com/

    Reply
  28. katie

    May 2, 2012 at 3:57 am

    Crystal I love this menu! Who knew their was chalkboard vinyl!?!?! Must find some ASAP!

    Reply
  29. Darby Hawley

    May 3, 2012 at 3:11 pm

    I love this; we could definitely use one of these in our kitchen! Stopping by from Southern Lovely Show and Share :-)

    Reply

Trackbacks

  1. 25 Spring Projects to Make says:
    April 21, 2012 at 1:22 am

    […]  DIY Chalkboard Menu @ A Pumpkin and a Princess […]

    Reply

Leave a Reply Cancel reply

Your email address will not be published. Required fields are marked *

Primary Sidebar

FREE EMAIL BONUS

5 DIY Ideas to Make in 10 Minutes!

Blog Archives

  • Facebook
  • Google+
  • Instagram
  • Pinterest
  • RSS
  • Twitter

Copyright & Disclosure


Disclosure of Material Connection: I received products or services that I have mentioned in some of my posts from the companies for free in hopes that I would review and mention the product or services on my blog. I only recommend products or services that I would or have used personally and know that my readers would enjoy. I am disclosing this in accordance with the Federal Trade Commission's 16 CFR, Part 255: "Guides Concerning the Use of Endorsements and Testmonials in Advertising."

Please note that this blog is a participant in the Amazon Services LLC Associates Program, an affiliate advertising program designed to provide a means for sites to earn advertising fees by advertising and linking to Amazon.com.

All posts and pictures are copyrighted by Crystal Owens and blog content may not be reposted elsewhere. If you would like to feature a post from A Pumpkin & A Princess please use one picture and a link back. You may not use more than one picture or use my pictures/content to create your own tutorial. If you have any questions please email me at apumpkinandaprincess {at} gmail.

Copyright © 2018 · A Pumpkin and A Princess · Log in