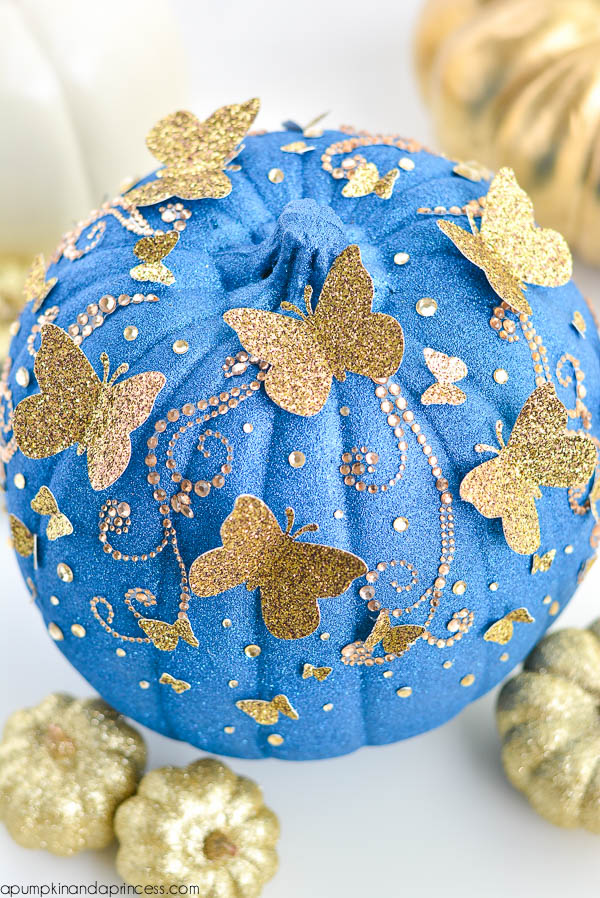
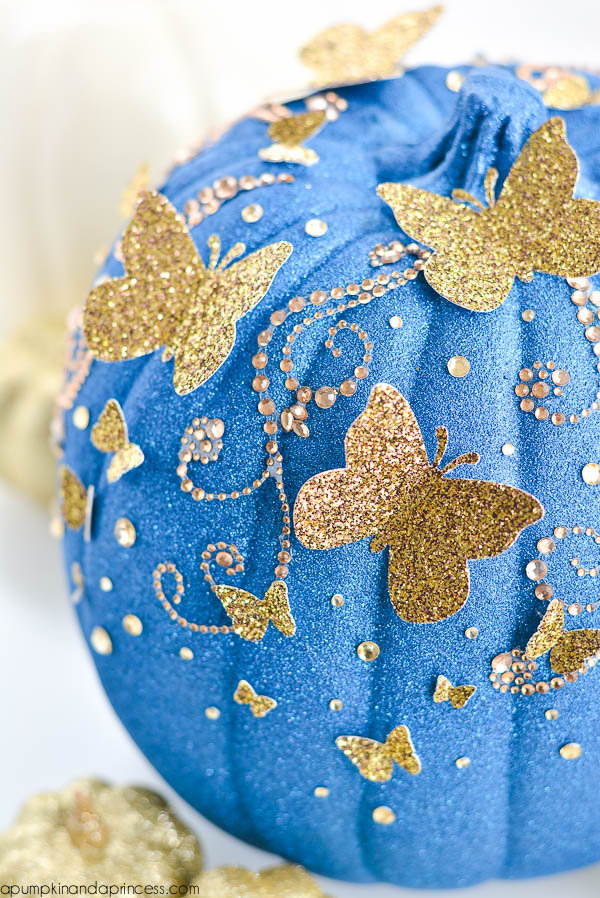
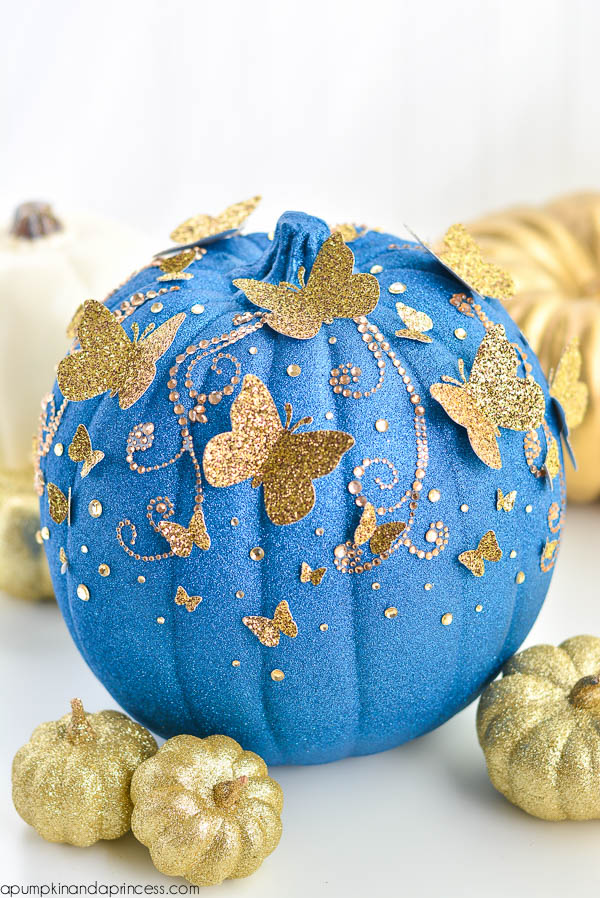
DIY Cinderella butterfly pumpkin – a glitter pumpkin embellished with gold glitter butterflies, inspired by the new Cinderella movie.
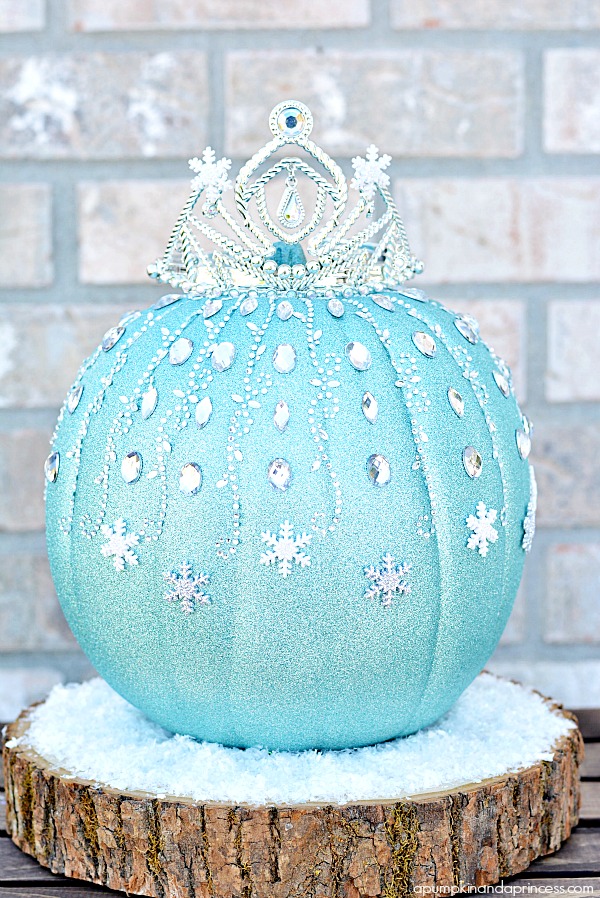
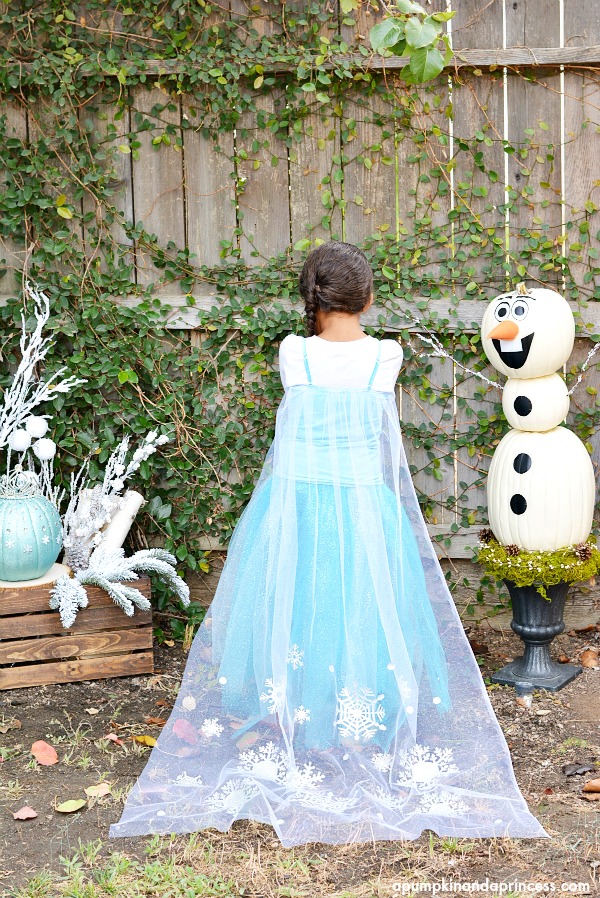
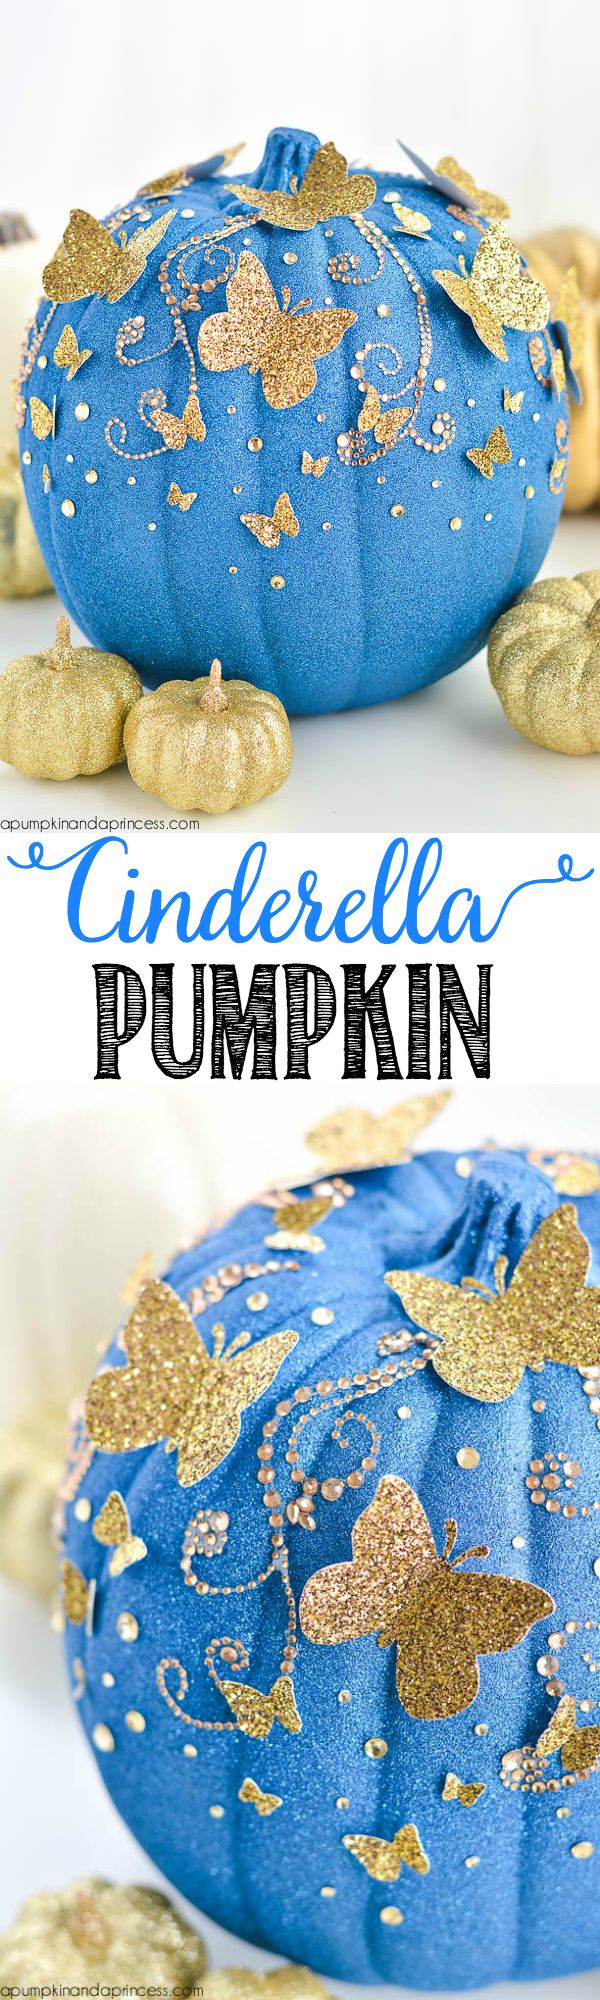 Hey crafty friends! With only a little over a month until Halloween, we’ve been busy decorating faux pumpkins to display on our porch. Last year my daughter was obsessed with Frozen, you may remember the Elsa pumpkin we made? This year she’s been talking nonstop about Cinderella and the beautiful butterflies on her dress. We’re still narrowing down our choices but she’s pretty sure she wants to be the “new Cinderella” for Halloween this year. Inspired by our Elsa pumpkin and the new Cinderella movie we made a Cinderella Butterfly Pumpkin.
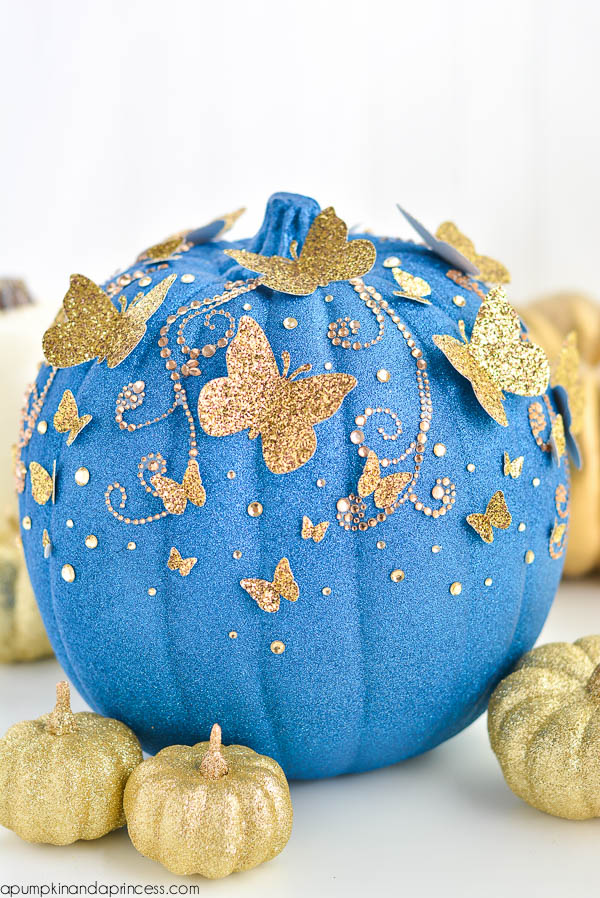 This DIY Cinderella Pumpkin was made with glitter blast to get the bright glittery effect, rhinestones, and gold glitter butterflies. You can find most of the items we used at Michaels or on Amazon; I’ve included affiliate links below.
 Supplies:
Glitter Blast
Butterfly Punch
Rhinestones
Gold glitter cardstock
Hot glue/rhinestone adhesive
faux pumpkin
Step one: apply 2-3 coats of glitter blast on your pumpkin. Allow each coat to dry in between (about 30 minutes) before applying the next coat. To get a full coverage you may need two spray cans of glitter blast. You could also try painting the pumpkin with royal blue acrylic paint, which would require less glitter blast to cover the white pumpkin.
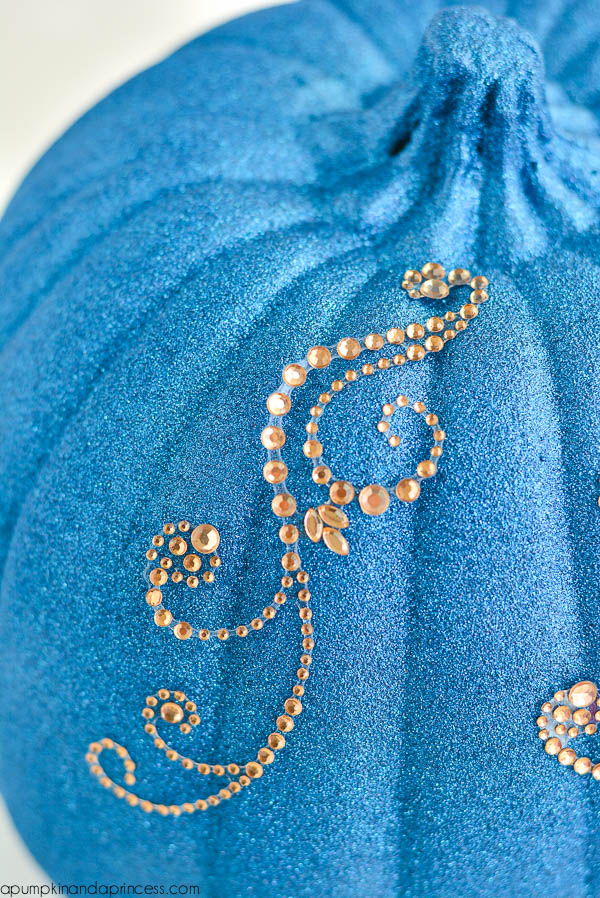
 Step two: once your pumpkin is completely dry (we waited 24 hours) apply the flourished rhinestones; we found ours at Michaels. Please note: last year I had a reader say she had trouble with the rhinestones sticking to the pumpkin, since we didn’t have an issue with our Elsa pumpkin I figure it could’ve been the rhinestones. However, this time around my rhinestones wouldn’t stay in place. We really liked how pretty they looked on the blue glitter pumpkin but we didn’t want them to fall off over time. To ensure they stayed in place we used a small amount of hot glue (you could also try a rhinestone adhesive). We didn’t apply hot glue to the entire rhinestone flourish, only in a few bigger sections. If needed, use a toothpick to spread the hot glue into the more intricate sections.
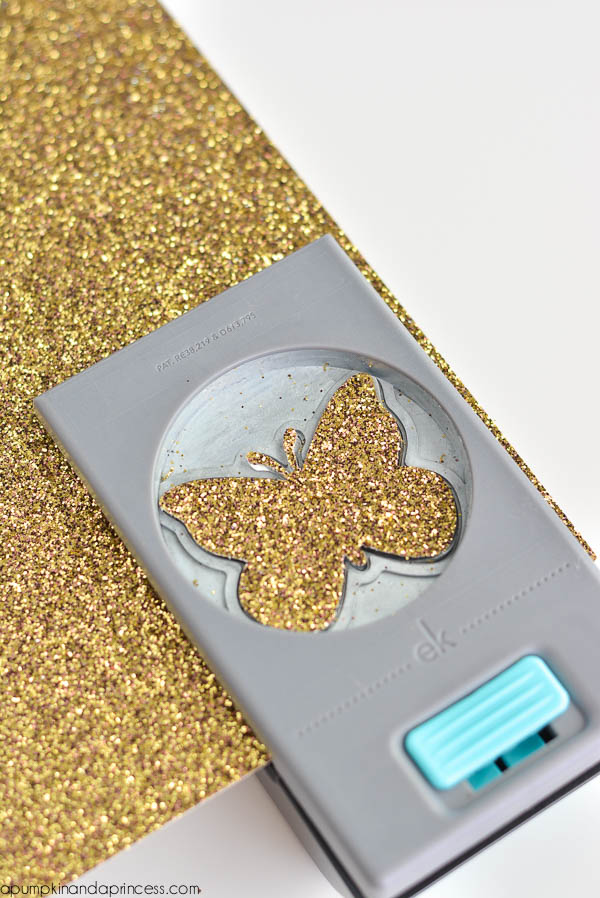
 Step three: use a butterfly punch and gold glitter cardstock for the butterflies. I used two different butterfly punches that I had from my scrapbooking days. The smaller butterflies helped fill in gaps and I really liked having a variety of sizes on the pumpkin.
What do you think? My daughter loves the way it turned out! I think we’ll make it a tradition to create a princess themed pumpkin every year.
 My blog besties Nat & Holly from My Sister’s Suitcase had the same idea and made a butterfly Cinderella pumpkin as well! Visit their blog for a different version, trust me their pumpkin is beautiful. *insert heart eyes emoji*
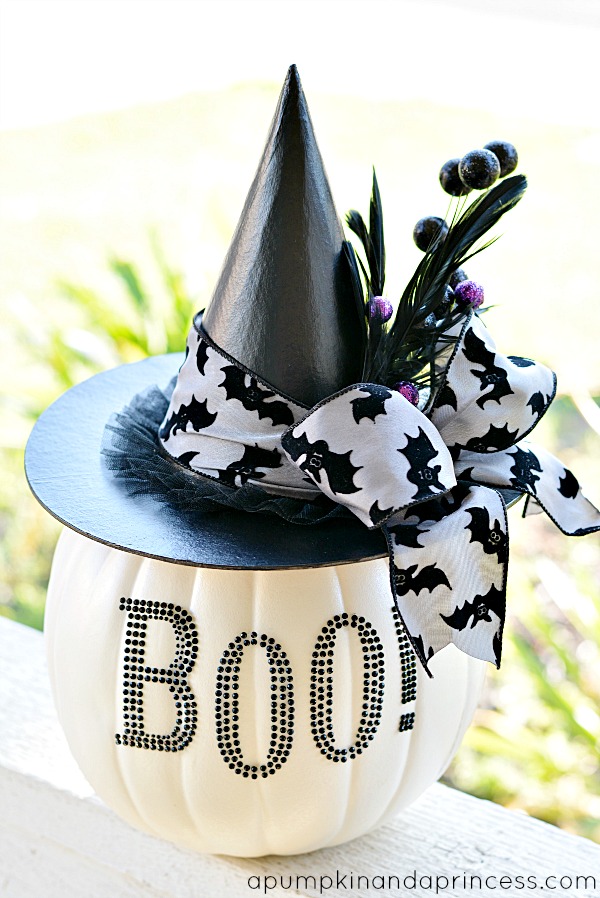
A few more Halloween ideas:
Wow what an gorgeous idea!! Absolutely love it! ♥
Thank you, Maria! :)
That pumpkin is so beautiful!!! I love the non-carving idea (I can’t stand the mess)!
How beautiful and fun! Love how it sparkles which is every girls dream to have bling :)
Thank you, Crystal. My daughter loves glitter and she’s so happy with the way it turned out. Have a great weekend! :)
Wow! Wow! This is a beautiful pumpkin…and the Elsa pumpkin from last year was amazing as well. Super creative. Love it!
Thank you, Angeline! Have a great weekend!
This is such an amazing idea! Thanks for sharing it. I’m Anita visiting from Link Party Palooza.
This is absolutely WONDERFUL! The possibility for these are endless, but I wonder how to make them more “boyish” but still have a little bling?
It’s so pretty! I’d be tempted to make them from fake pumpkins though, so you can add to the collection every year and have a whole row of princess pumpkins !
This pumpkin is gorgeous! I also love your pumpkin Olaf!
woow. that´s amazing :)
You are welcome to join my BlogParty
SATURDAY SHOW OFF
Hugs from Håkan in Sweden
This is Stunning!!
This is AMAZING!!!! I have got to do this!
Such a beautiful pumpkin! I love the idea!!
I absolutely fell in love with the Cinderella pumpkin. I’m actually going to try to make some to use as centerpieces for my daughter’s quincenera (15th birthday celebration). I just have a question, did you use pale gold rhinestones or yellow gold rhinestones?