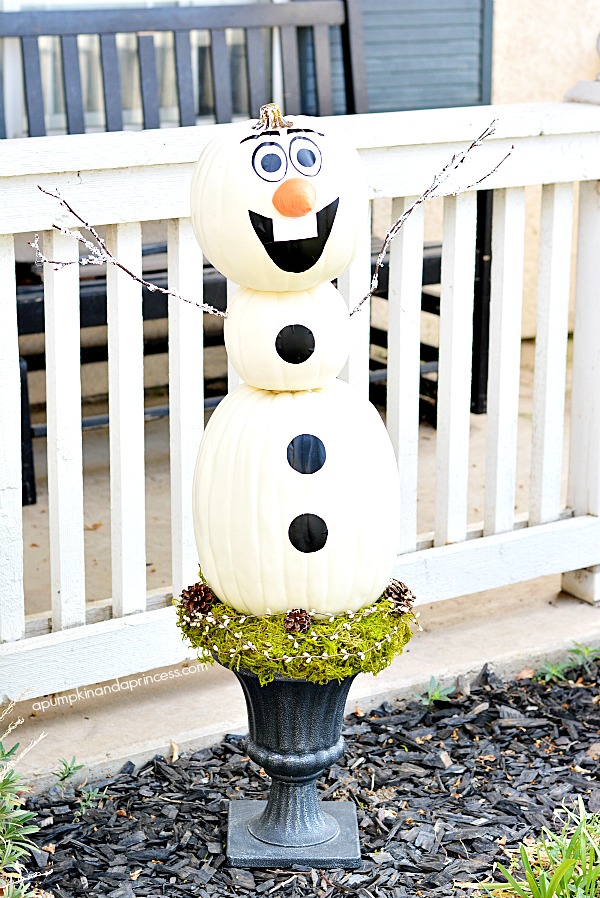
How to make a Disney Frozen Olaf Pumpkin topiary.
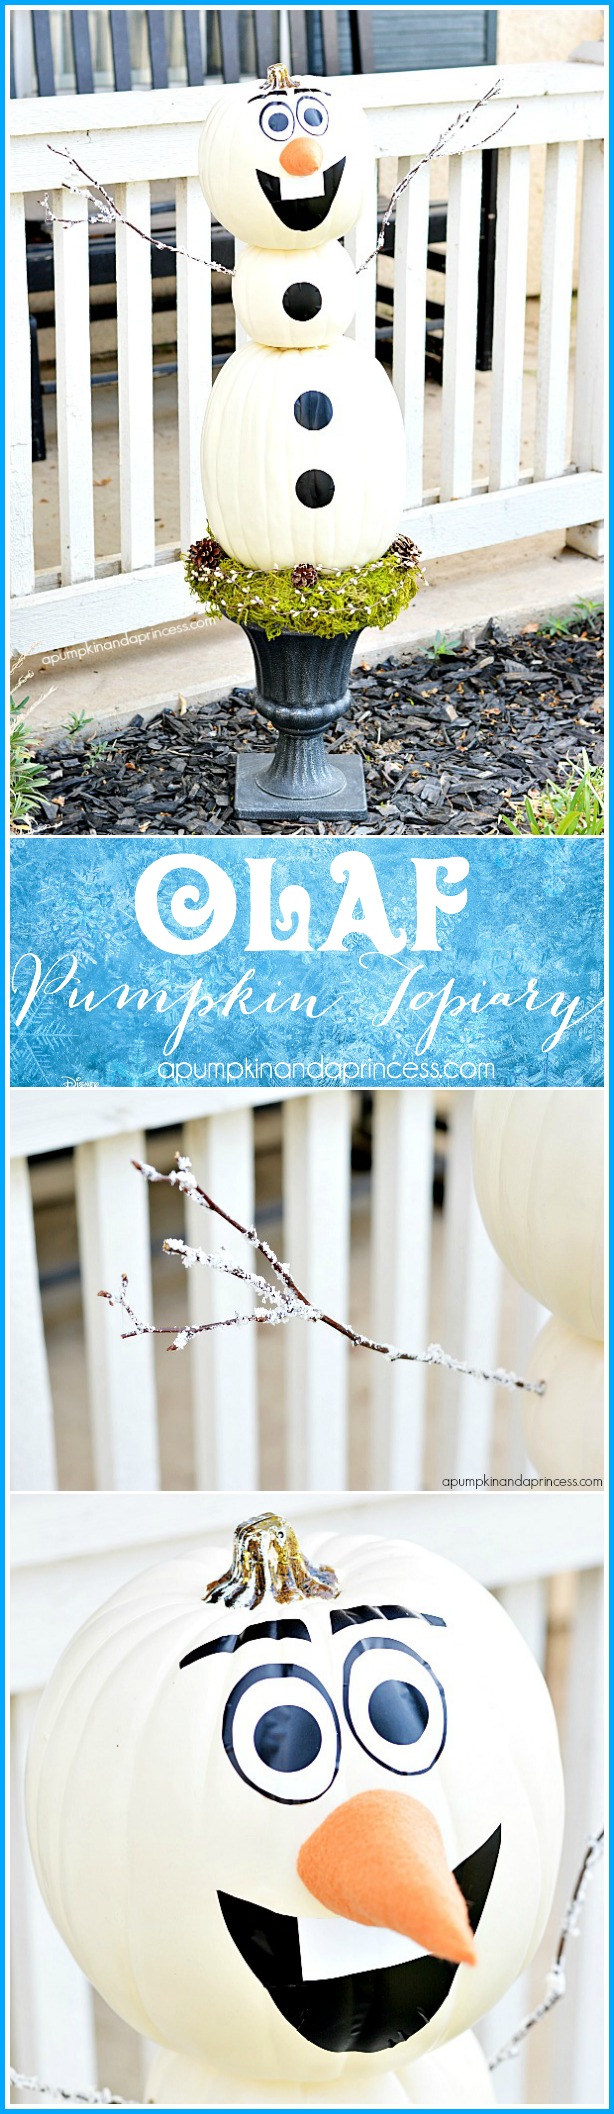
Happy Friday, my friends! Are you ready for yet another Disney Frozen craft idea? This Olaf pumpkin topiary has been a long time in the making. Remember the white pumpkin topiary I shared last month? I initially thought I’d make a spooky Halloween version with bats..then we watched Frozen fro the 785th time and was inspired to make Olaf instead. My kids absolutely love our Olaf topiary. My little guy goes up to him and tries to hold his hand. The best part is the pumpkin topiary is made with faux pumpkins so we can keep him year after year.
Looking back I wish I hadn’t glued down the large pumpkin when I made the topiary. I might have used that for the head since Olaf tends to have a slightly elongated head. If I could make it over I might see what the medium pumpkin looked liked on the bottom with the small in the middle and long pumpkin on top. Definitely play around with the sizes to see what resembles Olaf the most.
Supplies:
3 white faux pumpkins (in various sizes)
hot glue
black and white vinyl
orange felt
batting
twigs
urn
moss
Step one: Visit my pumpkin topiary tutorial to see how I created a based filled with moss. Once your bottom pumpkin is secured cut a hole in the bottom of the second pumpkin. You can use a small knife or carving tool for this. Glue the second pumpkin on top of the first, inserting the stem into the hole you made.
Step two: Repeat the process for the top pumpkin. Try to avoid using too much hot glue so that it doesn’t show through each layer.
Step three: hand draw and cut eyes, mouth, and buttons using vinyl. I simply hand sketched the best I could and applied them directly onto the pumpkin. Why did I use vinyl instead of painting the face on? Just in case we’d ever like to reuse the pumpkins for something else. We definitely plan to keep him around for awhile but I like the option of making a different topiary later on.
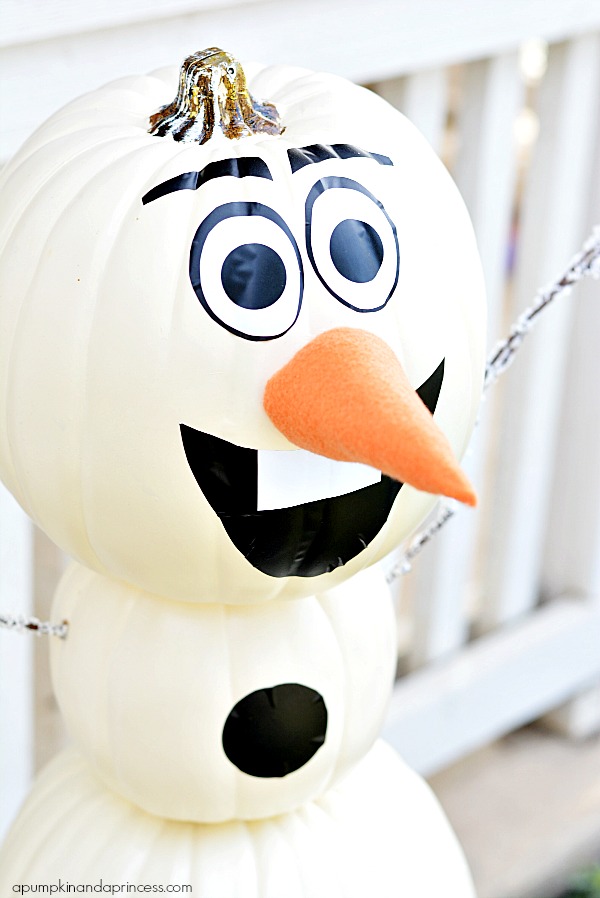 Step four: cut a triangle shape out of orange felt then create a cone. I glued the seams together then stuffed the nose with batting. Once the carrot was stuffed I hand stitched the top together and glued it on.
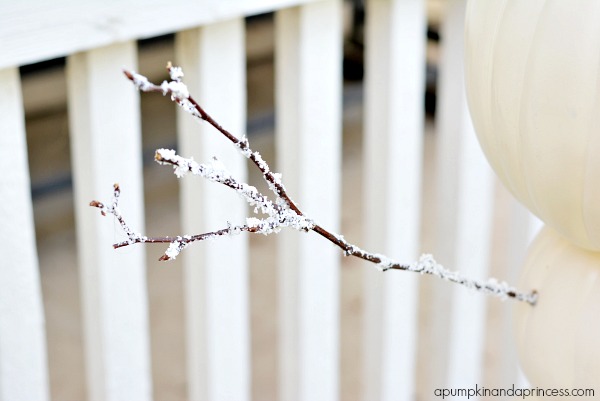
Step five: Make a small hole on the sides of the middle pumpkin. Put a small dab of glue onto the twig and insert into the pumpkin. Hold the twig in place for about a minute or until the glue dries. This will ensure your twigs stay in place.
 What do you think? I’m pretty sure this guy is going to stay on our porch through winter.
 More Disney Frozen ideas:
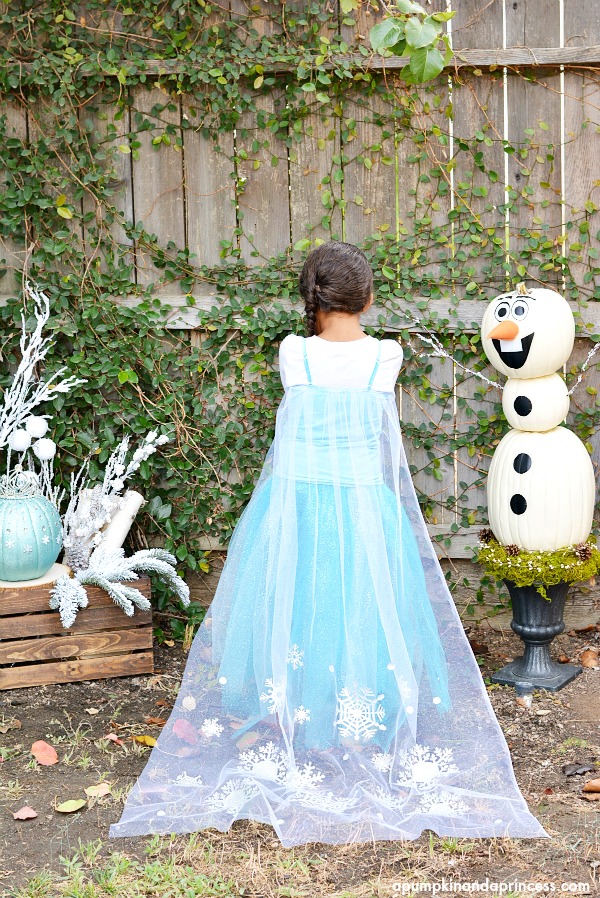 Frozen Elsa Pumpkin
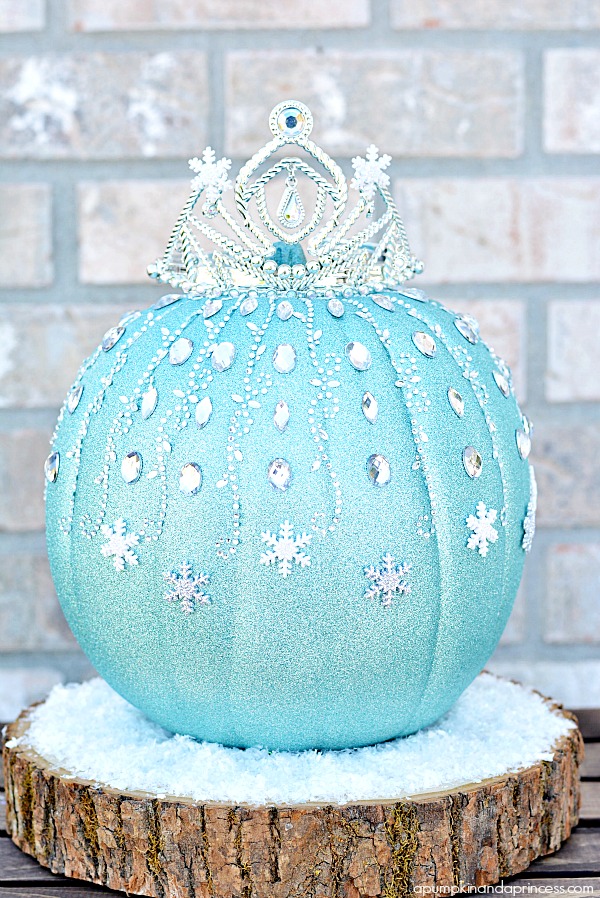
Have a great weekend, my friends!
I love the Olaf topiary & the Elsa pumpkin. So creative.
I didn’t see anything about how you created the nose other than orange felt in the supplies list. Did you just roll it into a cone shape and hot glue it to the face?
Hi Crystal! You are so awesome! I love your Frozen inspired pumpkins, cape, etc. I have seen your stuff in multiple link parties during the week, and I am always impressed with your projects! You rock!!! Have a great day and thanks for always making me smile! :)
super cute, and i love that this is a topiary.
b
Can you tell me how you got his arms to look like snow? is it just acrylic snow you glued on? Thanks! So cute!
Hi Katie, I found the snow covered twigs at Michaels. If you can’t find them you could make them yourself with the spray can of fake snow and twigs from your backyard. I hope that helps! :)
My daughter is having a Frozen birthday party in 2 weeks. This is adorable! What is on the twigs to make them look like snow? Glitter? Please share. Thank you.
The twigs are from Michaels, they’re covered in fake snow. You could probably use a spray can of snow and make your own if you can’t find them at your local store. I hope you daughter has a great time!
Thank you! We will have a great time. Love your site. I am a crafter at heart.
This is the most adorable pumpkin craft I have ever seen! Such a great idea :) I’m including it in my kid-friendly Halloween Pumpkin round up with a link back in the next few weeks.
Awesome tutorial! Love the end results. I was just curious how you attached the vinyl material to the pumpkin? I have never seen vinyl that is self stick so I was just curious. I would think hot glue would be too messy?
Thanks in advance for your time!