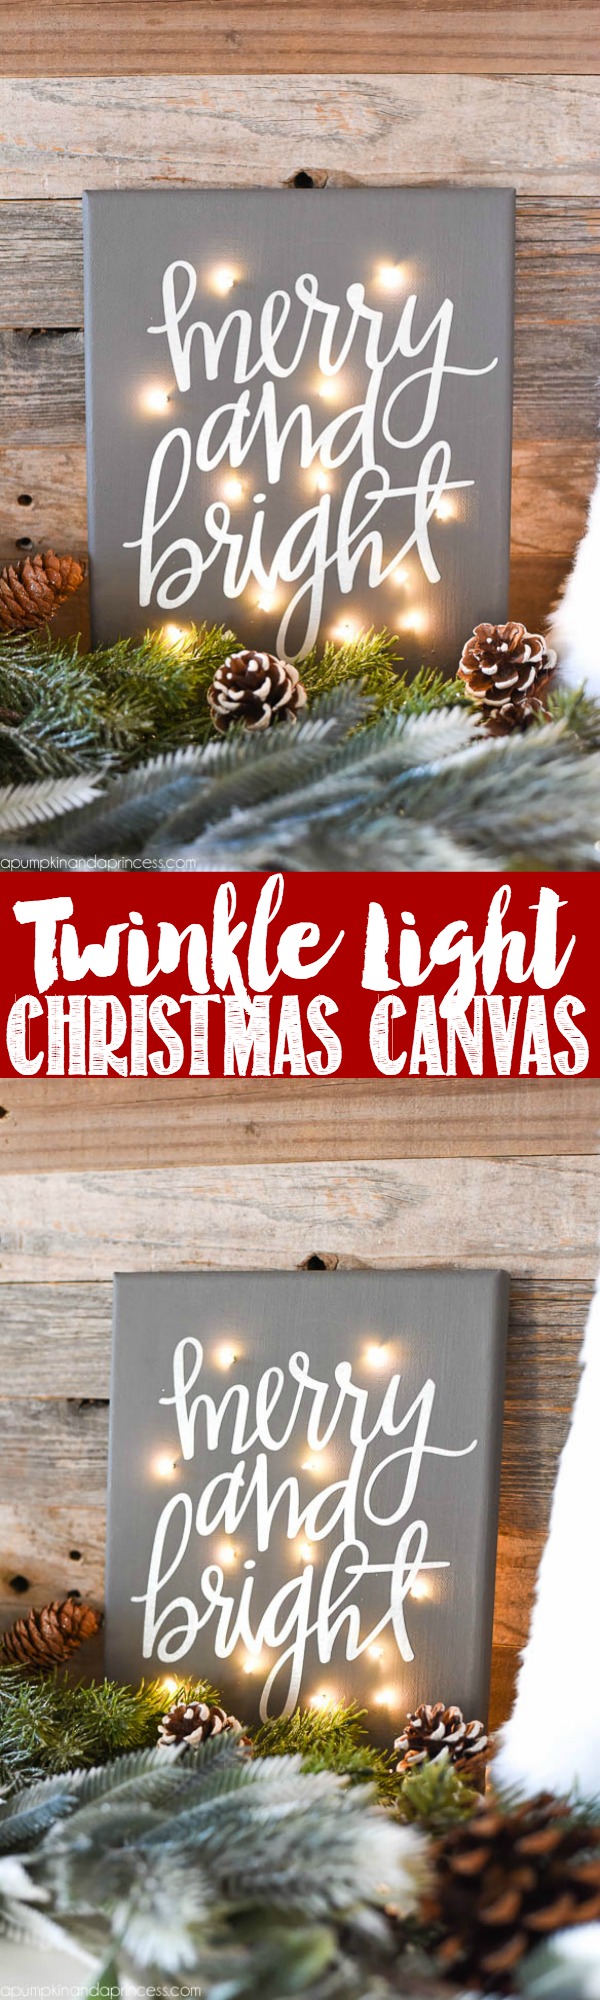
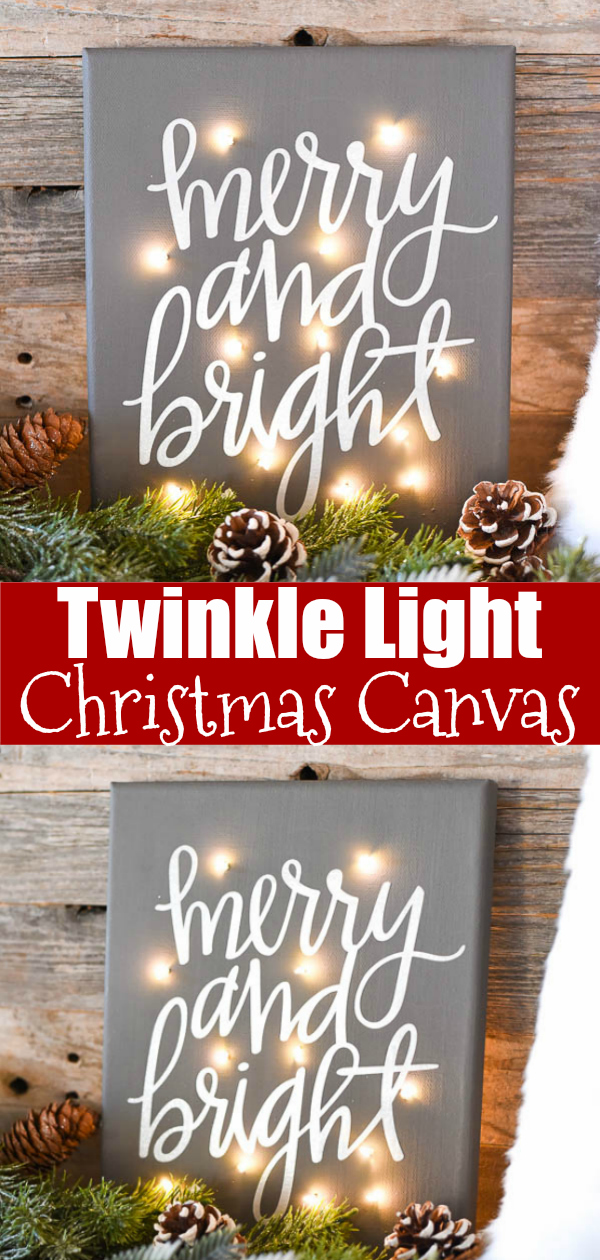
How to make a twinkle light Christmas canvas
 This is a sponsored post on behalf of DecoArt as part of their Core Blogger program.
Hello friends, I hope you had a wonderful Thanksgiving. We had a great week celebrating with our family from Southern California and Nevada. We begin our festivities early on in the week and spent each day with delicious food and good laughs. I assume the majority of families begin their Christmas decorating the weekend after thanksgiving and that’s just what we did. Well, with the exception of our Christmas tree since that’s been up for a while. We did however decorate around the house and put together mini Christmas trees in the kid’s rooms. Now I’m working on finishing up on filling a few shelves and the mantle with Christmas decorations. My latest DIY is this Merry & Bright Twinkle Light Canvas. I’ve always wanted to make a twinkle light canvas and until I made it I didn’t realize how easy they are to put together. You can use twinkle lights (also called Rice Lights and fairy lights) or traditional Christmas lights. I personally think the tiny twinkle lights look the best. I’ve included Amazon affiliate links below to the products I use to make our Merry & Bright canvas.
How to make a Twinkle Light Canvas
Supplies:
8×10 Canvas
American Paint in Neutral Grey
Vinyl Transfer Tape
Twinkle Lights
Cutting Machine
Vinyl
X-Acto Knife
Step one: add 2 coats of Americana paint in grey, allowing the first coat to dry for a couple hours before adding the second coat.
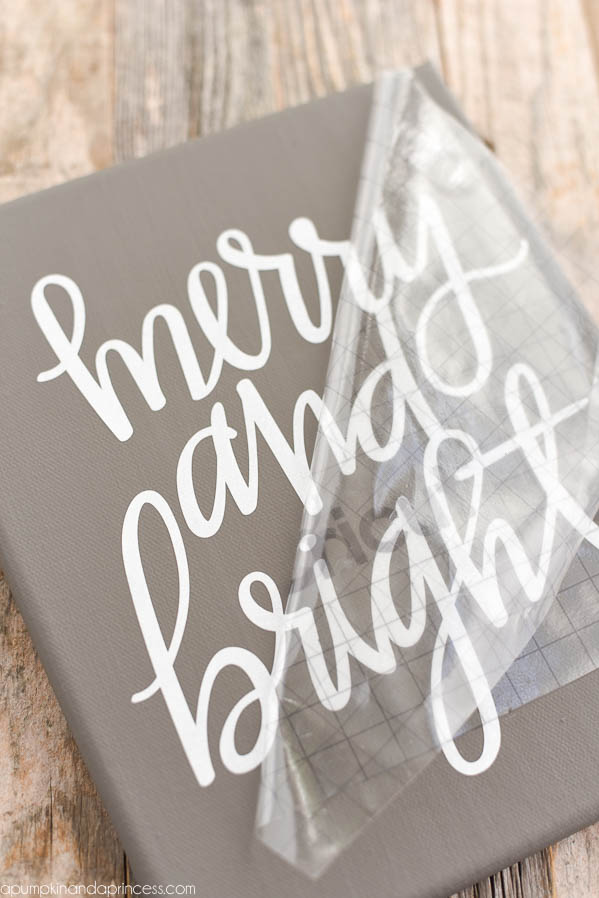
Step two: find a shape/saying in the Silhouette store for your canvas. You can easily create your own with the TEXT option and a pretty hand lettered font. Size the font/shape to fit your canvas. Cut your shape using white vinyl.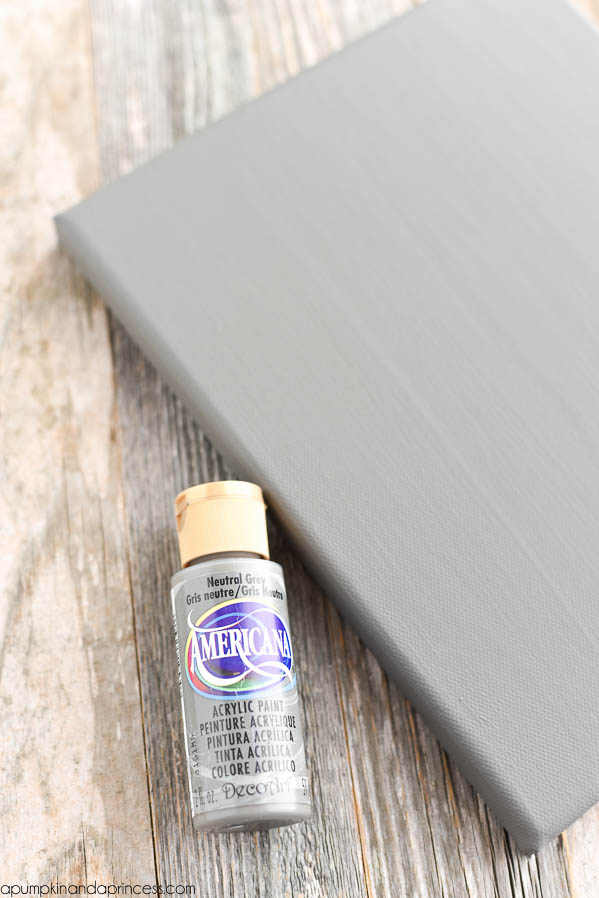 Step three: cut your design and use transfer tape to apply the vinyl to your canvas. I highly recommend the Cricut Clear Transfer Tape. This is the best transfer tape I’ve tried and since it’s clear you can easily align your vinyl using the margin lines.
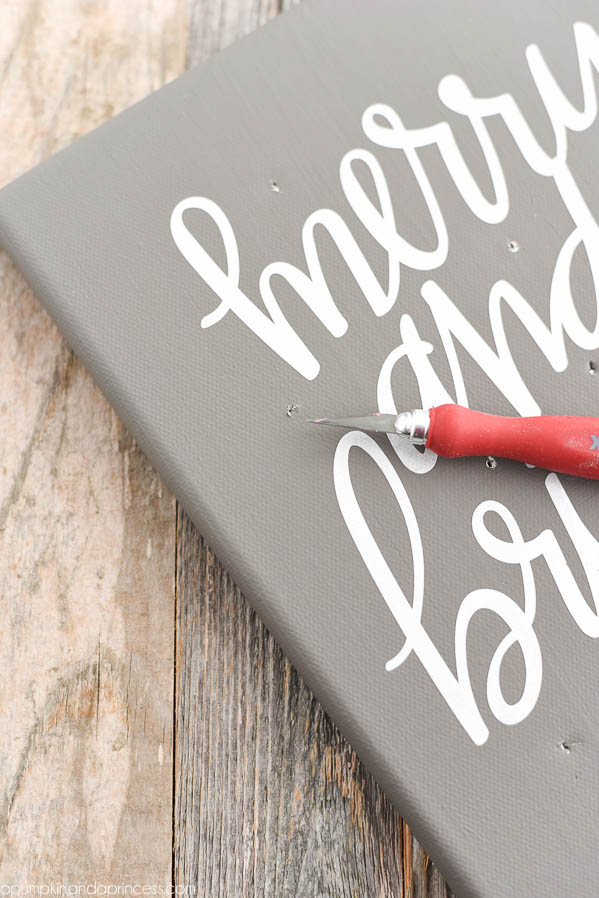
 Step four: use an x-acto knife to cut small slits for your lights to fit through. You can tape the battery pack down in the back if you’d like.
 What do you think? Seems easy, right? If you give it a try I’d love to see your DIY canvas!

More Christmas ideas:
THE BEST glue to use to glitter ornaments


I love this! It is so pretty and not too hard to make, and so much cheaper than getting it at the store! I think I might have to add this to my Christmas crafting list. :)
What kind of battery pack/lights did you use?
Won’t regular white lights be too long?
Great idea! Thank you for sharing.
Do you mind sharing what font this is? It is just perfect for Christmas!
I LOVE this. I’m all about anything I can make with christmas twinkle lights. I’m going to HAVE to make this
Do I understand you push the lights all the way through or just so they stay in place?
Love this. What font did you use for this project?
Do you remember the name of the font you used? I LOVE it!!
Is there a file to purchase for the “merry and bright” you used here? Love this project!
Very Pretty
Can you tell me the name of the font you used?
I just ran across your idea on Pinterest. Love it! If you use the rice lights, though, do you still need to cut holes? Just curious because the lights are very tiny.
I dont have a cricut to make the image, as most people dont. but i like the concept of putting lights in my paintings! So thanks for that idea!
Love the canvas! What font did you use for the “MERRY and Bright?”