After I made the Mystery Braid Bracelets my daughter asked if I could make her one. I mentioned that I had several leftover and she could pick the color she wanted. Being the girly girl that she is she asked if I could make her a pretty mystery braid bracelet. Pretty to this almost 4 year old means bright and colorful. I’ll be honest I didn’t know how bright and colorful I could make a leather bracelet, but I was up for the challenge. I took her along to the craft store and found rhinestone rivets and leather flowers cut outs. Then we went home and I figured out the easiest way to add a rhinestone rivet to leather using a scrapbook tool I already had on hand.
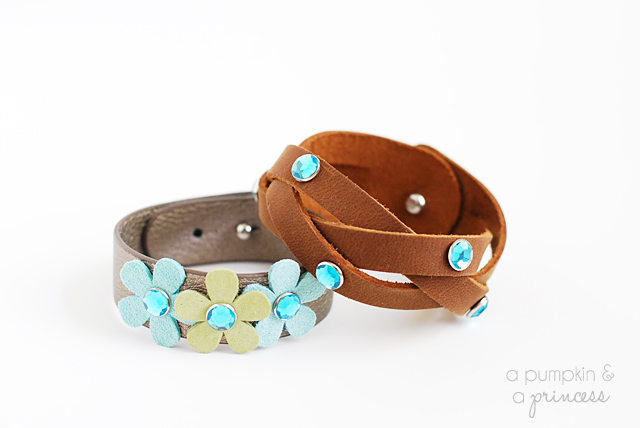
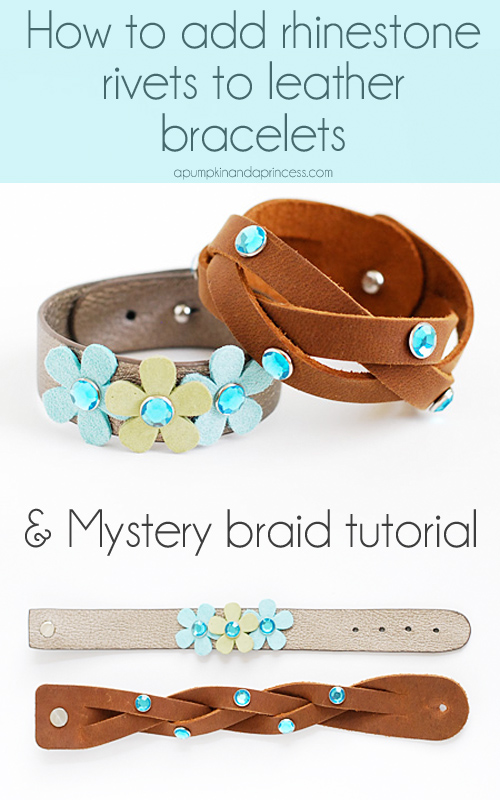
Here is a quick tutorial on how to add rhinestone rivets to leather bracelets.
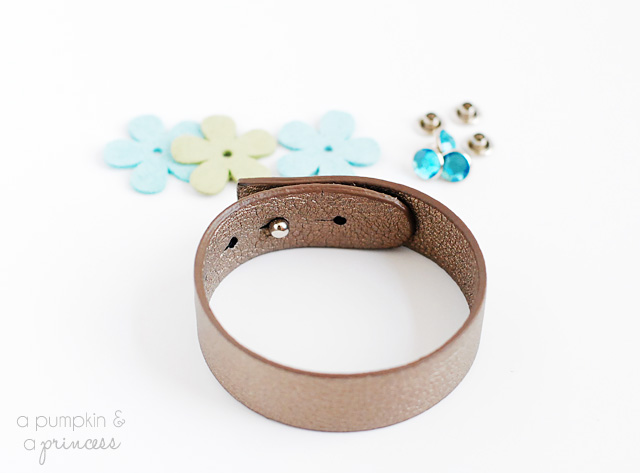
Supplies:
- leather bracelets
- rhinestone rivets
- leather flower cut outs
- Crop-A-Dile tool
DIY Leather Bracelets
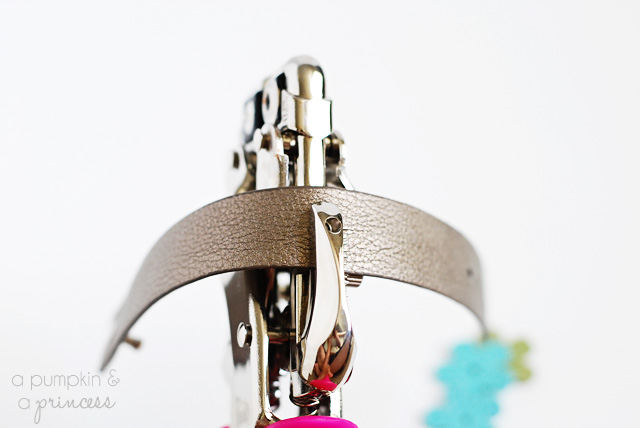
Step one
Figure out where you want to punch your holes on the leather bracelet, make a small marking with a pen to make sure they align correctly or are evenly spaced out. Punch your holes using the Crop-A-Dile tool. This tool has two sizes (1/8th and 3/16th inch) so use the size that best fits your rhinestone rivets.
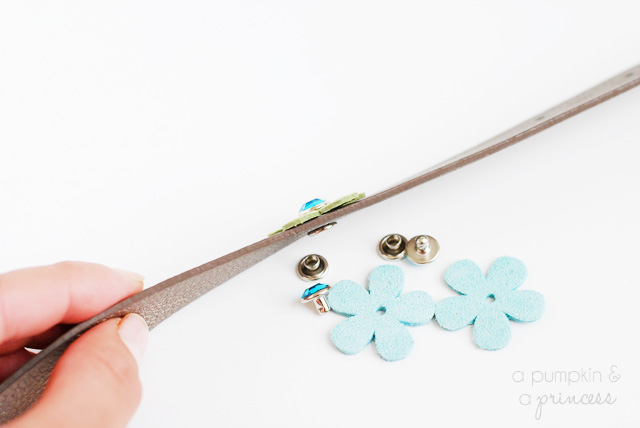
Step two
Once your holes are punched place the rhinestone rivet through the leather flower and bracelet then snap the bottom piece of the rivet to the back of the bracelet. It’s seriously THAT easy!
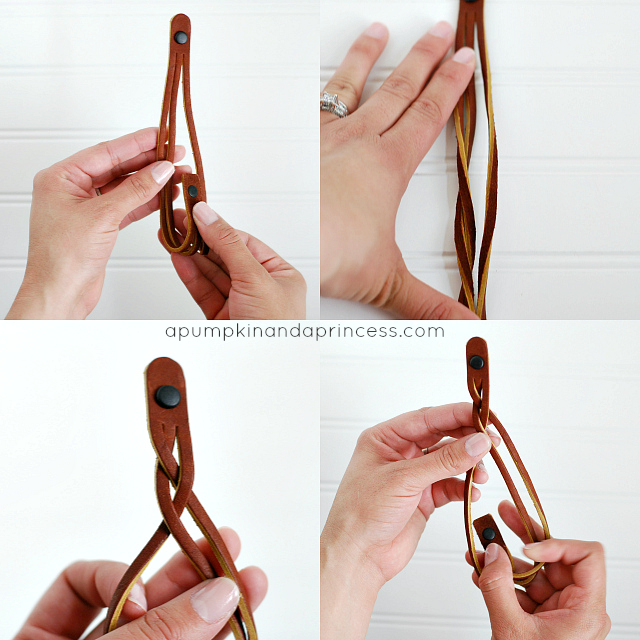
For the mystery braid bracelet I used a thick leather bracelet and made the braid before adding the rhinestones.
I also have a tutorial on how to make a leather mystery braid bracelet.
The mystery braid bracelet ended up being too big for her to wear but she loved the flower leather bracelet! She even asked if I could add charms to it..hmmm I think I have a creative little one on my hands. I’m looking forward to creating with her as she grows, I have a feeling she’s going to be super crafty! Maybe she’ll even have her own craft blog someday. :)
So cute!!!! I want to come craft with you and your daughter :-)
Jocelyn @ BruCrew Life » Awww I would love that! I wish I was going to BlogHer food so that we can meet in person! Someday soon we’ll get together. :)
They are super cute, I love the Madi twist on it.
Haylee Vowles » She is such a girly girl! Of course she couldn’t wear a plain bracelet with her fancy tutus. :)
These are AMAZing! LOVE LOVE LOVE. Pinning immediately. Would LOVE for you to come and share this on my blog tomorrow at THE Pin It Party!
XO, ellie
I love them! Very trendy and girly!
Love the bracelets!! The one with the flowers is so adorable!! Going to put these on my To Do list. Thanks for the tutorial!!
These are adorable. Just what I’ve been looking for as small extra gifts for some grads I know. Thanks for sharing and I will be pinning this for sure! Blessings, Patti@OldThingsNew
ooh I love these! THE TUTORIAL IS FANTASTIC, I am going to give this a try.
I think you did a great job making it bright and perfect for a 4 year old :) I love these bracelets. It was SO GREAT to finally meet you at SNAP!
so fun and cute Crystal!
Thanks for linking up! I featured your post in my wrap up https://tidymom.net/2013/mothers-day-ideas-2/
Have a super Sunday!
So cute Crystal! I think your daughter has great taste! ;)
Thanks so much for coming out to the party at Clean and Scentsible. I’ll be featuring these today. Happy Sunday!
Jenn
These are so so cute!!
Wow these are gorgeous Crystal! Pinning!!!!
I looooove this!!!! So easy… I wnat to make me a dozen LOL! Come and link this up at my place, I would love it!
Hope you are having a wonderful day
Hugs
Cami @ TitiCrafty by Camila
I love this idea. I have been trying to figure out what to do with some left over leather I have. These are really cute.
Very cute! You’re little one will be guest posting when she can write for sure!
So cute, Crystal … I love how girly they are but still so simple and pretty! Thanks for linking up at Project Inspire{d}!
Those are just darling, I heart them. Xo jen
You have been featured at Craftionary. :)
Gorgeous! I’m going to have to try these out for my very girly girls too.
I’d be honored if you shared these at my Show & Tell party going on this week. https://www.gingerlymade.com/2013/05/show-tell-24.html
Wow, these are so cute. I’m adding them to my gifts to make pinterest board :)
We’d love for you to share your posts with our readers at our weekly Finished Friday Link-Up.