DIY marbled clay earrings
One of my goals this year is to try new crafts. I’ve always enjoyed creating but there are so many creative outlets that it’s impossible to find time to try them all. At the top of my list are painting, knitting, pottery making, and working with polymer clay. These are a few things I have little to no experience with but have always wanted to try. In April the Michaels Makers were challenged to try something new and take a class offered at Michaels. I’ve taken several classes at my local Michaels store over the years, everything from cake decorating, jewelry making, and paper crafting. My kids also really enjoy the kids club classes, especially over the summer. I decided to try making jewelry with polymer clay. I have to say it was easier than I thought but at that same time challenging. I highly recommend using tools specifically for clay projects. After experimenting I’ve found that fingerprints and tiny smudges are very noticeable once the clay is baked. I also recommend using the glaze to give your projects a shiny finish.
How to make marbled clay earrings
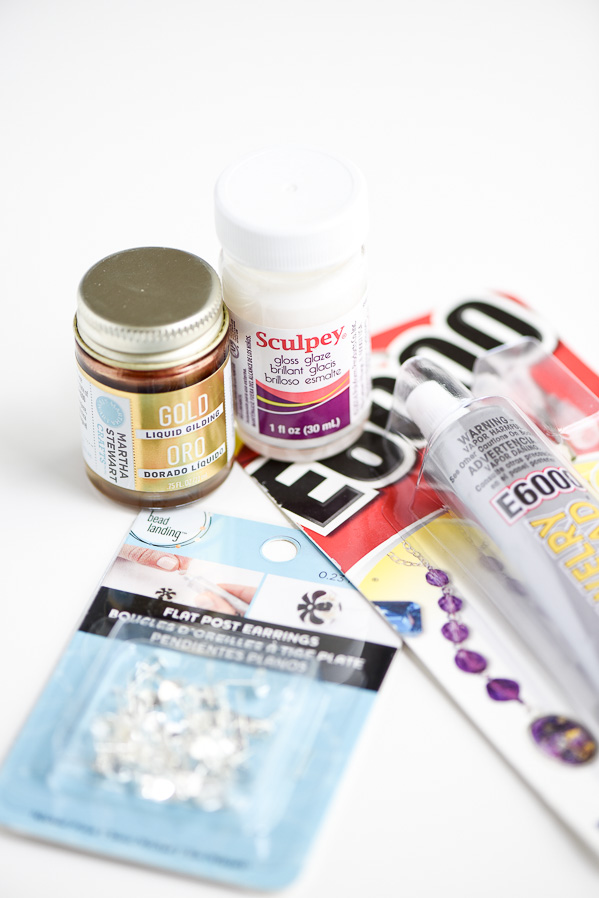
Supplies:
Sculpey oven-bake clay
Sculpey mini clay cutters
Sculpey glaze
earring post
e6000 jewelry adhesive
Rolling pin
 Step one: cut a section of clay from your brick and roll it into thin snake.
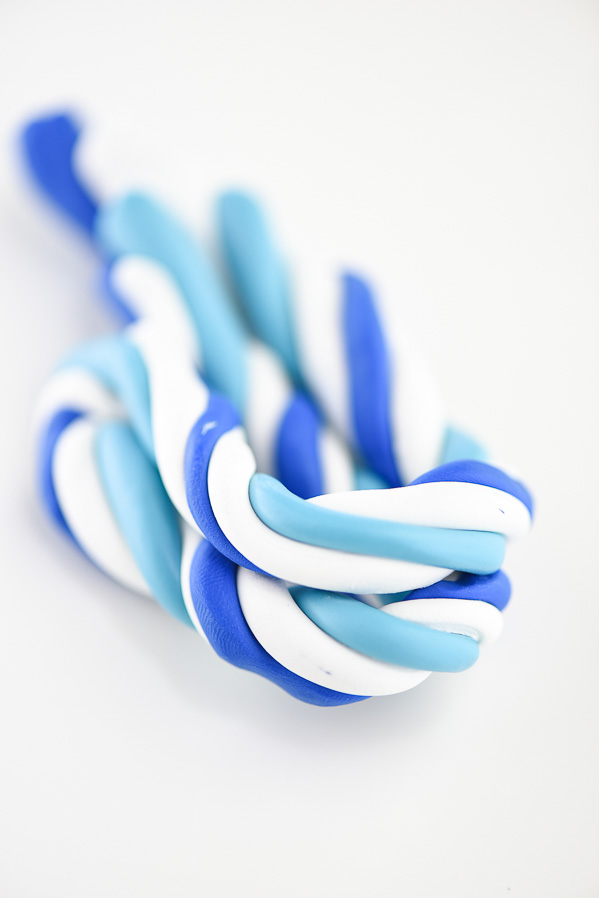 Step two: twist the clay rolls together then gather into a ball. As you roll out the clay it will marble the colors together.
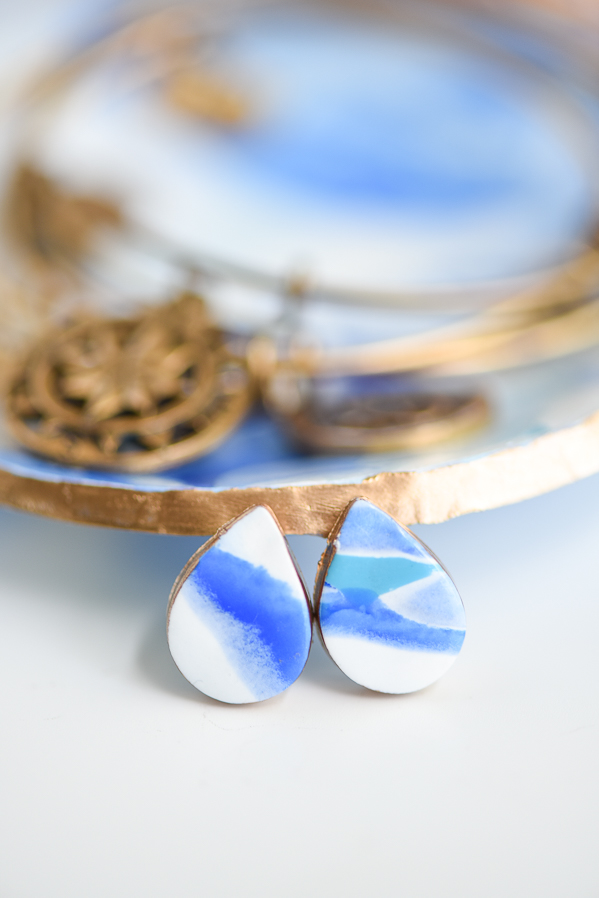
Step three: use shaped cutters, found next to the clay at Michaels, to cut small shapes. My favorite was the teardrop cutter to make these marbled ocean inspired earrings. The colors almost look like they’re watercolor.
 Step four: bake according to clay package directions. Allow clay to cool completely. Once the clay is cool apply 1-2 coats of Sculpey glaze. Optional: paint the edges with gold gilding before applying the glaze.
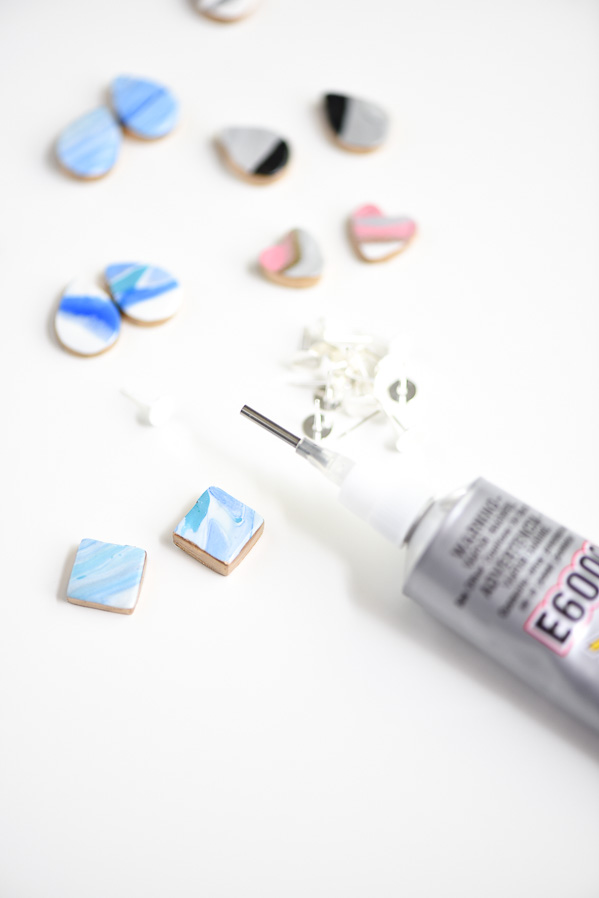 Step five: use e6000 jewelry glue to attach clay earring to earring post.
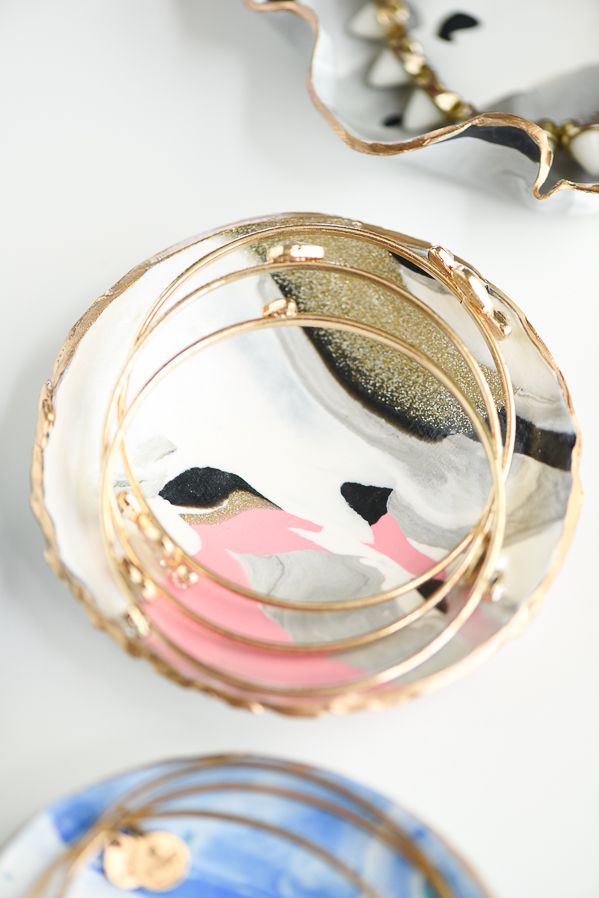
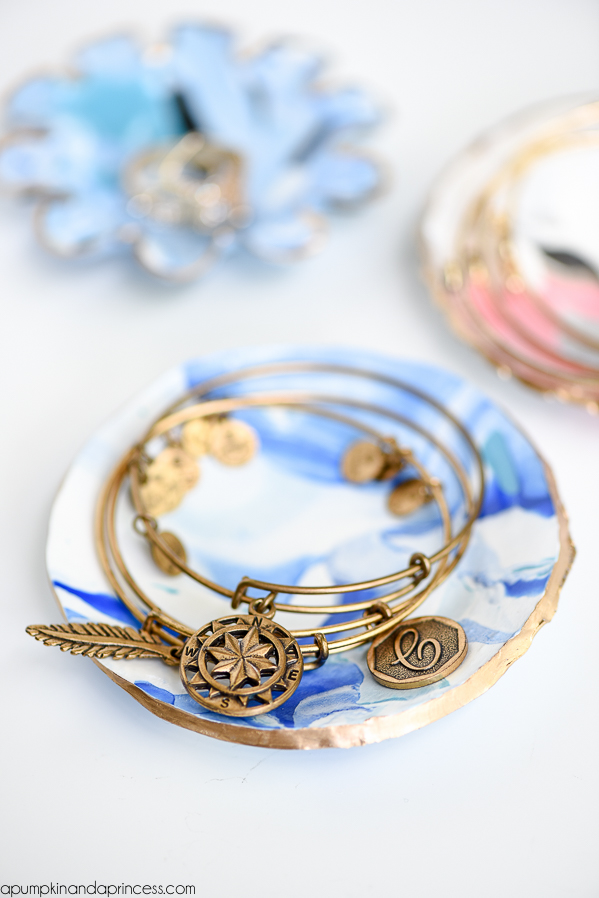 In addition to the earrings I made a couple of jewelry dishes. These were a lot of fun to make!
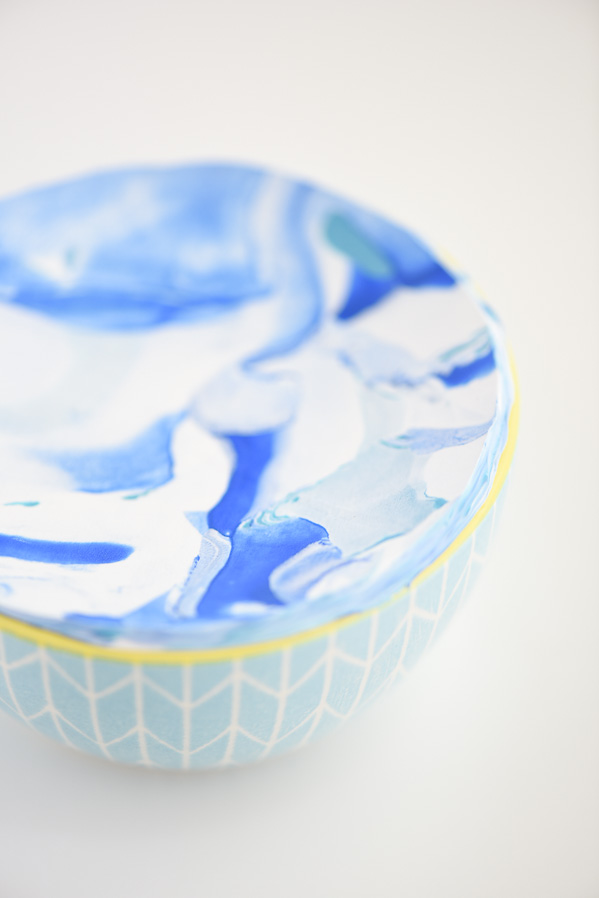
I simply rolled out the clay and used an oven safe bowl to lay the clay on. After I baking and cooling the clay I turned the bowl over and removed the clay jewelry dish.
Looks great, and the steps you posted easy to follow. Thanks for sharing…