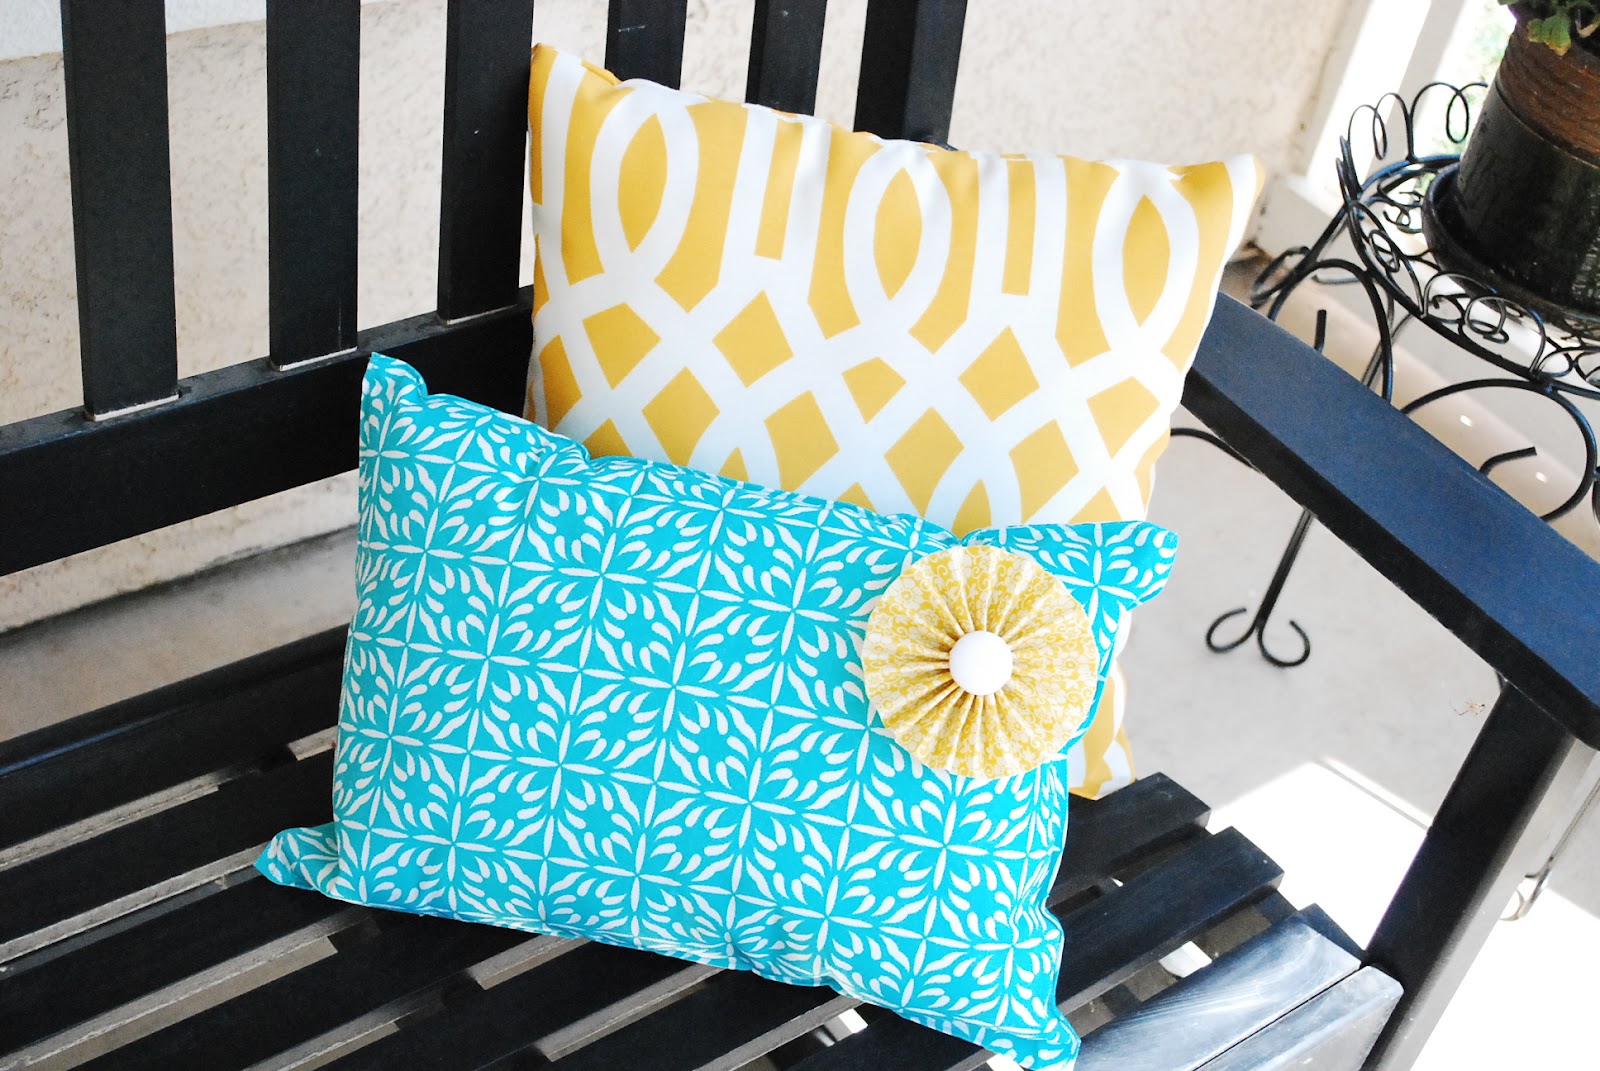
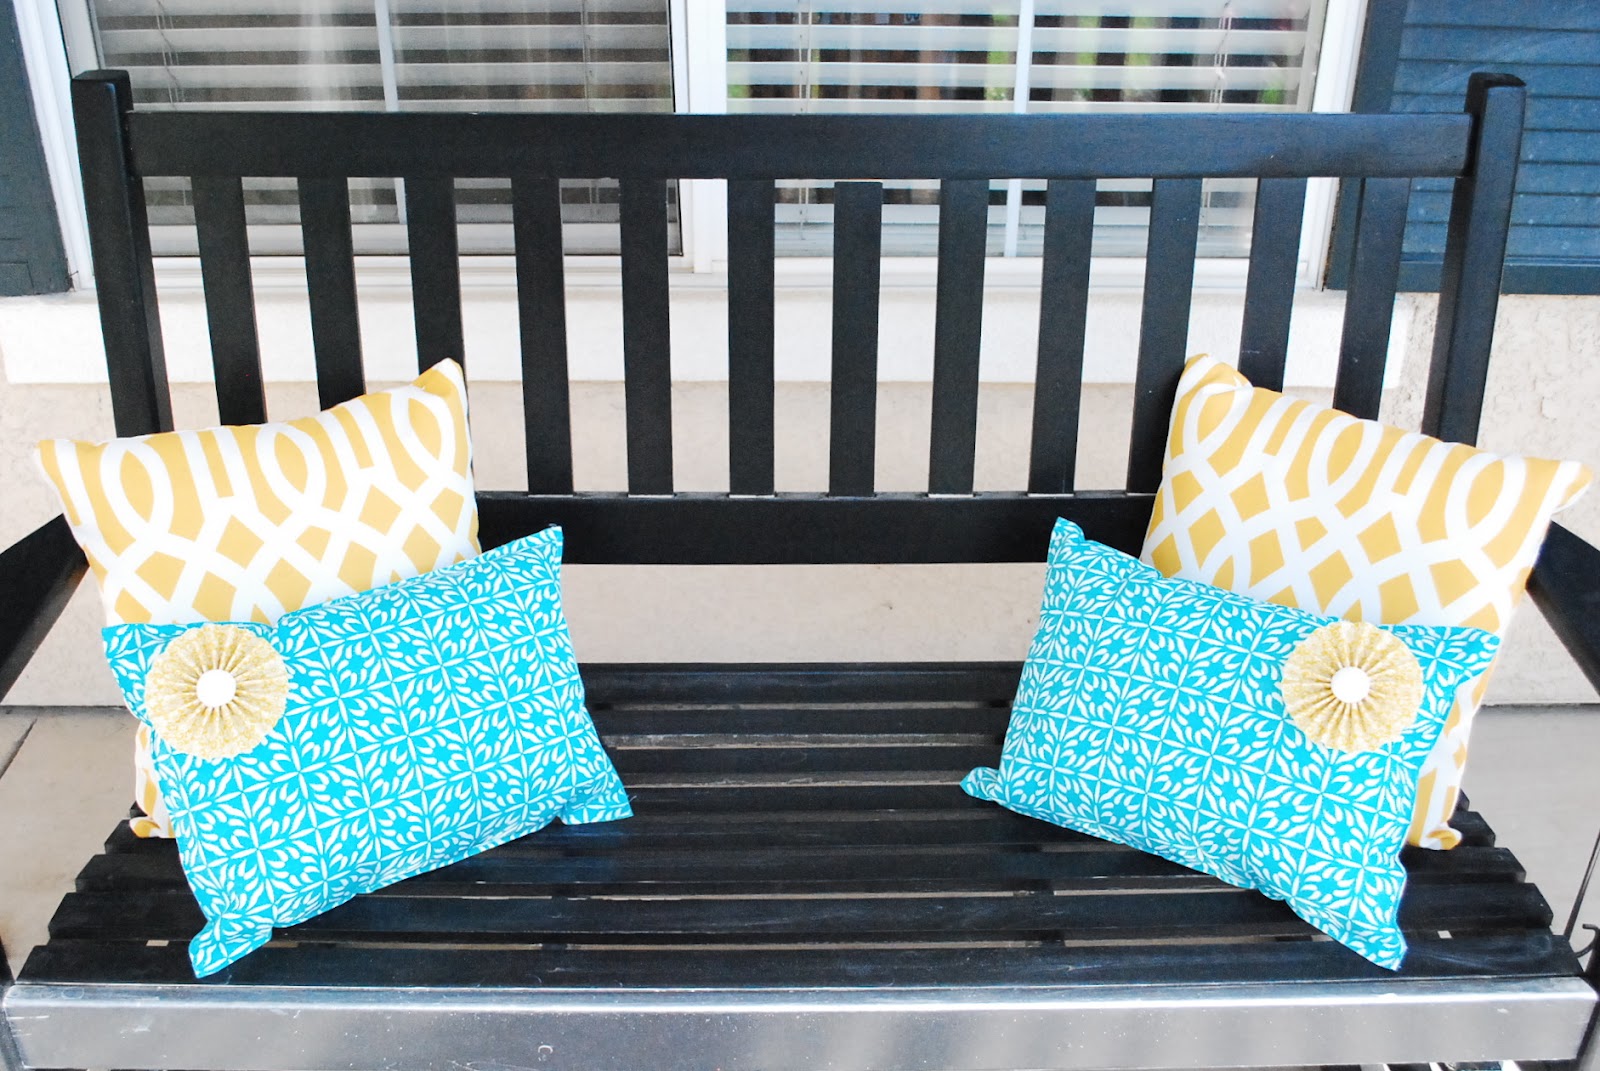
A few weeks ago I showed you my budget-friendly porch makeover with its bright and colorful pillows. The yellow pillows were from Kmart but the turquoise pillows I actually made out of placemats. It was my first time making placemat pillows, but with how easy they are to make you’ll be seeing a lot more during the holidays.
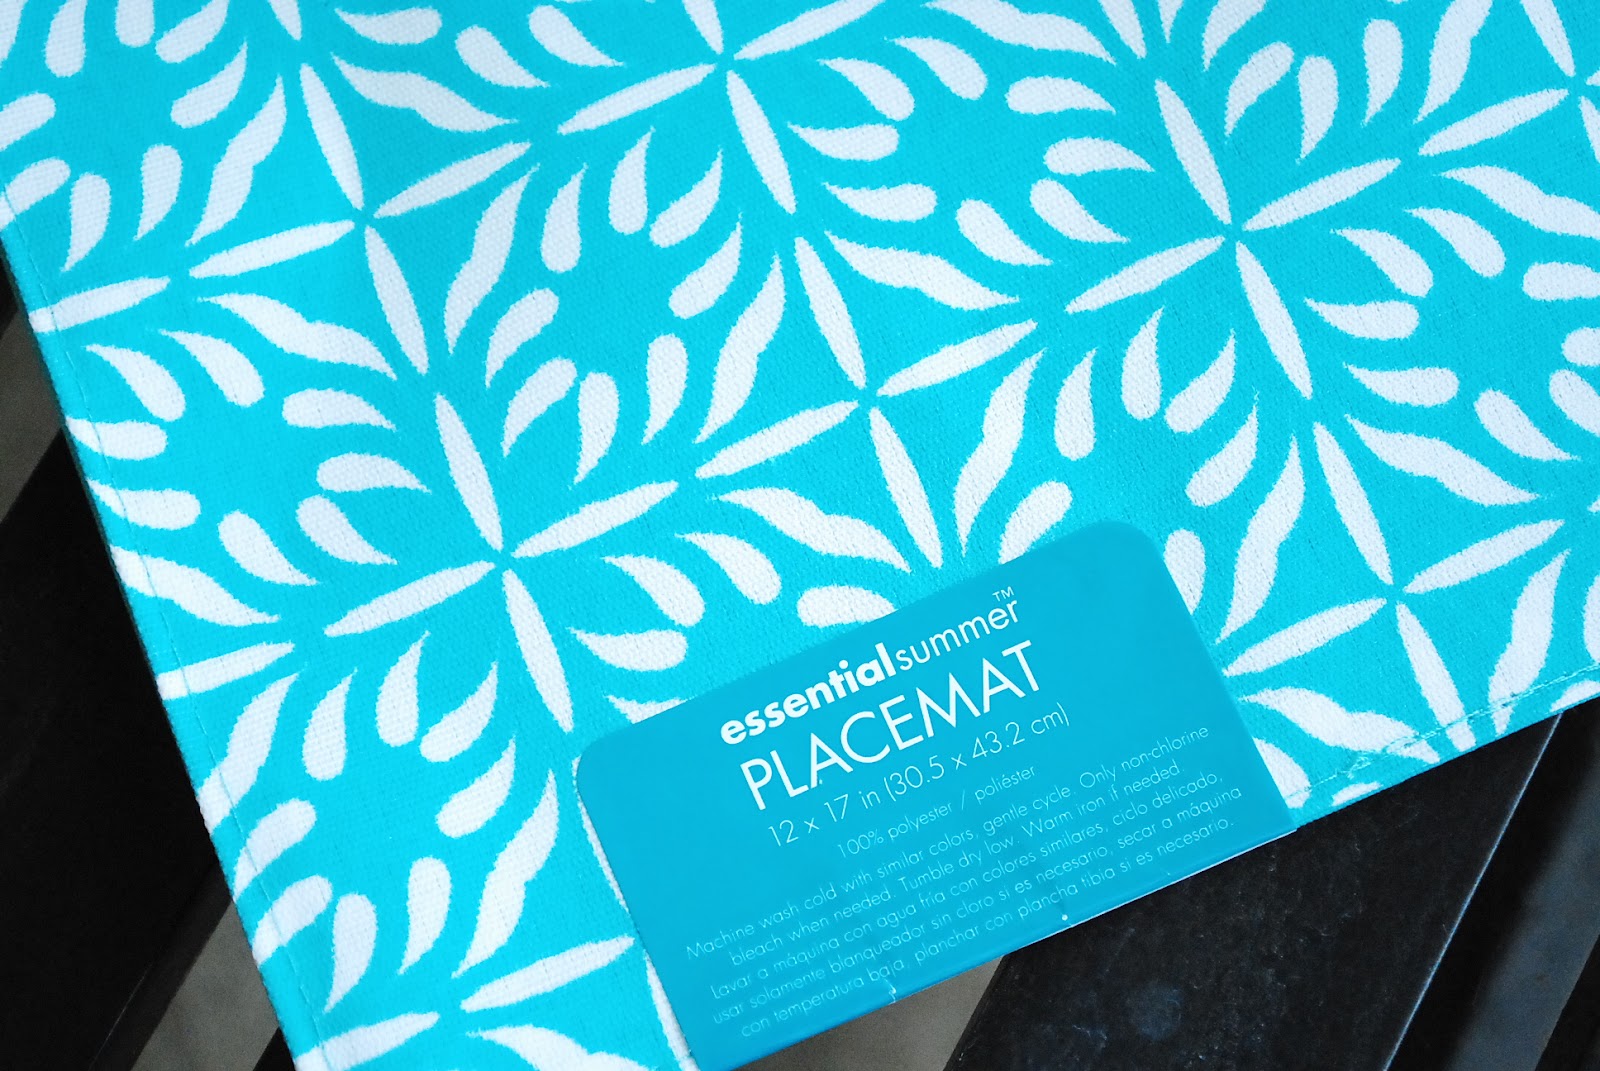
I remember seeing placemat pillows all over blogland last Summer and thinking I should make some. Well I finally got around to it and I’m in love with the simplicity of this project. What’s great about placemat pillows is that they’re fairly inexpensive to make. I bought my placemats for less than $3 each and the stuffing I already had on hand but you can find it at your local craft store.
To make your own you’ll need a seam ripper, placemats, stuffing, and a sewing machine or you could even hand stitch the seam close if you’d like.
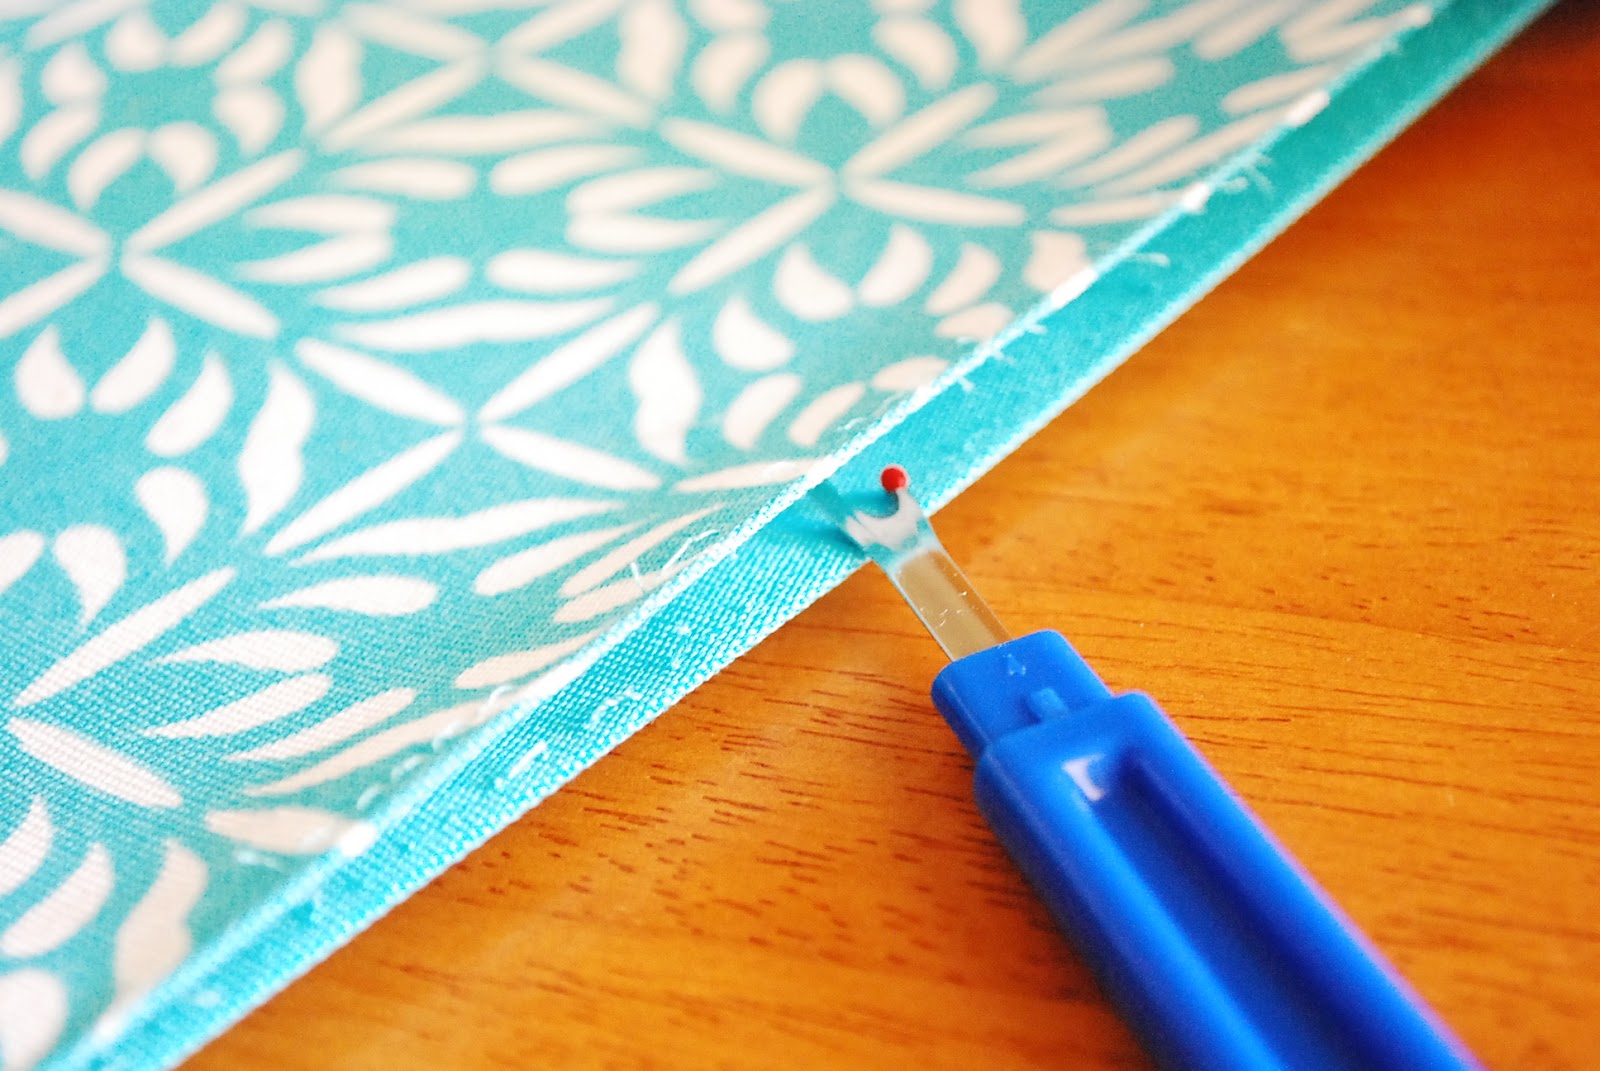
Carefully open one seam and stuff the pillow. For this size of placemats I used half a package of stuffing for each one.

Insert pins and sew the seam close. If you need to, push the stuffing to the opposite side while you’re sewing then fluff the pillow when you’re done.

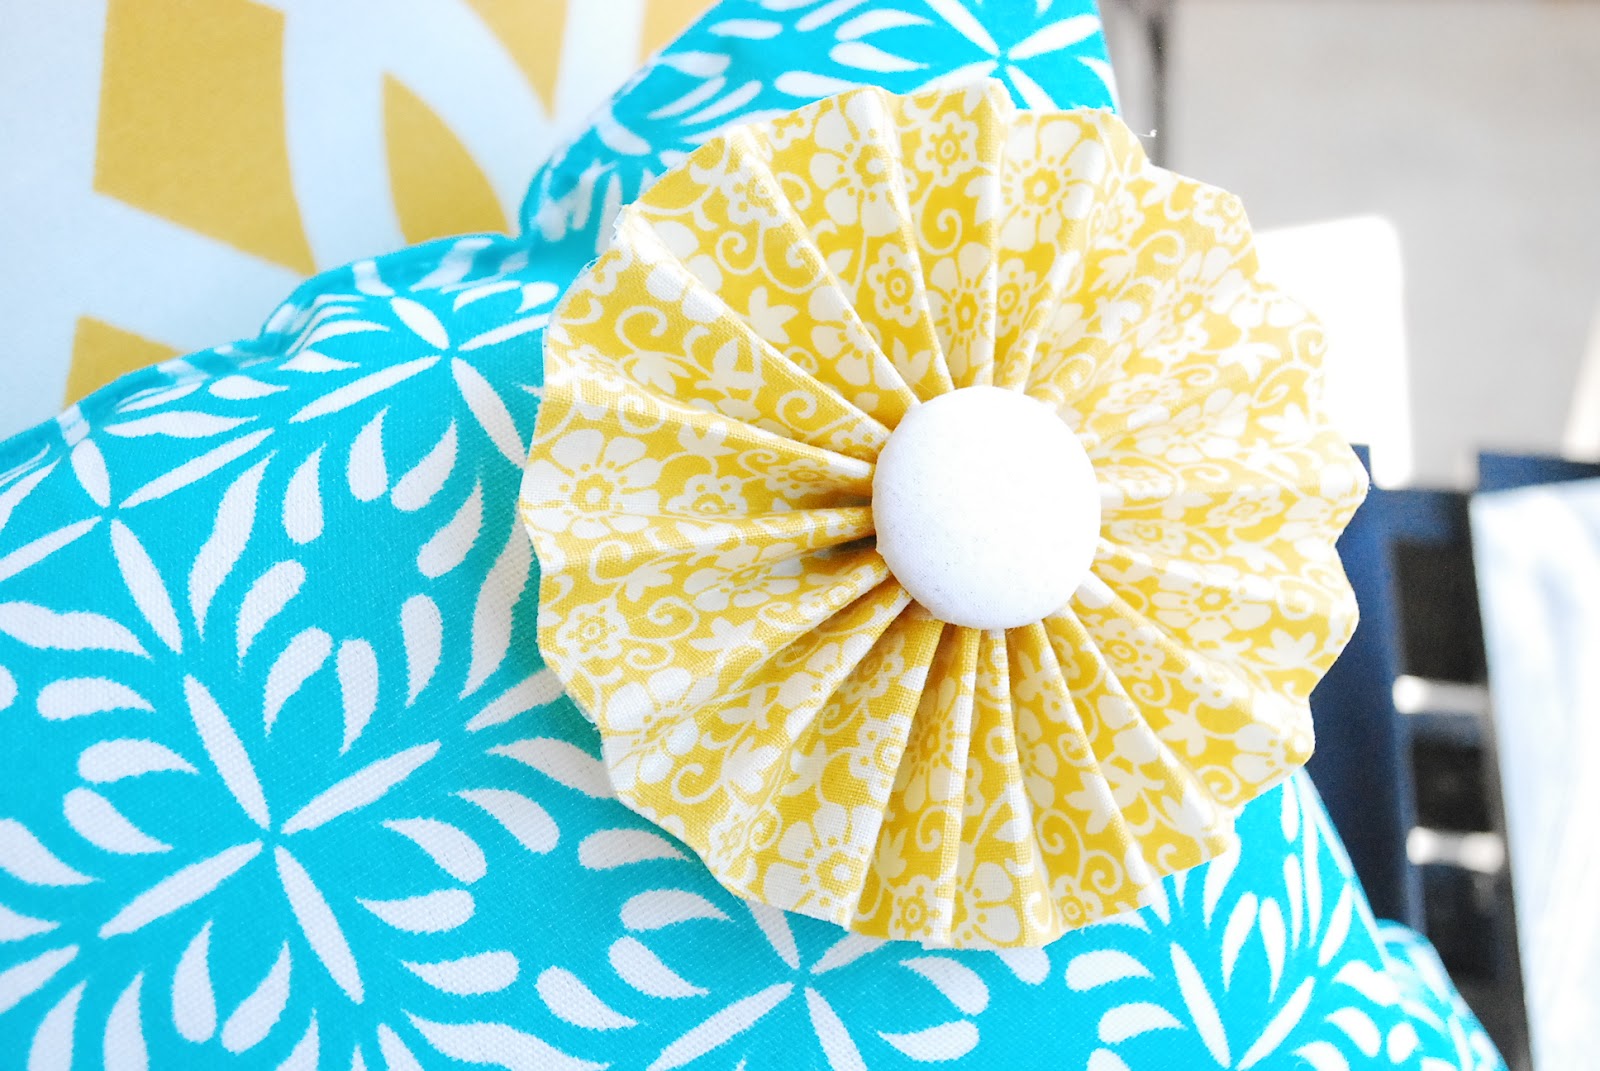
You can add flowers to embellish them or even a coordinating trim. I added fabric rosettes with a fabric button center. I’ve been on the lookout for the i-top button maker but can’t find it locally. But I did find this neat little device at Joann’s for a couple of bucks.
Fabric Rosettes Tutorial:
1. Iron interfacing to the back of your fabric.
2. Cut strips of fabric 1-2 inches wide depending on how big you want your flower to be.
3. Fold fabric strip accordion style and glue the ends together.
4. Press rosette down and hot glue the center together.
5. Add fabric button if desired.
I’m loving the porch makeover with its blue and yellow theme. I’ve received a lot of compliments from guests on how bright and cheery my porch looks.
I love this idea! I have been thinking how to make some pillows without a sewing machine. The colours you chose are perfect.
Love the pillows! What a great idea for easy pillows. I had never seen those before. Stopping by from Vintage Wanna Bee.
Loving this simple tutorial! Super adorable pillows! I am stopping by via Blog Hop and following!
Wow, that is easy. What kind of stuffing is best? I don’t want saggy flat pillows :)
Seriously I have not seen these placemat pillows yet, so thank you for introducing me!!! Super cute:):)
Love them! I LOVE placemat pillows…so easy and so fun!
So cute! And how great they look on that black bench!
I have never heard of placemat pillows until just now! Thanks for sharing this project. It does make a huge impact on your porch! Love your color choices.
I must have missed these too – but this is a fantastic idea! I love the embellishment and how quick and easy they are. Great job! Stopping by from “Not Just a Housewife”.
Great idea and these pillows look wonderful!
I just love them
Love this idea!
These turned out sooo cute!!! Here from Home Stories A To Z and your latest follower :)
Tanya
https://twelveoeight.blogspot.com/
What??!?!! I had no idea it was that easy! I’m definitely heading down to the store and picking up some place mats. Thank you so much!
darling, darling blog! i LOVE this idea! found you via the chasing sunshine blog hop! xo
How cute great idea thank u for sharing!
Great, easy idea!
These came out great! What a wonderful idea!
I love the placemats. The colors, patterns, and cute covered button make this the cutest porch pillows I’ve ever seen ;)
Visiting from Lil Luna and now a follower!
What a clever idea. Just love your new pillows. Might have to steal your idea. ;-) It looks so (sew) easy.
Hi, Crystal
I love the pillows. Super easy and they are just beautiful. I found your lovely blog on Not just a housewife link party. I love looking around your lovely blog and I am a new follower. Love for you to stop by http://www.homesweetbutterfly.com.
Have a great week.
Vanessa