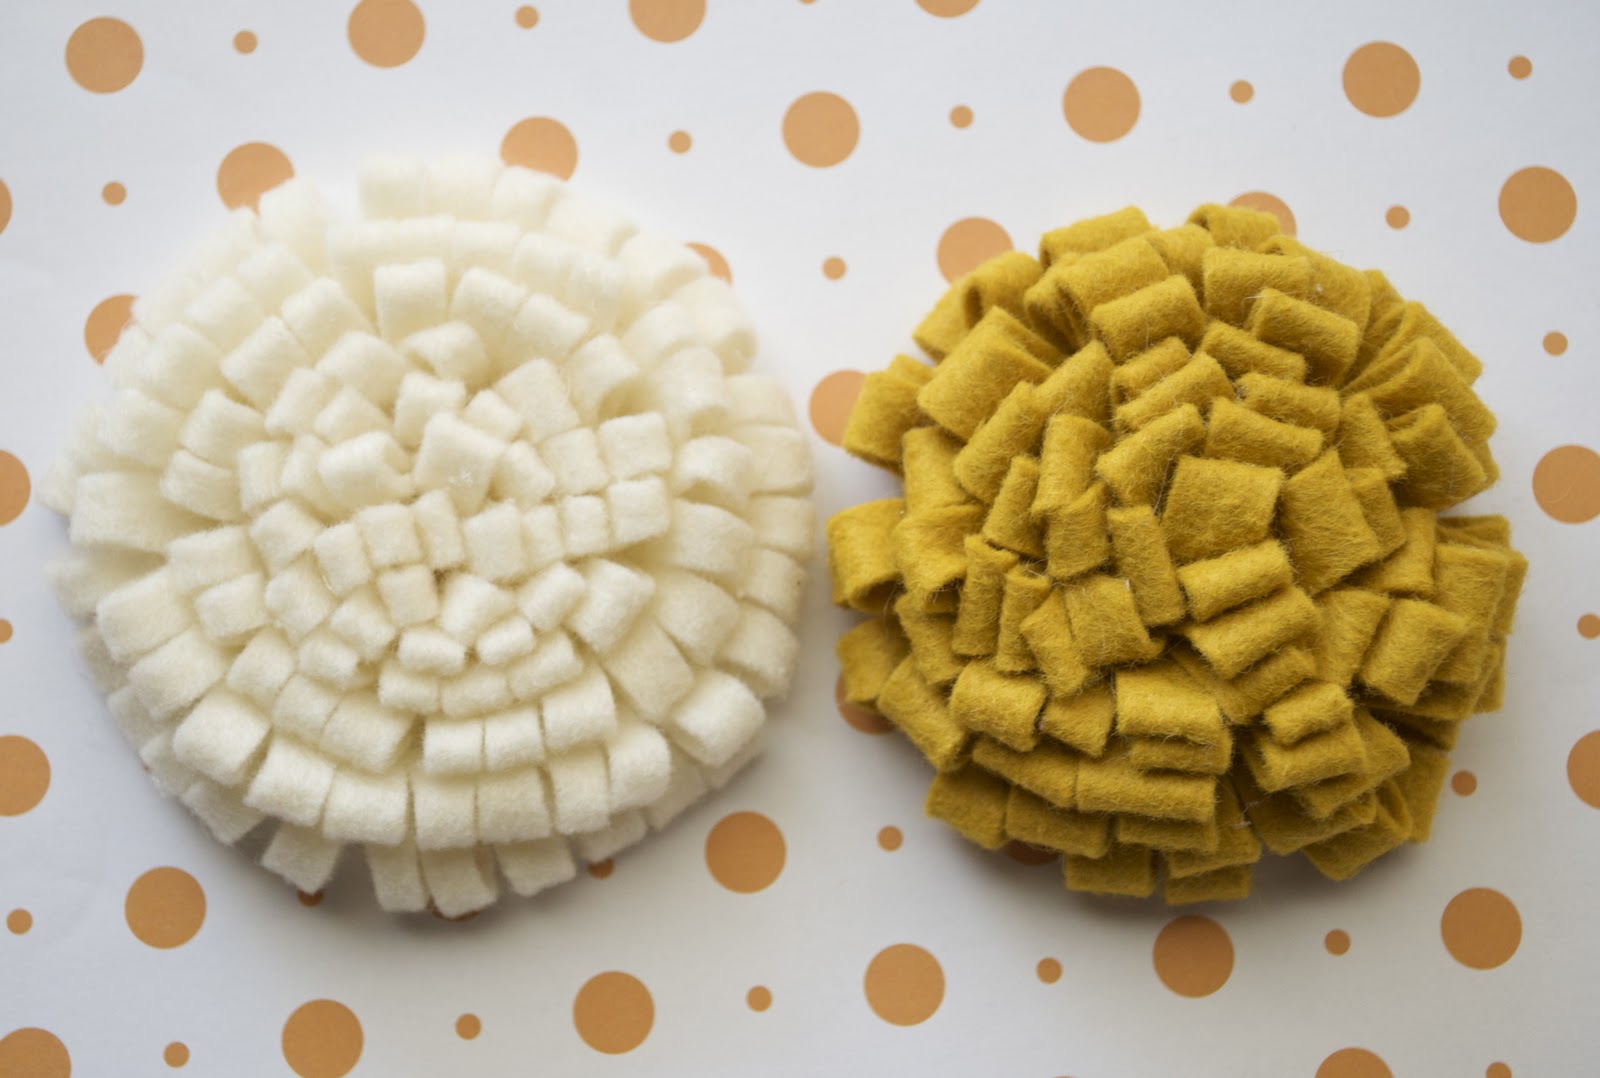
I received several emails asking me how I made the brown flowers on my Fall Wreath. Sorry for the delay, but I’m finally posting the tutorial on how to make them.
I’m going to show you two ways to make these. I’ve placed them side by side to show you how each flower will turn out depending on the method you use.

First take your felt and cut it into strips about 1.5inches wide. I didn’t use the 8.5X11 felt sheets for the yellow one. The strip for my yellow flower was approximately 1.5in wide by 20in long.

Fold it in half and glue the corner together
Then cut slits half way down the folded strip.
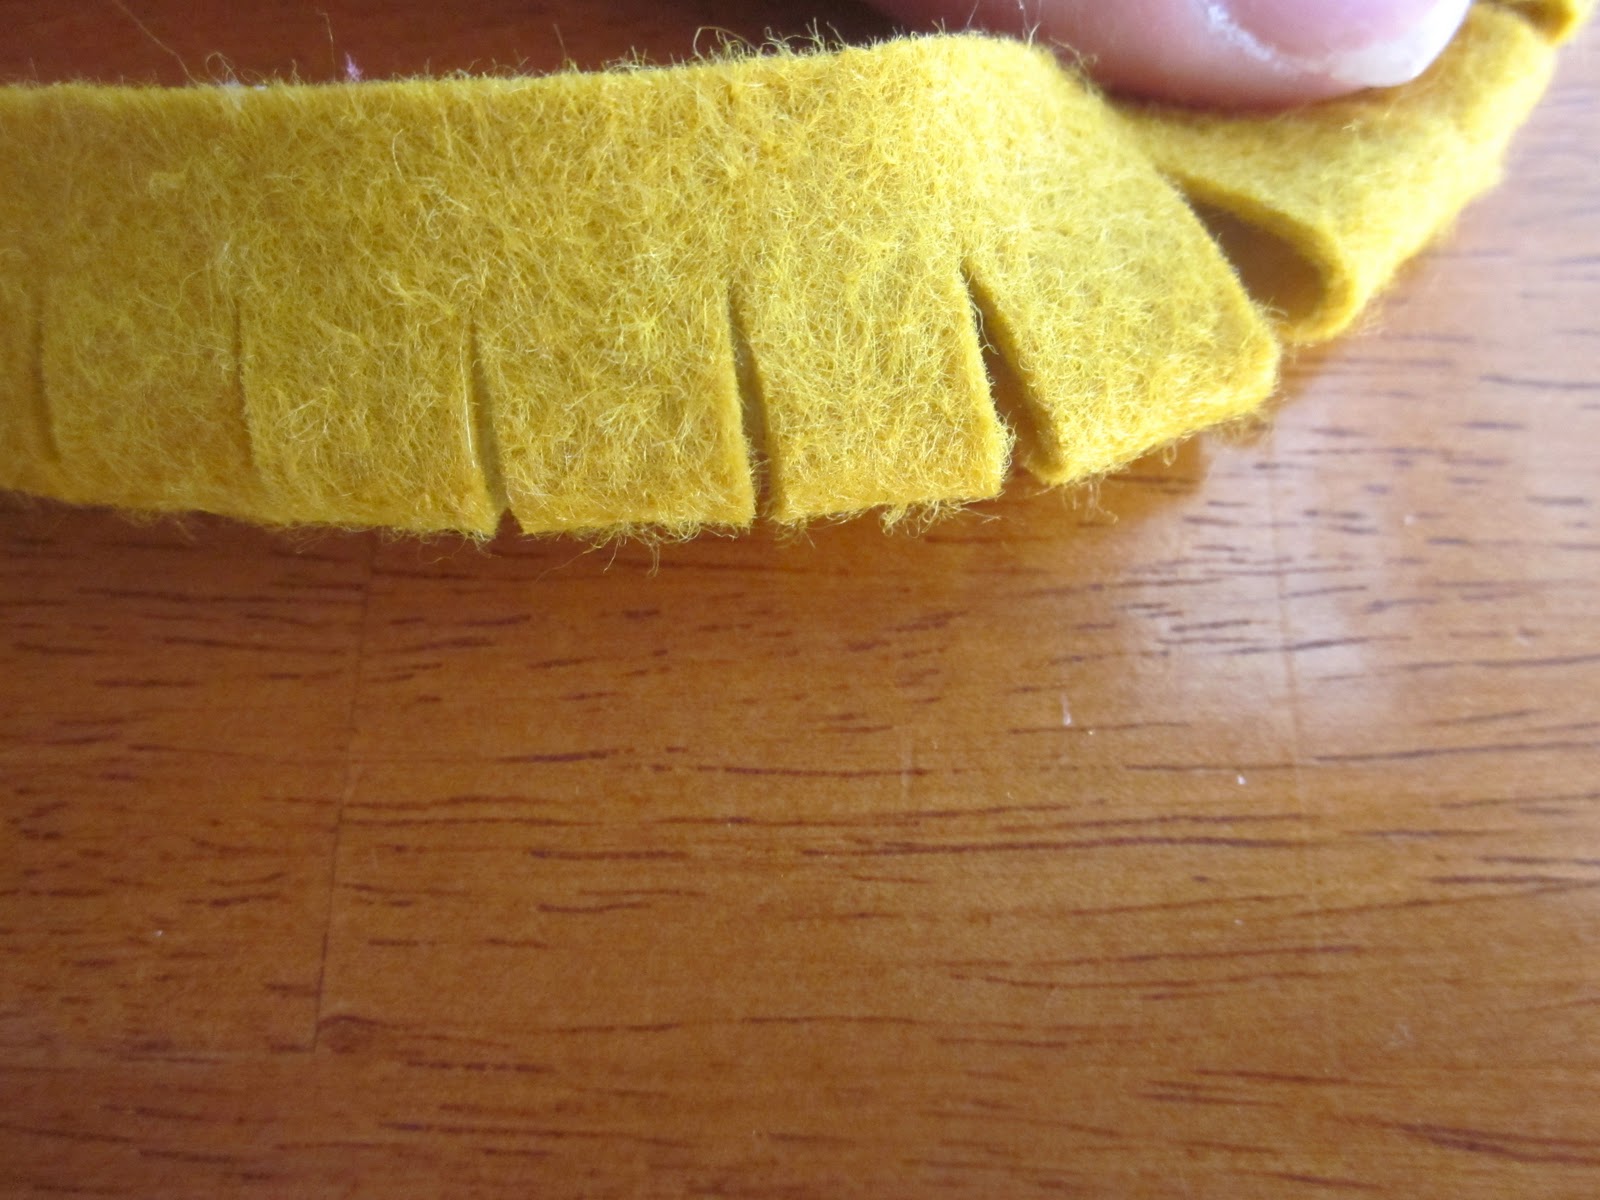
For the yellow flower all you’re basically doing is rolling and gluing as you go.

Then for the cream flower cut out a felt circle and glue your strip onto it.
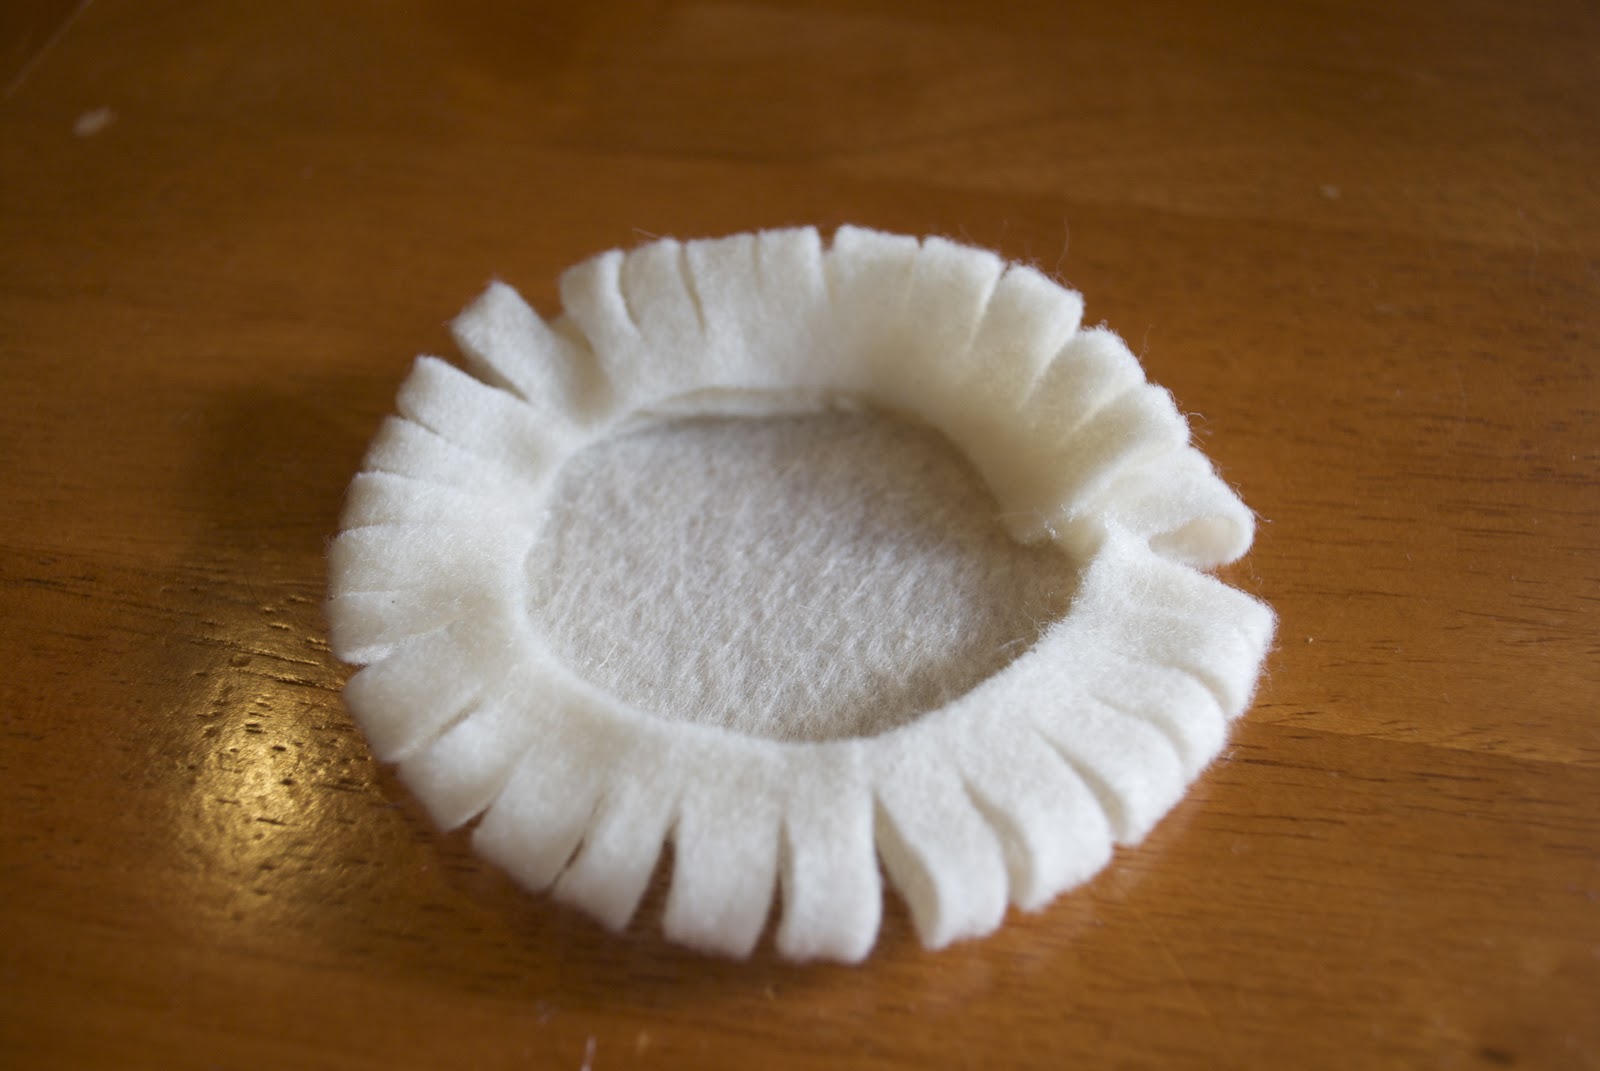
I forgot to take a picture of the next step. But at this point you just grab your second strip that’s already been cut and start where you left off. Continue to go around the circle until you get to the center (cut off any excess).
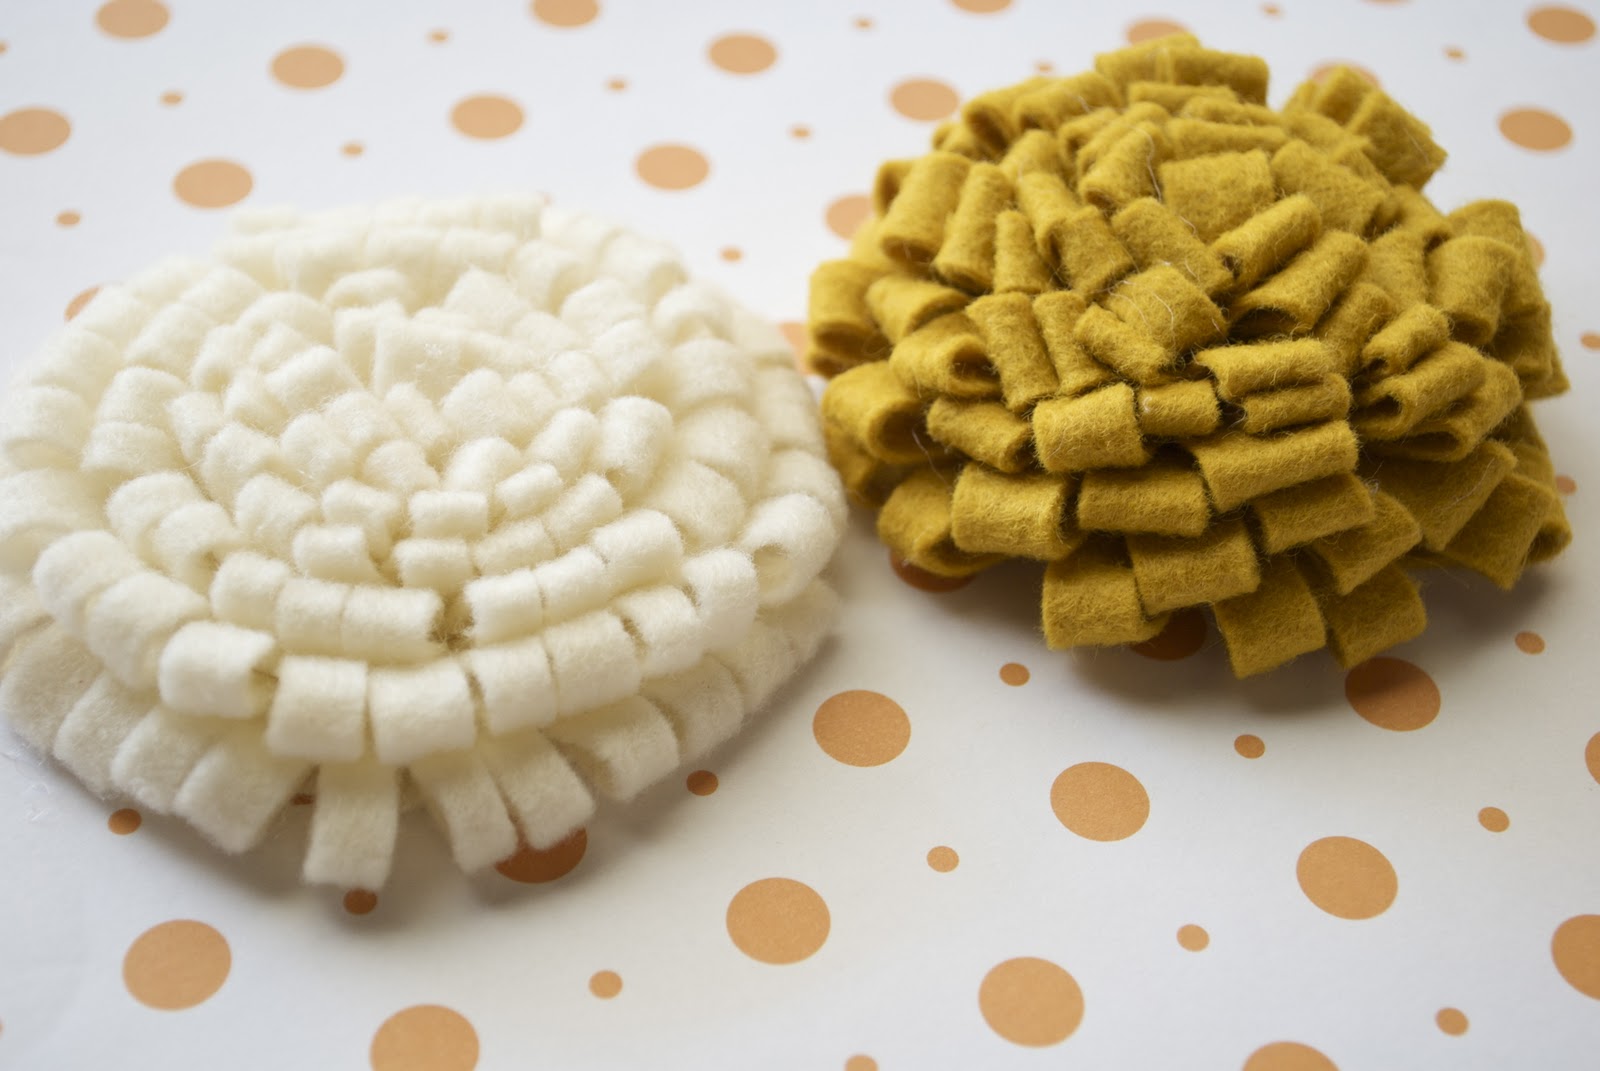
As you can see there’s quite a difference in shape depending on which method you use. I personally like the messy feel the yellow flower has. I’m thinking these are going to make great Christmas present bows this year.
I hope you found this Flower Tutorial helpful. Let me know if you have any questions :)
Thanks for stopping by!
Please visit my link party tab to see where I’m linking up.
Oh, thank you for sharing this! I really want to make some of these! Adorable little flowers!
I LOVE the look of the yellow one! And I never would have guessed it would be so simple. Thanks so much for sharing it :)
what a clever method–have not seen this one before! thanks for sharing, i may have to try this :)
Cool! I have seen these around and wondered how to make them. I think they would be adorable on a wreath!
:) crafty texas girls
Fantastic! These are gorgeous :)
Saw you on Craft-O-Maniac. New follower :)
Come visit me @ https://littlebirdthreads.blogspot.com
Lovely tutorial. I will have to see if I can whip up a few of these and create a wreath!
I hope you are able to join us at the It’s a Wrap Link Party at Artful Rising.
Erika
Hi! I saw your flowers on Thrifty Decorating! Thank you for the tutorial!
a great to use all those felts we have accumulated.
I would love to have you join us at our linking party this week at
https://www.passionatelyartistic.com/2011/10/celebrating-fall-with-linking-party.html
Have a great week,
Maggie
https://passionatelyartistic.com
Those are so cute! Thanks for sharing. :)
I love that you shared that with us! They had a pillow with a flower on it just like this at target.
Very cute! And easy. great combination.
We've included you on our latest post. We've nominated you for the "Versatile Blogger" award. Please come over and check it out. Thanks for all of the daily inspiration :)
Corie @ Design DNA
Thanks for sharing this I really love these flowers and have never been able to find a tutorial! Thanks!
These are adorable! Thank you for sharing the tutorial!
Angela
wraysist3rs.blogspot.com
Thanks for sharing! I'll have to try it now.
Rachel
adventuresofadiymom.blogspot.com
These are great aren't they?
I had seen them around before and made a whole bunch last year to stash bust a lot of felt.
Good tutorial btw.
:)
I've always wondered how to do this! Thank you so much for sharing the tutorial! I am so happy I found your crafty blog and joined! Stop by mine and join if you'd like!
Warmest Regards & Happy Fall!
Annamaria
So cute!! Thanks for sharing this great tutorial!!
~ Sarah
wow, i love these! so cute, and so simple! i'll have to do this soon.
i would love for you to come link up this or any other amazing project at my creativity party going on right now!
letbirdzfly.blogspot.com
thanks so much for sharing!
awesome tutu :)