I received several emails asking me how I made the brown flowers on my Fall Wreath. Sorry for the delay, but I’m finally posting the tutorial on how to make them.
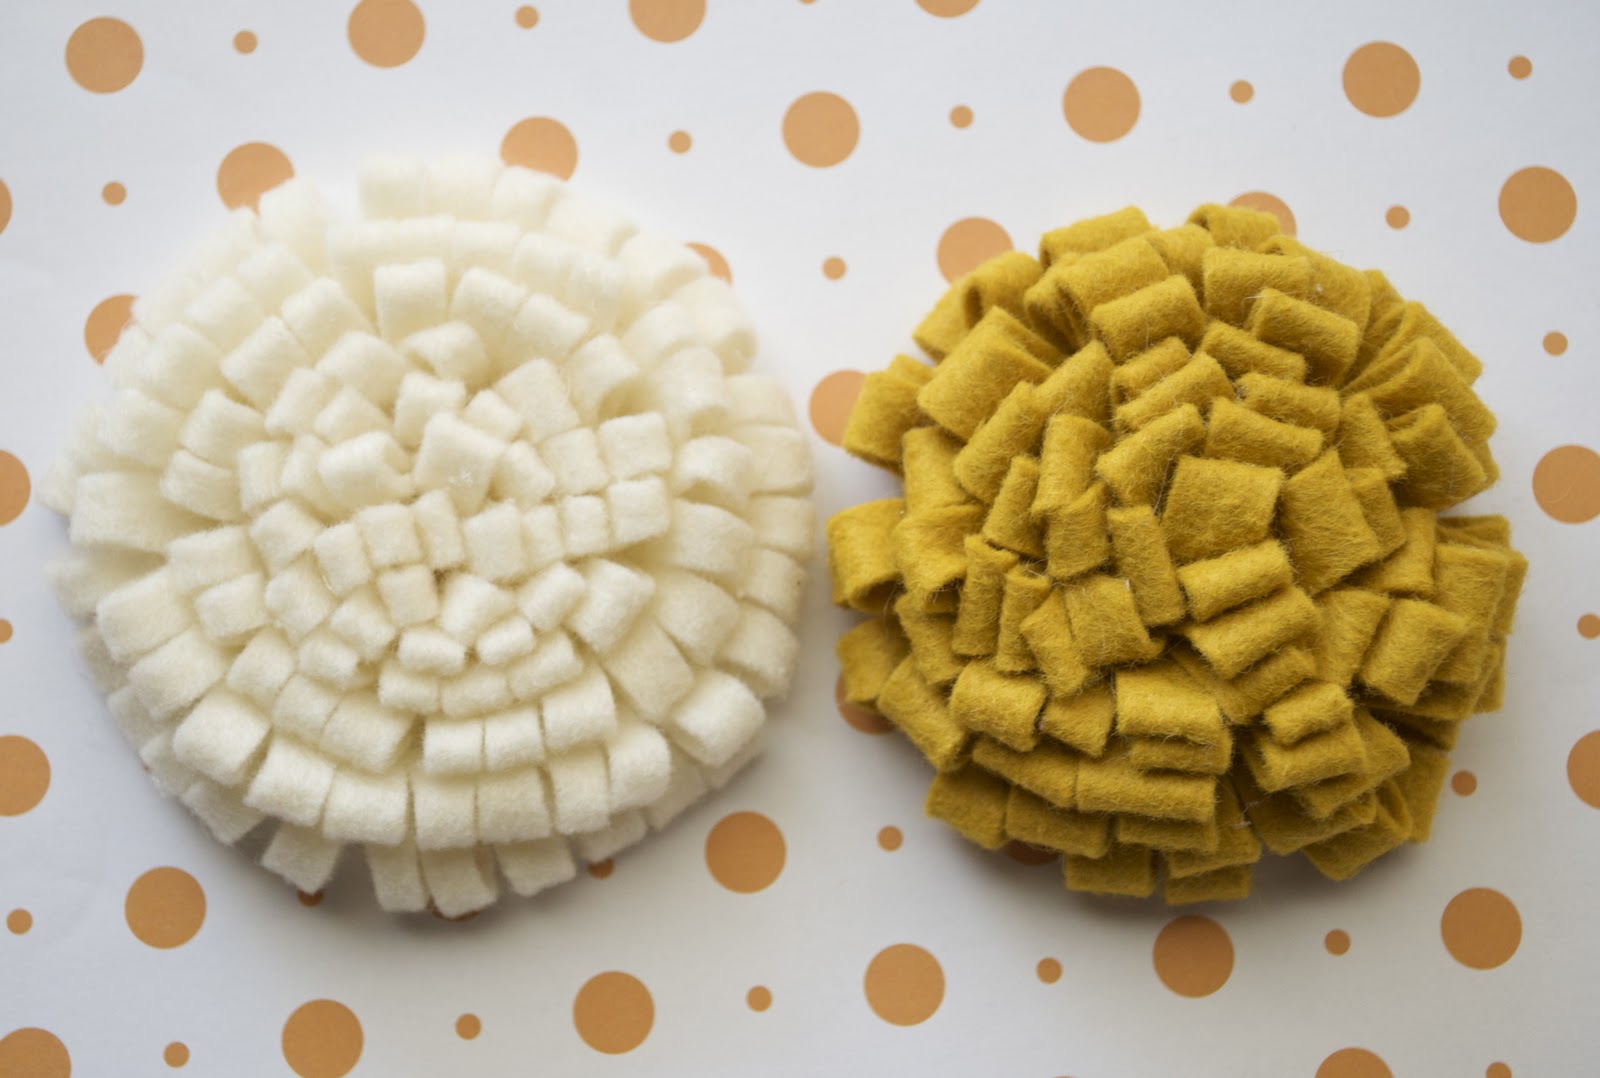
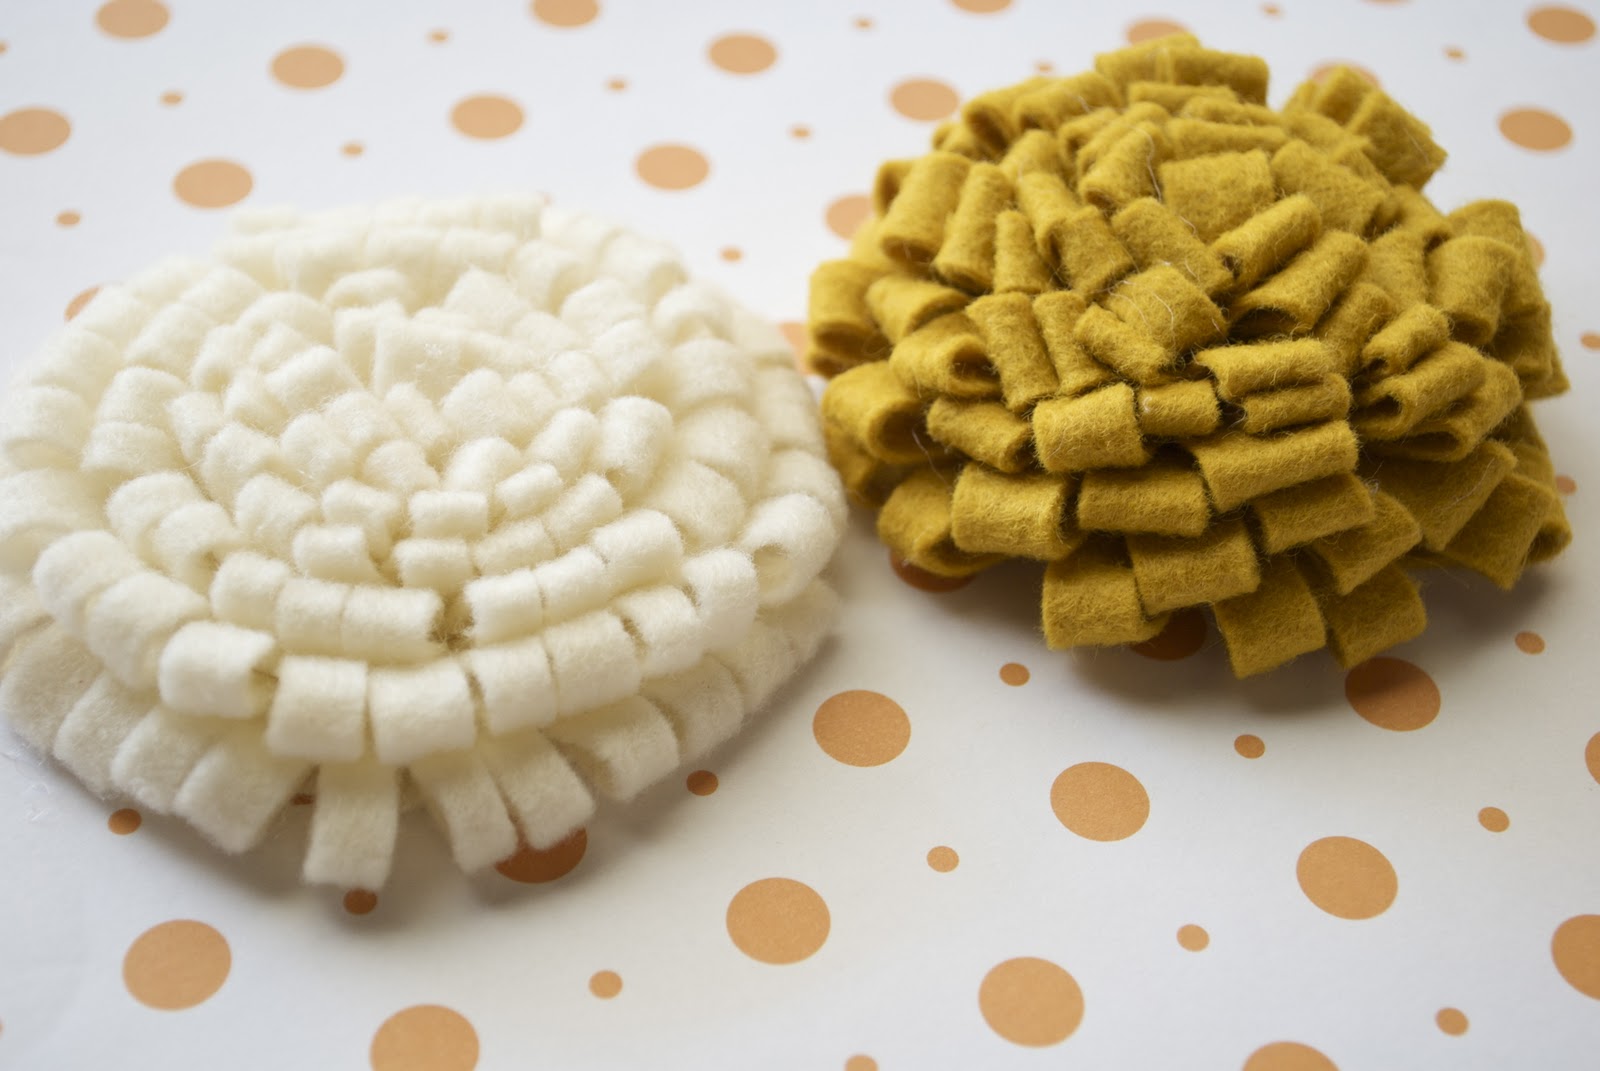
I’m going to show you two ways to make these. I’ve placed them side by side to show you how each flower will turn out depending on the method you use.

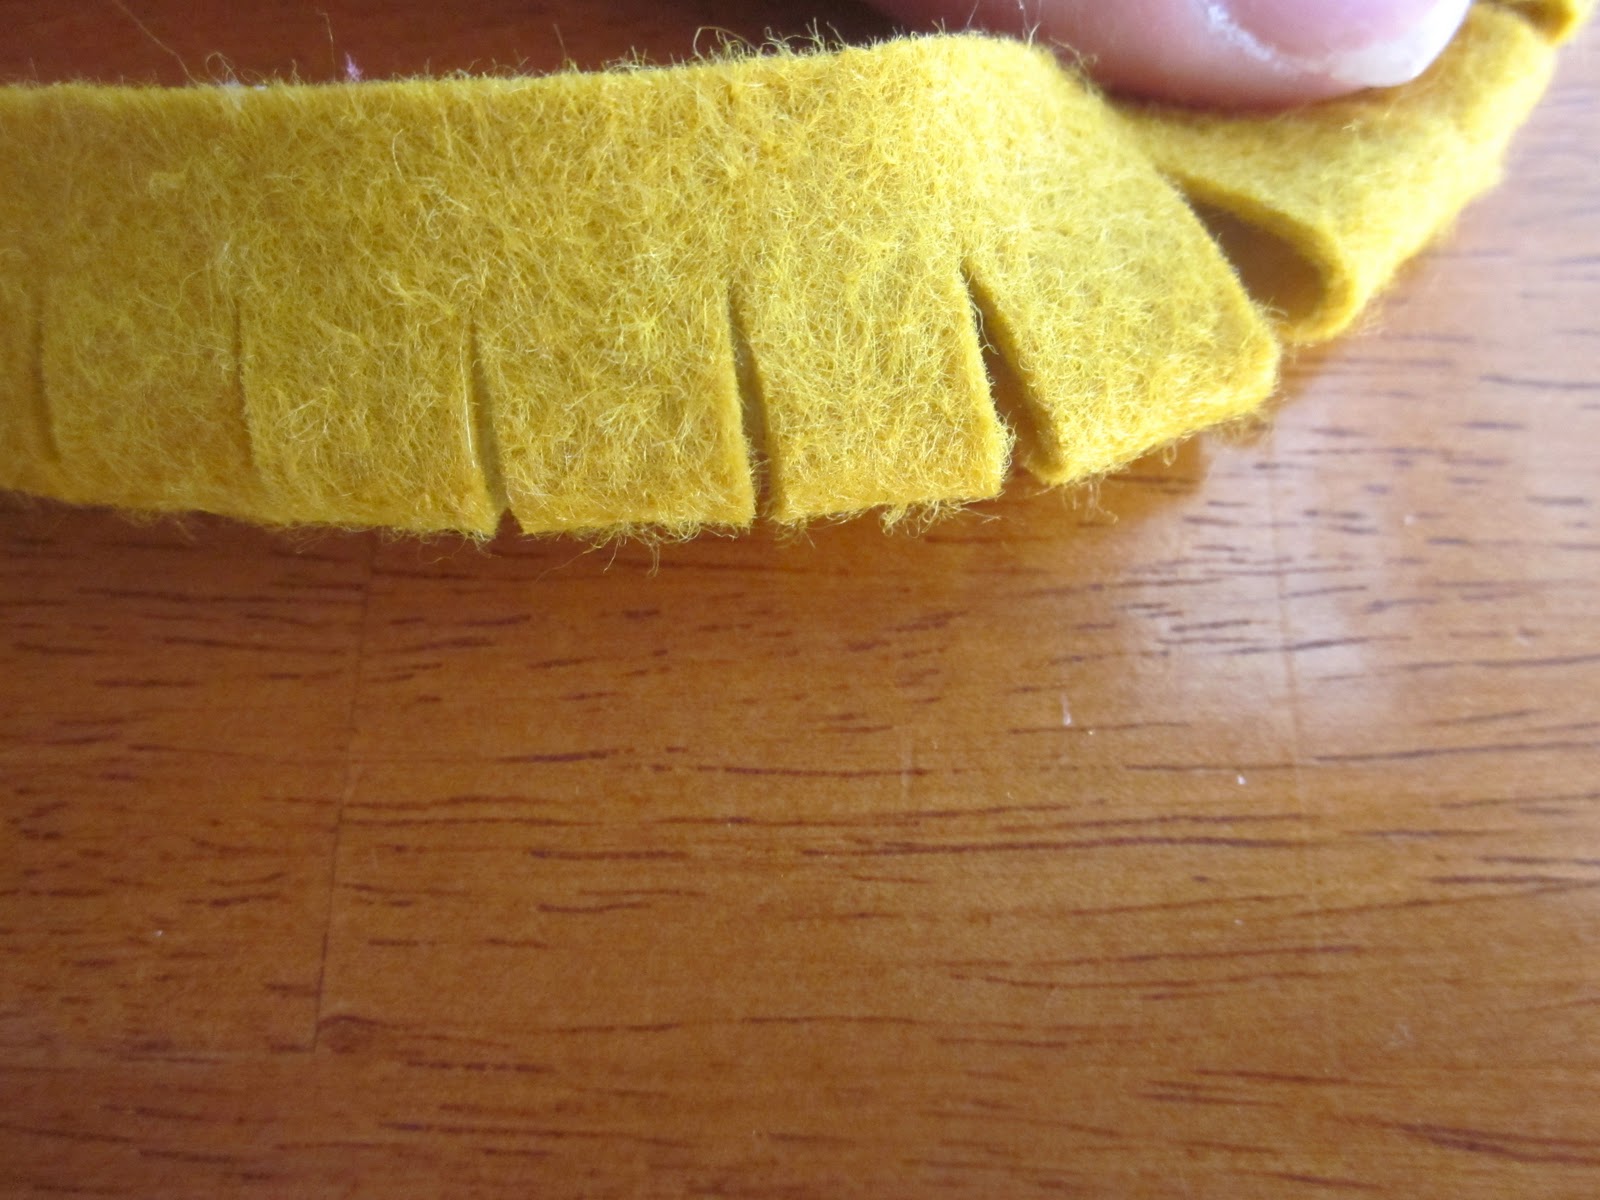
First take your felt and cut it into strips about 1.5inches wide. I didn’t use the 8.5X11 felt sheets for the yellow one. The strip for my yellow flower was approximately 1.5in wide by 20in long.

Fold it in half and glue the corner together
Then cut slits half way down the folded strip.
For the yellow flower all you’re basically doing is rolling and gluing as you go.

Then for the cream flower cut out a felt circle and glue your strip onto it.
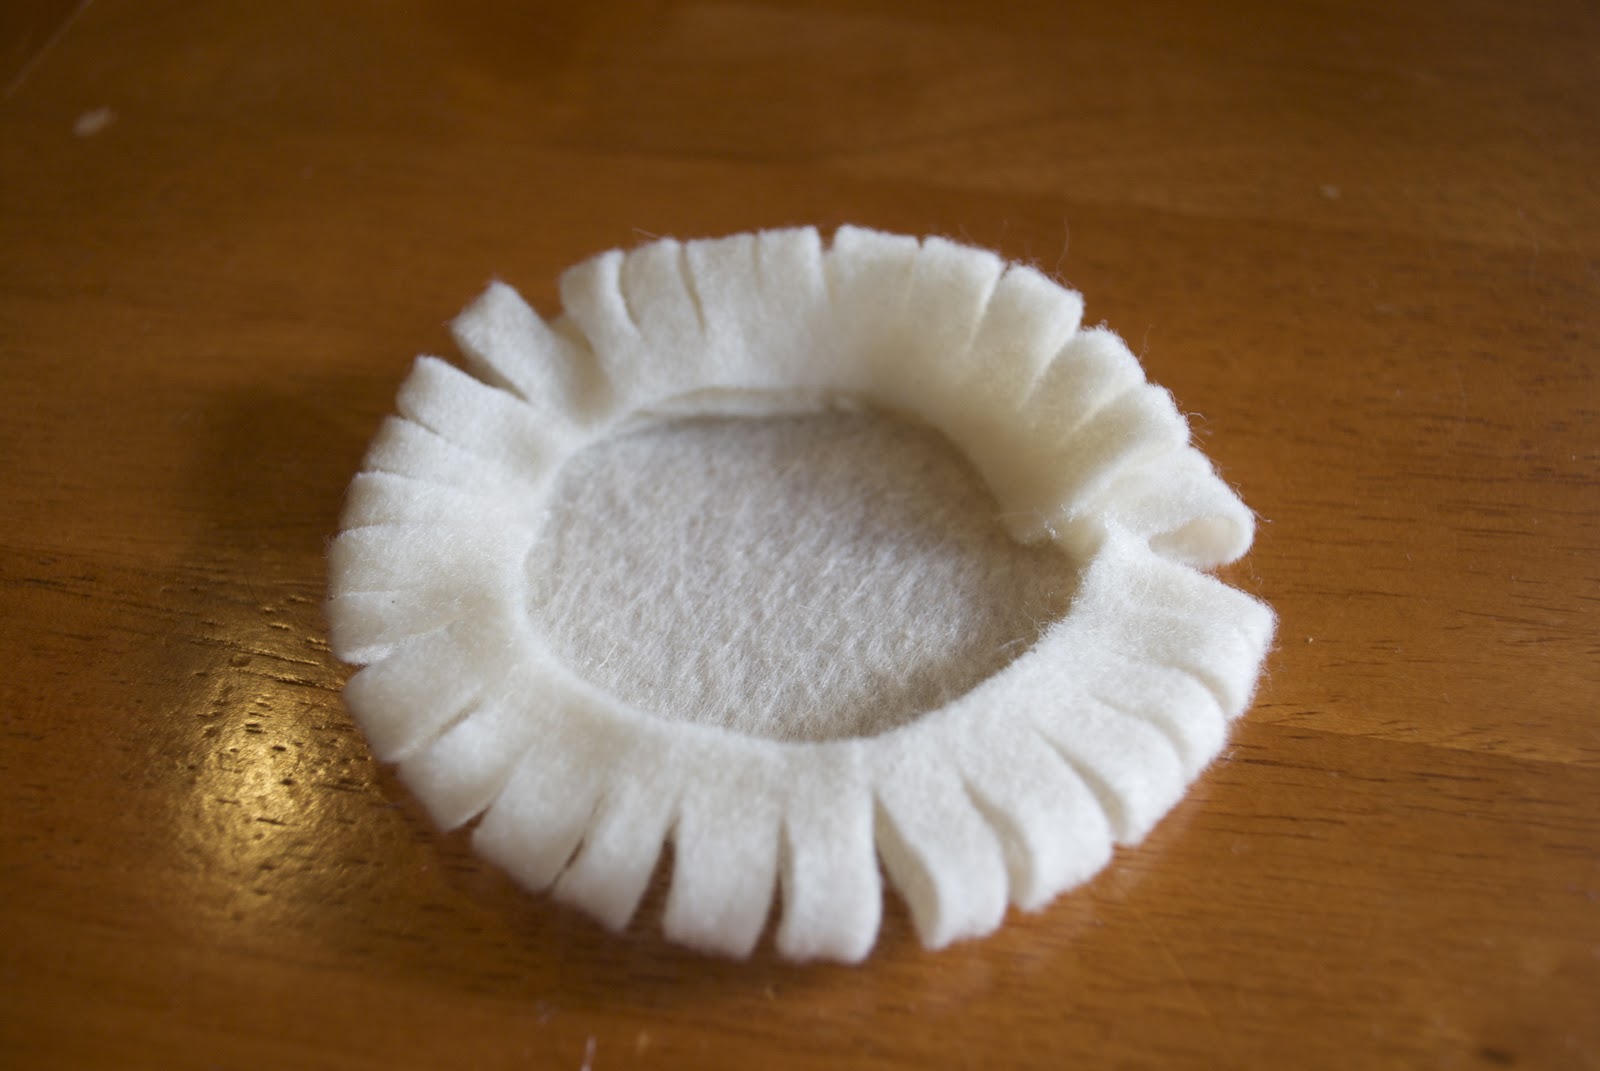
I forgot to take a picture of the next step. But at this point you just grab your second strip that’s already been cut and start where you left off. Continue to go around the circle until you get to the center (cut off any excess).
As you can see there’s quite a difference in shape depending on which method you use. I personally like the messy feel the yellow flower has. I’m thinking these are going to make great Christmas present bows this year.
I hope you found this Flower Tutorial helpful. Let me know if you have any questions :)
Thanks for stopping by!
Please visit my link party tab to see where I’m linking up.
Thanks for linking to Take-A-Look Tuesday!! You were featured today!
-Mandy, Sugar Bee Crafts
Super cute!! New follower and can't wait for more yummy recipes and great crafts.
Tabitha
divatodomestic.blogspot.com
Oh my! I can't tell you how cute I think your flowers are. Thank you, thank you, thank you for showing us how to make them. Now I just need to get my hands on some felt! LOL
Oh these are so, so, so pretty! What a fabulous idea! Jen @ http://www.icantstopcrafting.blogspot.com
so cute! I love this version of felt flowers!
Wow these look so good! Thanks for sharing the tutorial with us!
Great little tutorial! Have you linked it up with Creative Me Monday this week? It's open all week long and I'd love to have you. Here's the link:
https://www.thesoutherninstitute.com/2011/10/creative-me-monday_09.html
Hope to see you there!
Jenny
Cute! I pinned your post. I may have to make some of these in school colors. Thanks for the tips!
Very cute (and easy) flower tute! So glad I found it through Simply Designing!
Love these! Please oh please consider linking up to my weekly Refresh Your Nest linky party; I'd love to feature them. They'd make great Thanksgiving napkin rings, too!
https://makinglemonadeblog.blogspot.com/2011/10/refresh-your-nest-friday-5.html
I think these are just fantastic. I'd like to try them using multiple colors for a layered effect. Found you on Simply Designing.
Trish @ https://www.MomOnTimeout.com
Cute! I love that they're so easy to make. I like the neatness of the white one, myself.
–Jill
from Jill Made It
ok, I have always wanted to know how these are made! Thank you! I hope you will link up with me here: https://www.thegingerbreadblog.com/2011/10/sweet-saturday-v9.html
Thanks for this, I've always wanted to know how to make these and just couldn't figure it out.
Those are really cute flowers. I've never seen that kind before. I can't decide which style I like better, I guess I'll just have to try them both. :)
These are adorable! I can think of so many ways to use these for Christmas presents!! Thanks so much for showing how to make them!
Cute flower and a great tutorial. I stumbled the post too.
What a fresh spin on felt flowers! I really like the look of the yellow one. Thanks for the tutorial, I'm pinning it!
Found you through TT&J.
Way cool!! They look like they'd be hard!! I'm gonna have to try! Are these methods best with felt or can you use fabric too?
Pinning right now girl!
Thanks for sharing at Show & Share!!
These are cool!! So many ideas of how to use these! Pinning them :) Would love if you would stop by and share these at my linky party. https://everything-underthemoon.blogspot.com/2011/10/bedazzle-me-monday-4.html