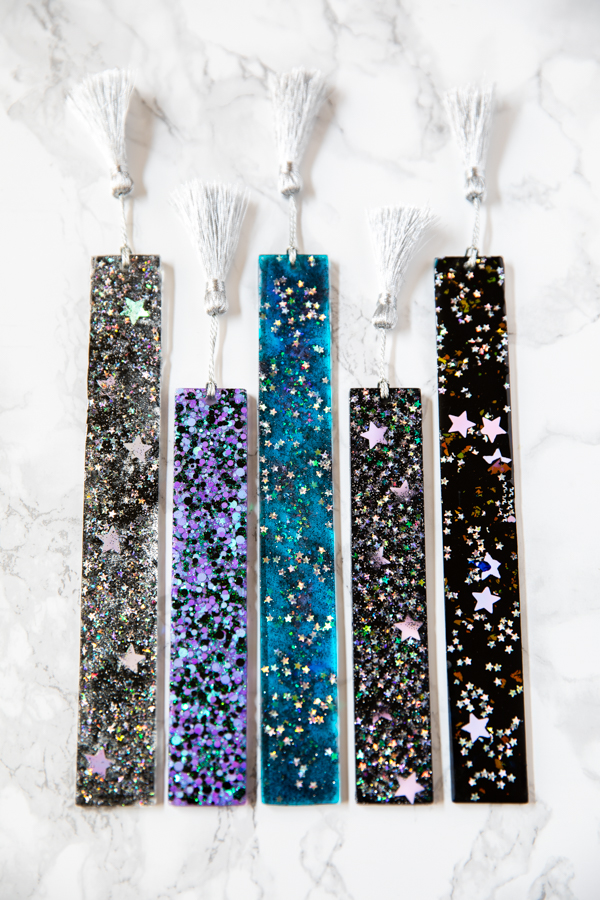
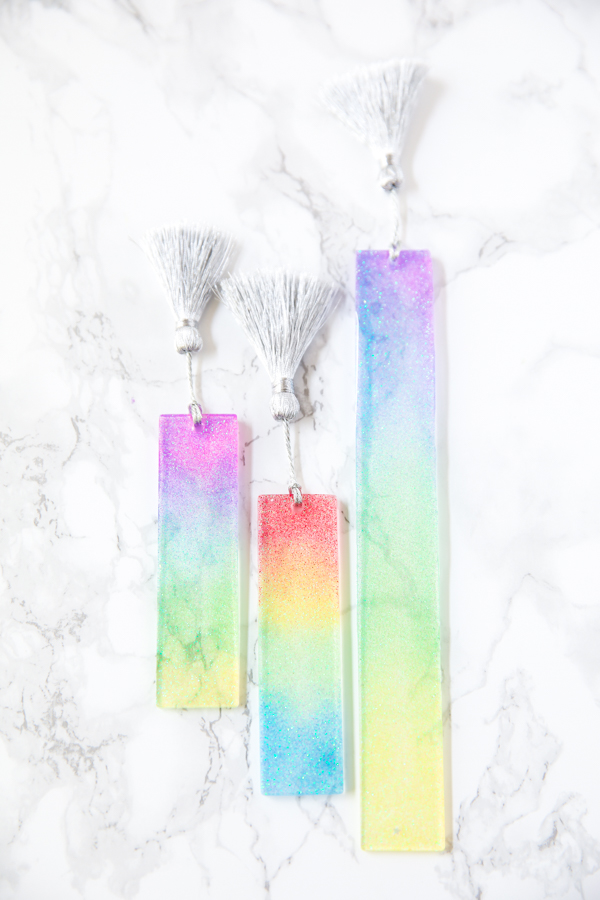
Create glitter resin bookmarks for the bookworms in your life! This easy step-by-step tutorial will show you how to make resin bookmarks with tassels.
 My little bookworm is always in need of a bookmark. This summer she decided to read the Harry Potter series again along with the Percy Jackson series. I decided to make her glitter resin bookmarks to keep track of her reading.
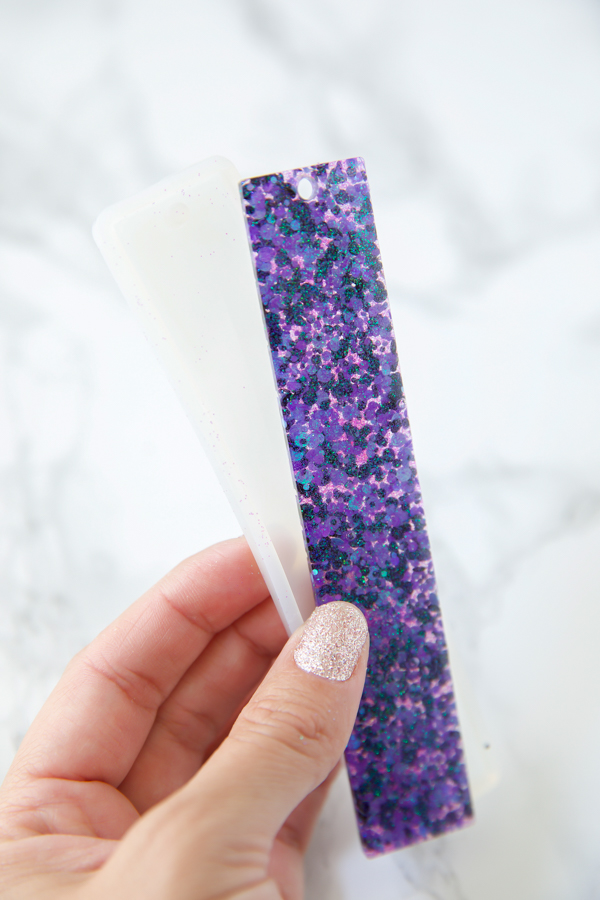
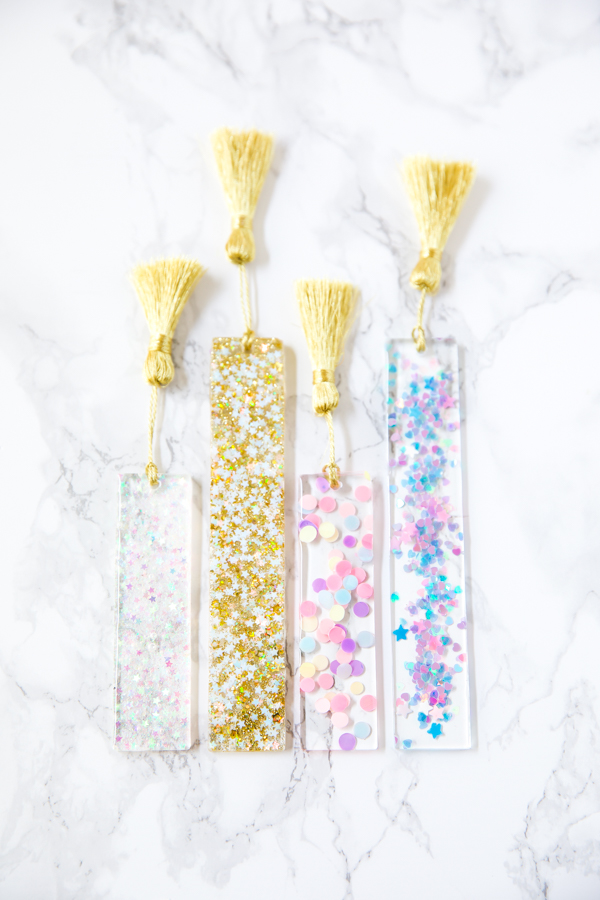
The best part about working with resin is creating custom colors and using fun molds like this BOOKMARK MOLD SET. Add glitter or pigments to make bookmarks in your favorite colors. The best part is the mold will create a hole at the top so you can add a tassel to your bookmarks. Follow along as I share the tips and tricks I’ve learned along the way working with resin. I’ve also included Amazon affiliate links to the supplies needed for this project below.
DIY Resin Bookmark Materials
- Epoxy Resin
- Bookmark mold set or this Bookmark Set
- Glitter
- Gloves
- Silicone mat
- Respirator mask
- Plastic utensils or popsicle sticks
- Optional: dropper or syringe
Related: HOW TO MAKE RESIN BRACELETS
HOW TO MAKE RESIN BOOKMARKS (VIDEO TUTORIAL)
Measuring resin for a bookmark mold
Before you start, determine how much resin is needed for the project. An easy tip to measure fluid ounces is to use a syringe or small measuring cup filled with water. Pour the water into the mold and figure out how much was needed using the measurements on the cup or syringe.
The molds used in this project came in three sizes. I will list the fluid ounces I found to work best with each size.
- Small .30 ounces
- Medium .50 ounces
- Large .70 ounces
How to use epoxy resin
- Resin requires an equal amount of resin and hardener to cure properly. The resin used for this project is made with a 1:1 ratio. Having equal amounts is important for optimal curing results within 24 hours.
- To make the resin, mix the hardener and resin in a slow circular pattern until fully incorporated. Stirring slowly will help prevent excess air bubbles from forming.
- If you would like to add glitter or pigment to the resin, divide it into small cups to customize each color. Stir the glitter until fully mixed with the resin.
- Tip: allow the resin to sit in the cup for a few minutes. This will help air bubbles rise to the surface before pouring into the mold.
- The last step is to pour the resin into the mold. The resin will cure in about 24 hours or the time listed on the packaging.
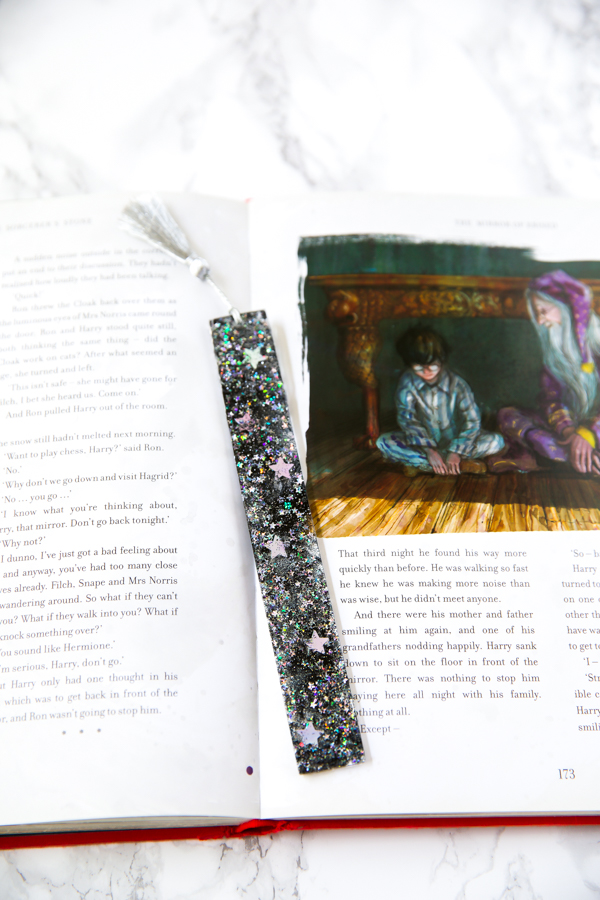
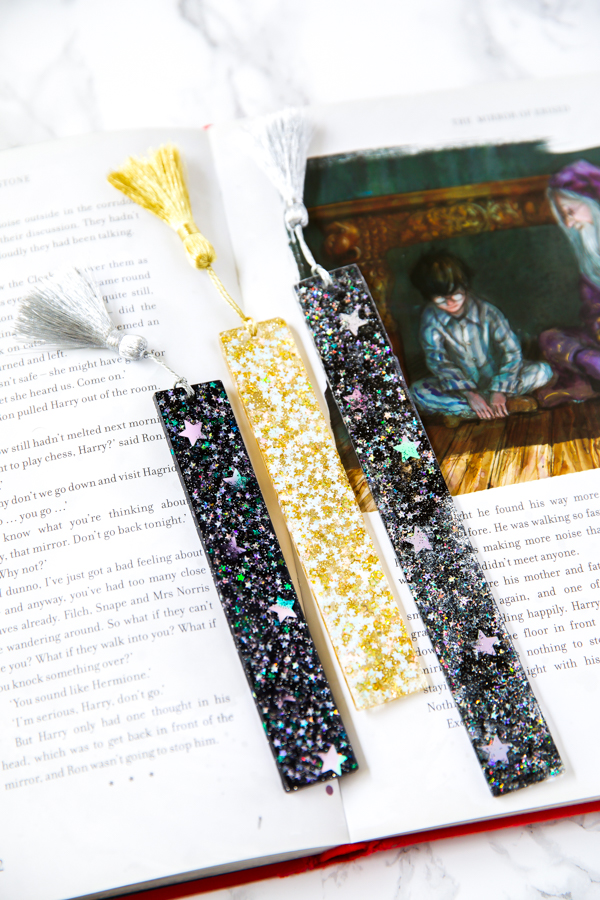
- Remove the bookmark from the mold and tie a tassel at the top through the hole created by the mold.
What can you use to color resin?
- Glitter – make colorful projects with glitter in a variety of sizes shapes.
- Alcohol inks – use alcohol inks to dye resin prior to pouring into the mold or add drops once the resin is in the mold and use a tool to make swirls with the pigment.
- Powder mica pigment – this can give your resin project an opaque color.
- Beads – add colorful beads to your project by placing them directly into the mold.
- Sequins – use sequins to add holographic shapes to your bookmarks.
- Dried flowers – small dried flowers add a beautiful look to handmade bookmarks.
- Gold foil – another beautiful addition to your bookmark is to combine dried flowers with gold foil flakes.
Resin Tips
- To prevent air bubbles, mix the resin and hardener together slowly.
- Allow the resin to sit for a few minutes before pouring into the mold.
- If you see air bubbles rise to the surface once poured into the mold, use a torch or heat gun to quickly pop them.
Safety tools for working with resin
- Resin can produce harmful vapors that can cause an allergic reaction in some people. To be safe, always wear protective gloves, a respirator mask, and goggles.
- It’s also important to protect your work surface. If resin dries on your table or counter, it will cause damage. Resin is very sticky when it is still in liquid form and difficult to clean. To prevent this, use a large silicone mat to protect your surface and for easy cleanup. If resin drop on the silicone mat, let it dry and peel off the next day.
I’m so happy with the way these handmade bookmarks turned out! I plan to make them for my nieces’ birthdays and personalize the bookmarks with adhesive vinyl.