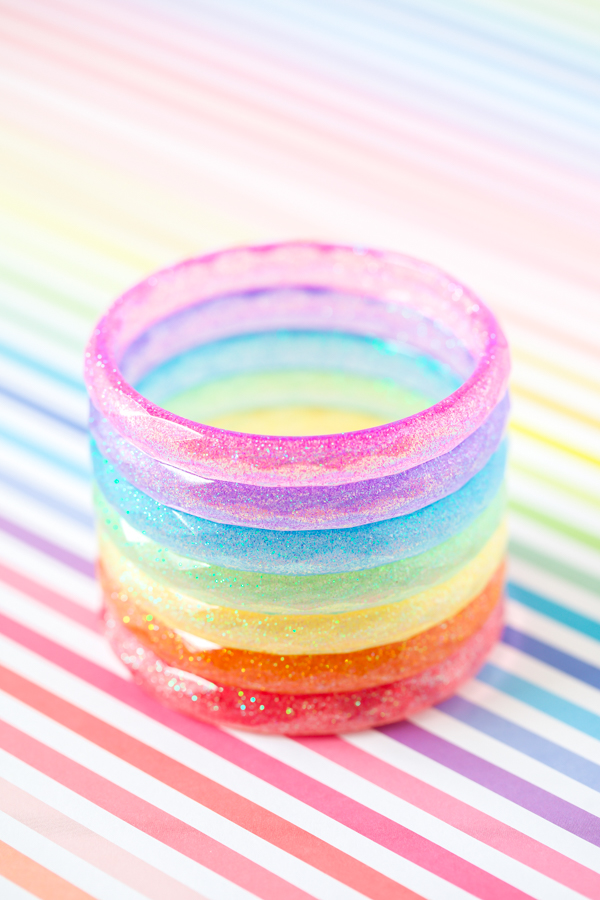
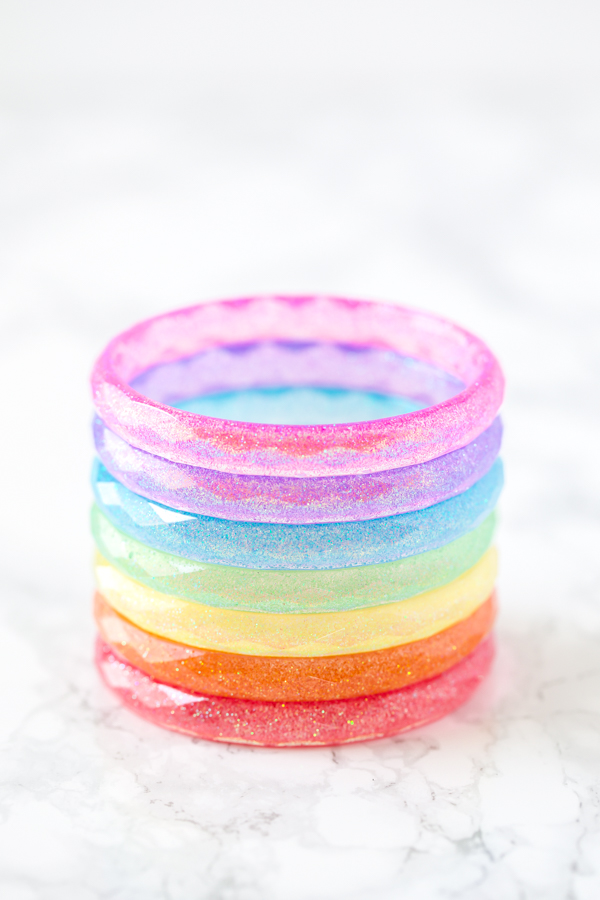
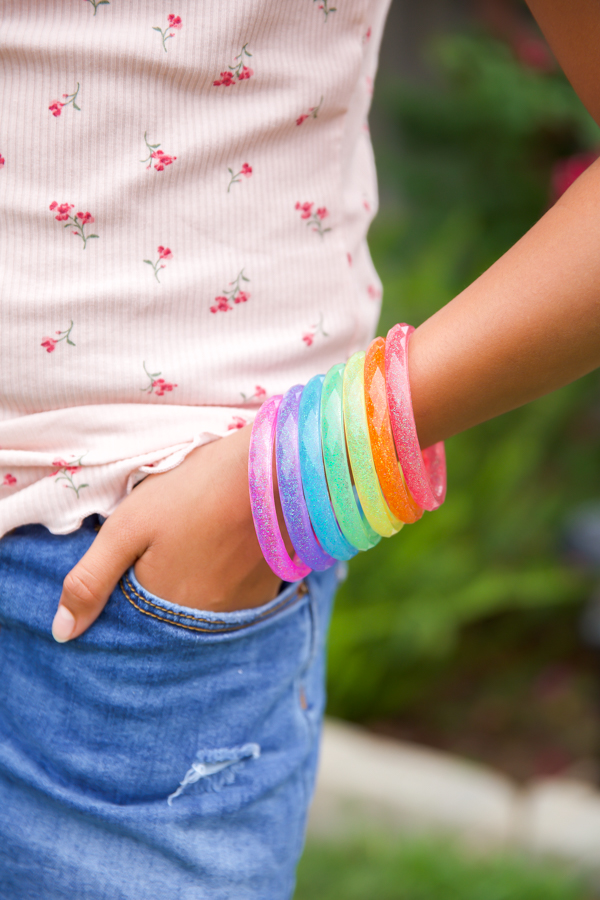
DIY rainbow resin bangle bracelets you can make at home. This easy step-by-step tutorial will show you how to make resin glitter bracelets. Kids will love this colorful craft project to play dress up!
How to make bangle bracelets with epoxy resin
Epoxy resin has recently gained in popularity. Resin has many uses including making bracelets, keychains, wall art, bookmarks and so much more. This tutorial will show you how to use resin to make bangle bracelets using fine glitter and a silicone mold.
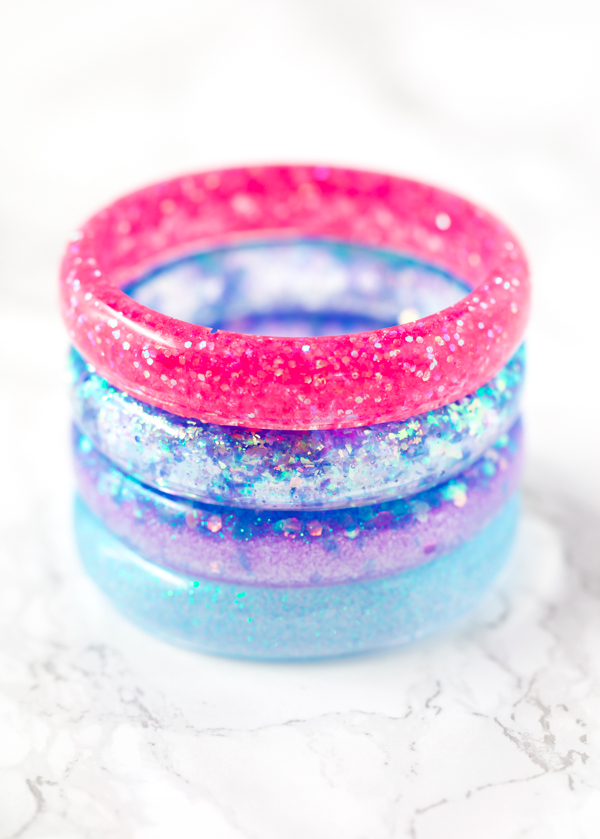
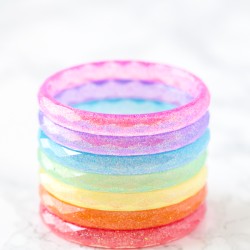
The best part about working with resin is the customization possibilities are endless! For this tutorial, my daughter requested a rainbow assortment of glitter bracelets. To make them I prepared the resin in a large cup then divided the resin equally into small cups with 10ml. Fine glitter was mixed into each cup before pouring into individual molds.
I’ve added Amazon affiliate links below to the products used to make this project
Materials needed to make a resin bracelet
- Resin
- Glitter
- Bracelet mold or this bracelet mold kit
- Silicone mat
- Gloves
- A small cup (a silicone cup works best)
- Respirator mask
- Plastic utensils or wooden stick
- Optional: dropper or syringe
How to use epoxy resin
The resin used to make the bracelets is a 1:1 ratio of resin and hardener. Meaning, you will mix exactly the same amount of resin and hardener for optimal curing results. The resin will cure in about 24 hours or longer depending on the resin used.
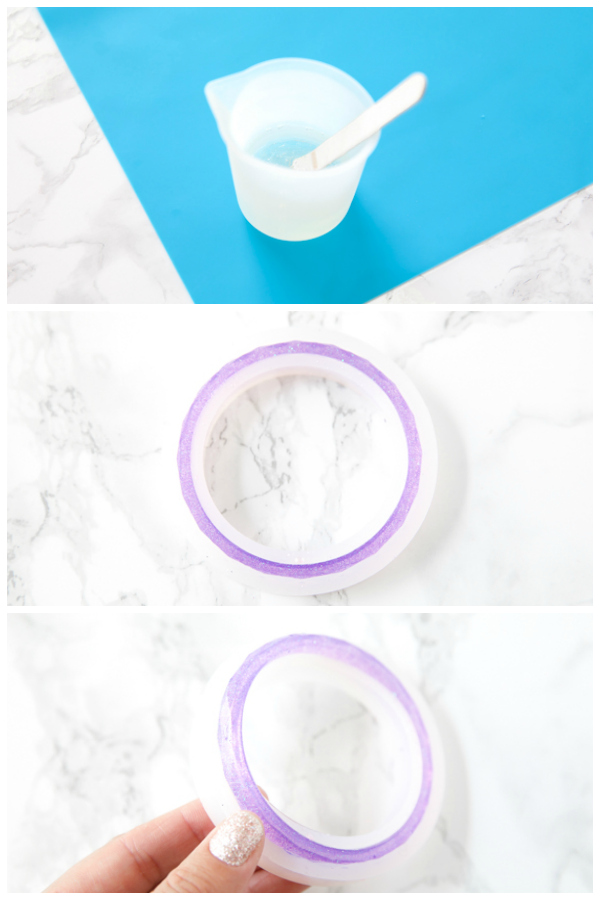
When working with resin you will need to calculate the amount of resin needed for the project, then mix the resin and hardener together in a large cup. Slowly stir the resin and hardener together to prevent air bubbles.
If you would like to use a variety of colors for your project, you will need to divide the resin into smaller cups to customize each color. Use a wooden stick or plastic utensil to slowly stir the glitter, sprinkles, or pigment together. Allow the resin to sit for a few minutes. Carefully pour the resin into the mold and cure for 24 hours or the cure time listed on the resin bottle. After it has cured you can remove the bracelet from the mold and it’s ready to wear.
Step-by-step video tutorial on how to make bangle bracelets
What can you add in resin to customize bracelets?
- Glitter
- Alcohol inks – this adds color to your resin
- Powder mica pigment – another option to make colorful resin bracelets
- Beads
- Sequins
- Dried flowers – making your own resin bracelets with flowers is easy to do. Add dried flowers into the bracelet mold and carefully pour the resin in. Use a toothpick or tweezers to place the flowers in the mold. This set of DRIED FLOWERS is great for making flower resin bracelets.

How much resin to use for a bracelet mold
The amount of resin needed will depend on the size of the mold. The beveled bangle design of the glitter bracelets required 10ml of resin mix (the resin + hardener combined). This amounts to about 1/3 of an ounce of liquid. The wide bangle mold is 15ml or ½ an ounce. The cuff filled with sprinkles will need 20ml or ¾ of an ounce of resin.
Tip: use a doppler or syringe to fill your mold with water. Determine how much water it took to fill the mold then use that as a guide to calculate how much resin is needed. Don’t forget to dry the mold before filling with resin.
More resin bracelets ideas
- Add Sprinkles to the resin to create a fun and colorful bracelet stack. For this project, I used 3 different bracelet mold styles: a cuff, a wide bangle, and beveled bangle mold. Tip: add sprinkles directly into the mold and the resin mixture then use a toothpick to help evenly distribute the sprinkles around the bracelet mold.
- Something to keep in mind is that heavier glitters and sprinkles may settle to the bottom of the mold. You may want to add extra glitter on top after pouring the resin and allowing it to sit for 10 minutes. This will help ensure the glitter will be on the top and bottom of the bracelet.
How to prevent air bubbles from forming in resin
- Stir the resin and hardener slowly.
- Use a torch or heat gun to pop bubbles on the surface of the mold.
- The most effective way to prevent an excess amount of bubbles from forming in your resin is to stir slowly. Very, very slowly. Be patient and gently mix the hardener and resin together in a slow circular pattern until it’s clear. Once the streaks of the hardener have been fully incorporated the resin will be ready to use.
- Another tip is to wait 3-5 minutes before pouring the resin after mixing. Allowing the resin to sit gives the air bubbles time to rise to the surface. If you still have some air bubbles after pouring the resin into the mold, you can use a torch or heat gun to pop any remaining bubbles on the surface.
Safety tools for resin
Resin can produce harmful vapors that can cause an allergic reaction in some people. To be safe always wear protective gloves, a respirator mask, and goggles.
Always work in a well-ventilated area when using resin.
Note: it’s important to protect your surface. The resin is very sticky and difficult to clean while wet. If the resin is accidentally spilled and cured, it may damage the surface when trying to remove it. Use a silicone mat to protect your work area and for easy cleanup. If resin dries on the silicone mat you can easily peel it off. I like working with this extra-large silicone mat to protect my table surface.
More DIY bracelet ideas
Resin Glitter Bracelets
Ingredients
- 5 ml resin
- 5 ml resin hardener
- 1 silicone mold
- glitter
Instructions
- Pour equal parts resin and hardener in silicone or disposable cup. Gently stir together until the resin is clear and streaks are not visible. This may take about 3-5 minutes of slow stirring to avoid air bubbles.
- Divide the resin into individual cups if using pigment or glitter. Carefully stir in the glitter.
- Pour resin into the mold and remove any excess using a scraping tool or wooden stick. Allow the resin to cure for 24 hours.
- Remove from the mold and sand down any rough edges with a nail file or fine-grit sandpaper.