DIY Ornament Tree Display – create your own holiday ornament display with The Home Depot #DIHWorkshop. Happy Monday, friends! Today I’m kicking off a week full of fun holiday DIY projects. As I mentioned last week I’ve teamed up with The Home Depot to create a holiday ornament display inspired by their DIH Workshop. Using a few pieces of wood, ornaments and hot glue you can create your own holiday ornament display.
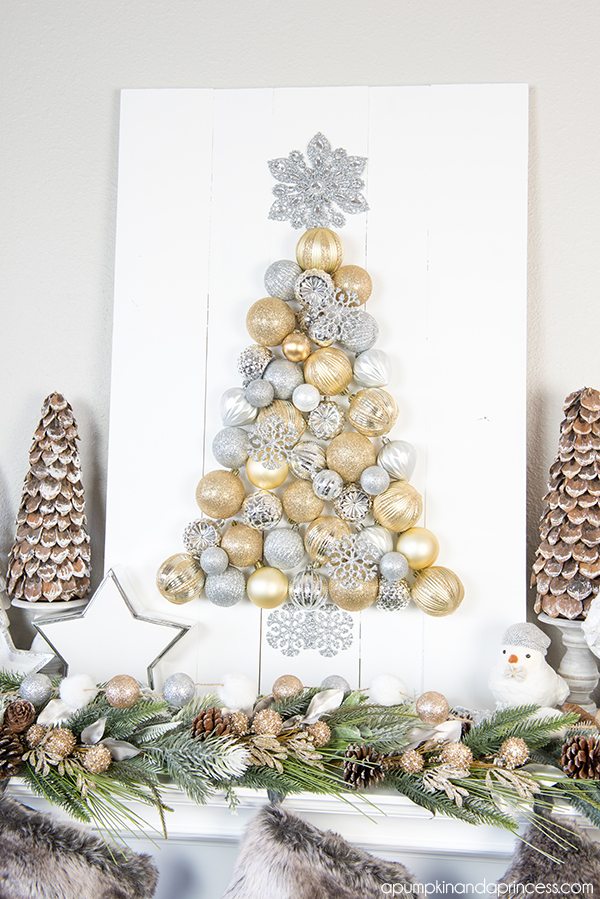
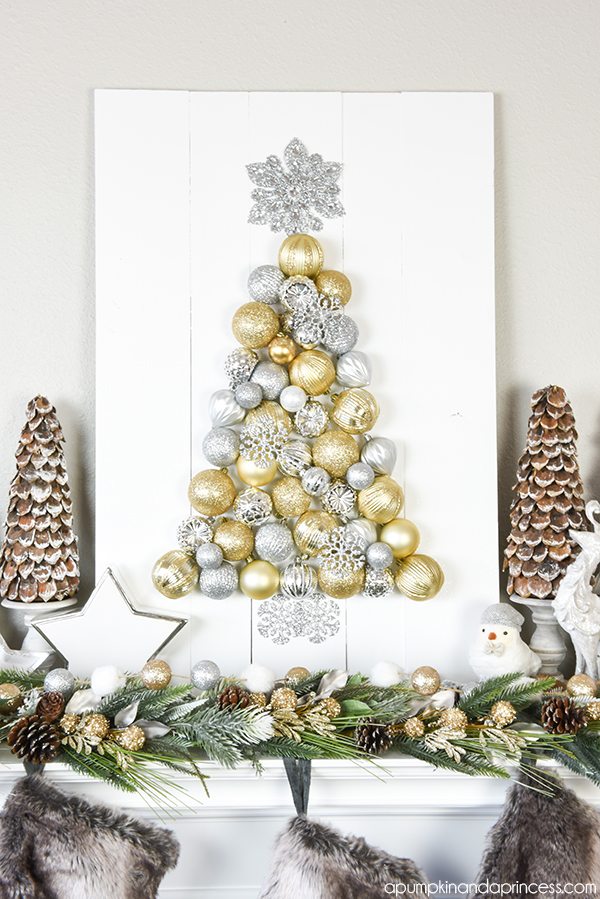
The original project is quite big for my small fireplace so I made a few adjustments. The original size is 48 inches tall, I downsized mine to 36 inches.
Here’s what I used:
How to make an Ornament Christmas Tree
Supplies:
1 – 1”x6”x10’ Common Board
2 – 1”x4”x6’ Common Board
#8 x 1 ¼” Philips screws
Sanding block
Ornaments
Hot Glue
Paint
Step one: Cut your 10’ board into (3) 36inches pieces, you will have a little leftover.
Step two: Cut one of your 6’ boards in half to make 36 inches. Cut the other board to make two 20 inch pieces; you will have a piece leftover.
I was able to have someone at The Home Depot cut the wood for me so it made it easy to take everything home and start assembling the project.
Sand your boards to remove any rough edges.
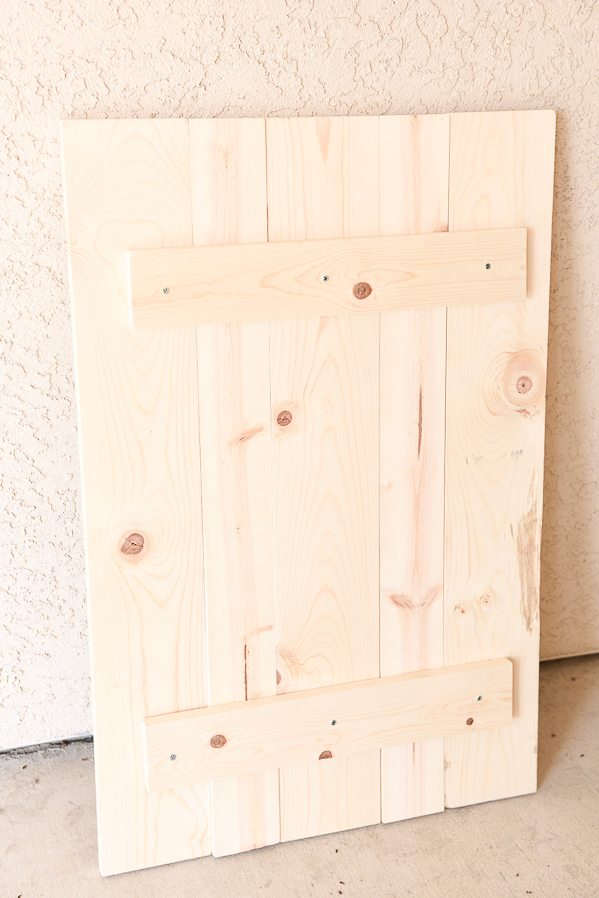 Step three: secure your 20 inch boards across your (5) 36-inch boards, alternating between 6” and 4” inch boards with a couple of screws.
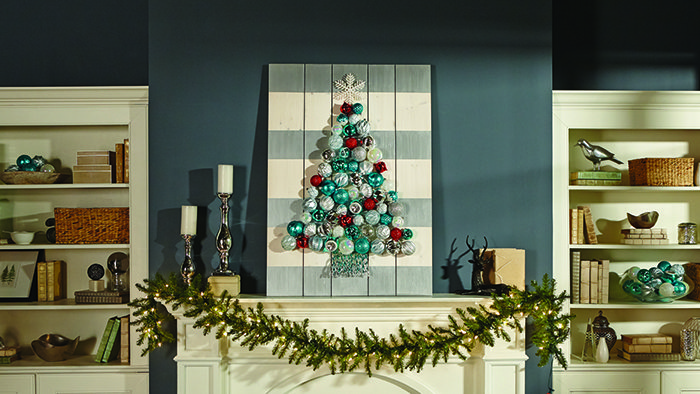
 Step four: paint your boards. The DIH Workshop shows you how to paint stripes across your boards; I went with a simple white background. Allow paint to dry for a few hours or overnight before adding ornaments.
Step five: use a hot glue gun to attach ornaments in the shape of a tree. I used a mix of gold and silver ornaments to match my Christmas tree. The big pack of shatterproof ornaments also came with small snowflakes, hidden in the center of the pack. They look beautiful scattered around the ornament tree. I also used two snowflakes to create a base for my tree. Then topped it off with a snowflake ornament.
I’m so happy with the way it turned out! The gold and silver go really well with my Winter Wonderland Christmas Tree.
 Check out the blog hop to see how everyone customized their ornament display board!
I love it!! Beautiful!!
What a great DIY project for the holidays!! So creative and simple enough to make.