Happy Friday, my friends! Did you have an awesome Fourth of July? We had a great time celebrating with family. Today I have a home decor tutorial to share with you and I couldn’t be more excited about how easy it is to make. This Nate Berkus inspired rope hurricane vase is perfect for a nautical themed mantle and only costs $3 to make!
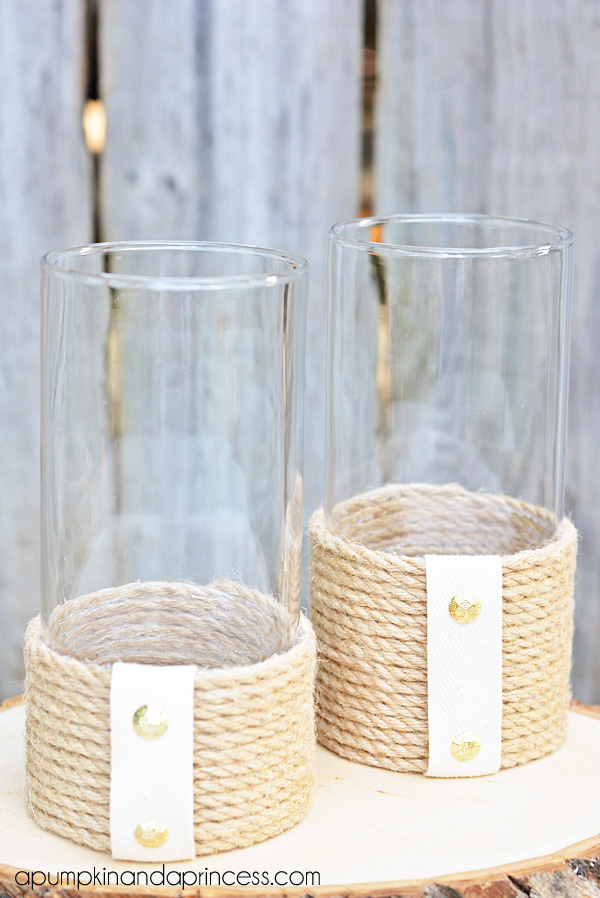
We all know about my love for Target right? In the last few years their home decor has become quite impressive, especially the Threshold line..swoon! When they started carrying the Nate Berkus line I was a little hesitant since it’s typically not my style, but I do like his newer items. Especially the rope hurricane vases! I’ve been keeping my eye out for months waiting to see if they would go on clearance because at $19.99 and $24.99 a piece I really don’t have a need for them..I just want them. Instead of waiting for a possible price reduction I decided to make my own.
You guys these are SO easy to make, I can’t believe I didn’t make them sooner! No offense Target or Nate, but you can totally DIY this candle vase. I’ve had the supplies for about a month and finally got around to making them last weekend.
DIY Rope Vase
Supplies:
- Vase
- Rope
- Hot glue
- Twill
- Gold Nails
The twill was maybe 50 cents at Jo-Anns and I have enough for 3-4 vases, the rope comes in a spool from the ribbon aisle at Hobby Lobby, and the nails were $1.19 at Jo-Ann’s for 24. When you break it down it comes out to under $3 to make one vase. It’s definitely a budget-friendly home decor project!
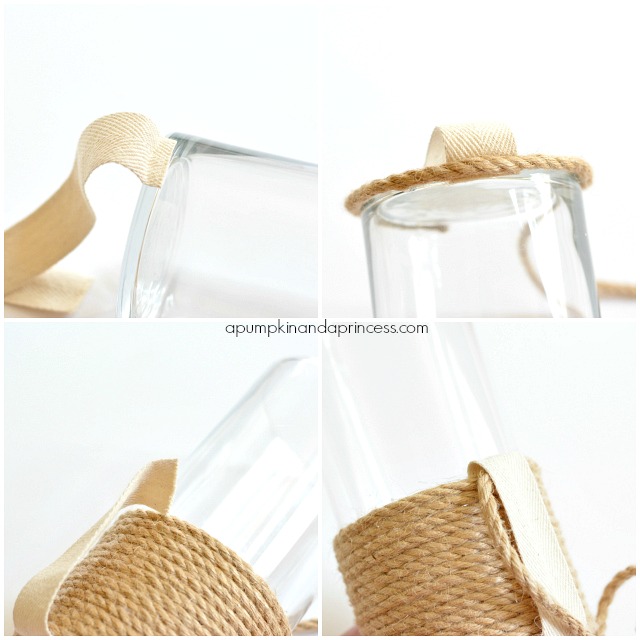
To make the vase start by gluing the twill to the bottom of the vase. Make sure that the front of the twill is flipped on the bottom like in the picture. The rope will later hide the twill and make it appear as if the twill is wrapped around the rope. Does that make sense?
Wrap the rope around the vase using a thin line of glue along the way (you don’t want the glue to seep through the rope).
Before you finish the last rope section flip over the twill and glue it to the vase, making sure there’s room for the rope. Then glue the last piece of rope down to hide the glued twill.
Trim the nails with wire cutters (be VERY careful with this step as the piece can sometimes fly in the air after it’s been snipped). Glue the nail head to the twill and you’re done!
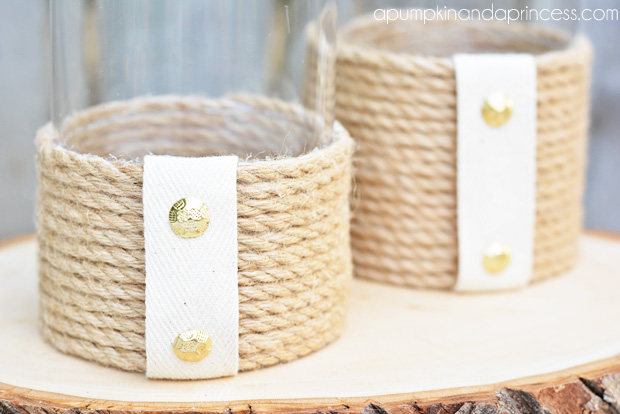
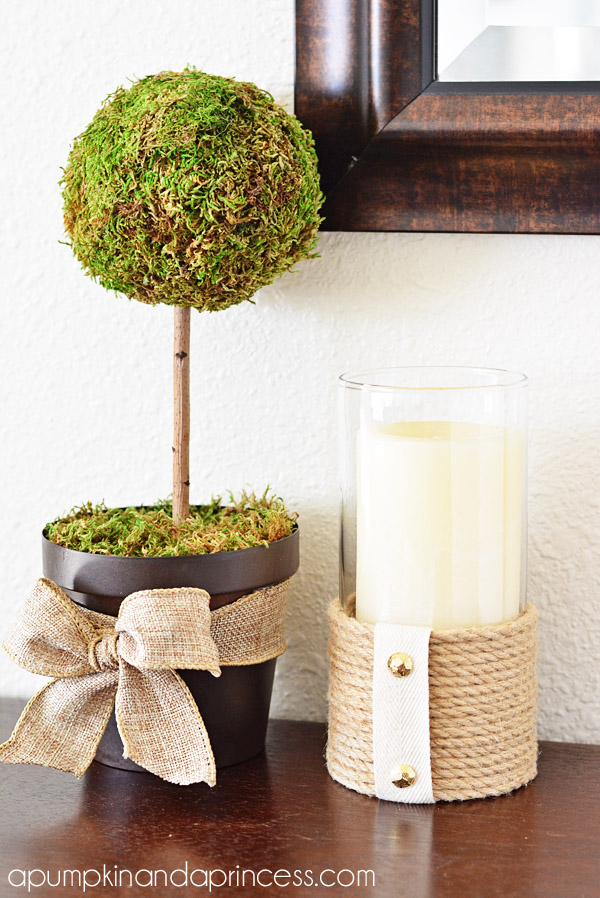
I’m so happy with the way they turned out!
Thanks for stopping by!
You did such a great job making these look so authentic. Love them. I’ll have to be looking for the vases next time I go to $tree. I might already have the rope but if not I’ll be getting that also.
These lanterns are wonderful, very sophisticated and versatile. Great tutorial showing us how. Really glad you shared this project.
Don’t get to go to Target very often, we live out from town where Target is. I love their decorative stuff but can’t afford it. I love to look tho and get ideas, try to figure out how to make things I see, kinda like how you did. My phone doesn’t take pics so I carry a little quickie camera with me if I think I might be going to Target. I love that making these lanterns is inexpensive and fairly easy/quick to make.
Great job. Happy summer
This is a great tutorial and I love the way they turned out! I’d love for you to link them up with me!
https://www.livingbettertogether.com/2013/07/tgif-link-party-no-3.html
Have a great weekend!
Rebecca
One of these would be perfect for the blank spot on top of my piano! I can’t believe how cute and easy they look. Thanks for sharing!
These turned out great! I can’t tell you how many times I looked at those in Target and thought I could make them, but haven’t yet! You’ve inspired me to finally try :).
Following you from ohsewcraftylife.blogspot.com
What a great job! I wouldn’t have been able to tell the difference!
What a great idea! These are so pretty and definitely at the top of my crafting to-do list! Thanks for sharing!
I love making knock offs! You did a great job!
I love this! Does not look homemade. I’d love it if you could link this up to our party, Give Me The Goods Monday! {1 party, 4 blogs}
Have a great week!
Jamie
Oh, I am so trying this one out! So pretty! I love the nautical look the rope brings!
Selene @ Restoration Beauty
What a great knock-off. I’m loving all the rope details I’ve been seeing.
Oh you are so smart! I always love how simple and beautiful your projects are!
They came out super cute! I’ve been meaning to buy some jute or rope for ages to do this! I will this week! Julia
These are really awesome! So simple and yet they have a lot of personality! Thanks for linking up to the Inspiration Gallery this week!
Mandy @ The Hankful House Blog
I featured you today here: https://www.settingforfour.com/2013/07/10-make-create-and-decorate-summer.html Thanks for sharing your creativity at Project Inspired!