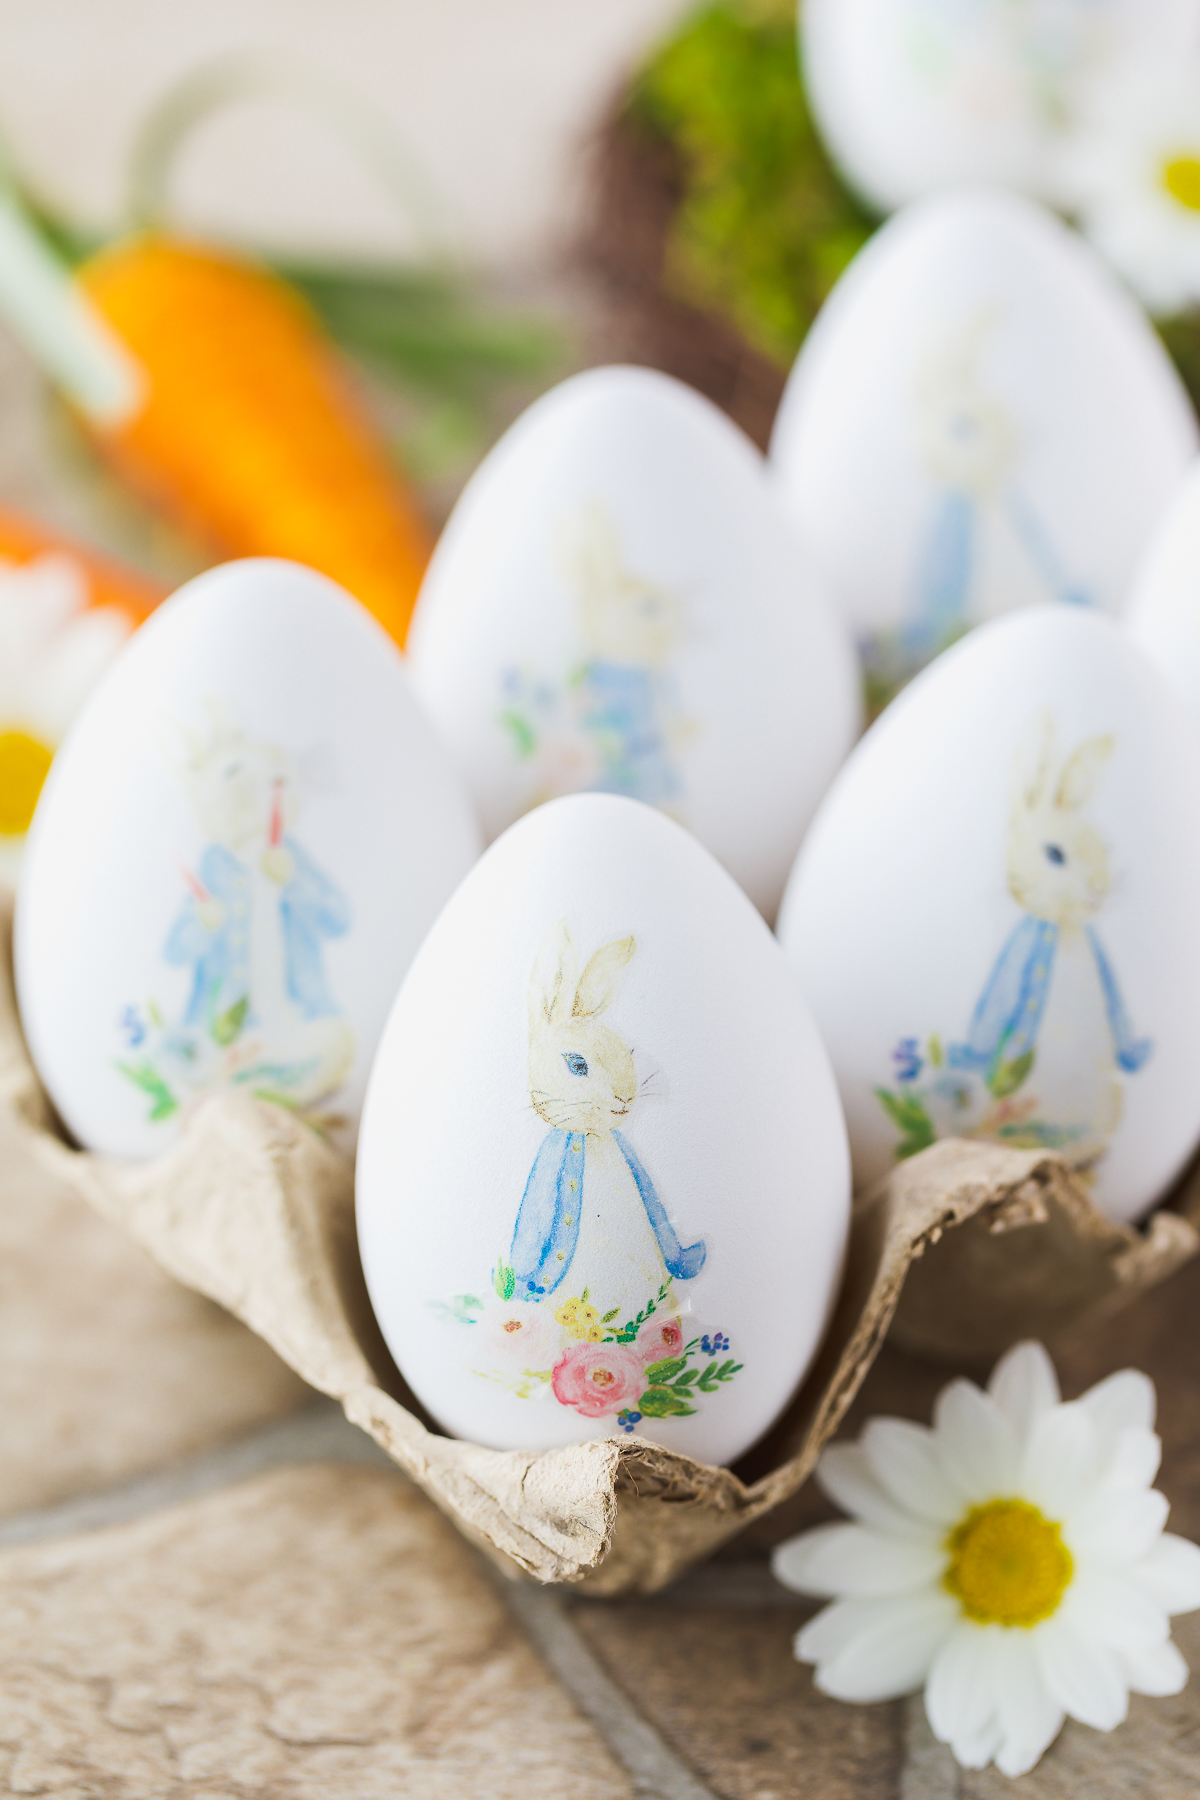
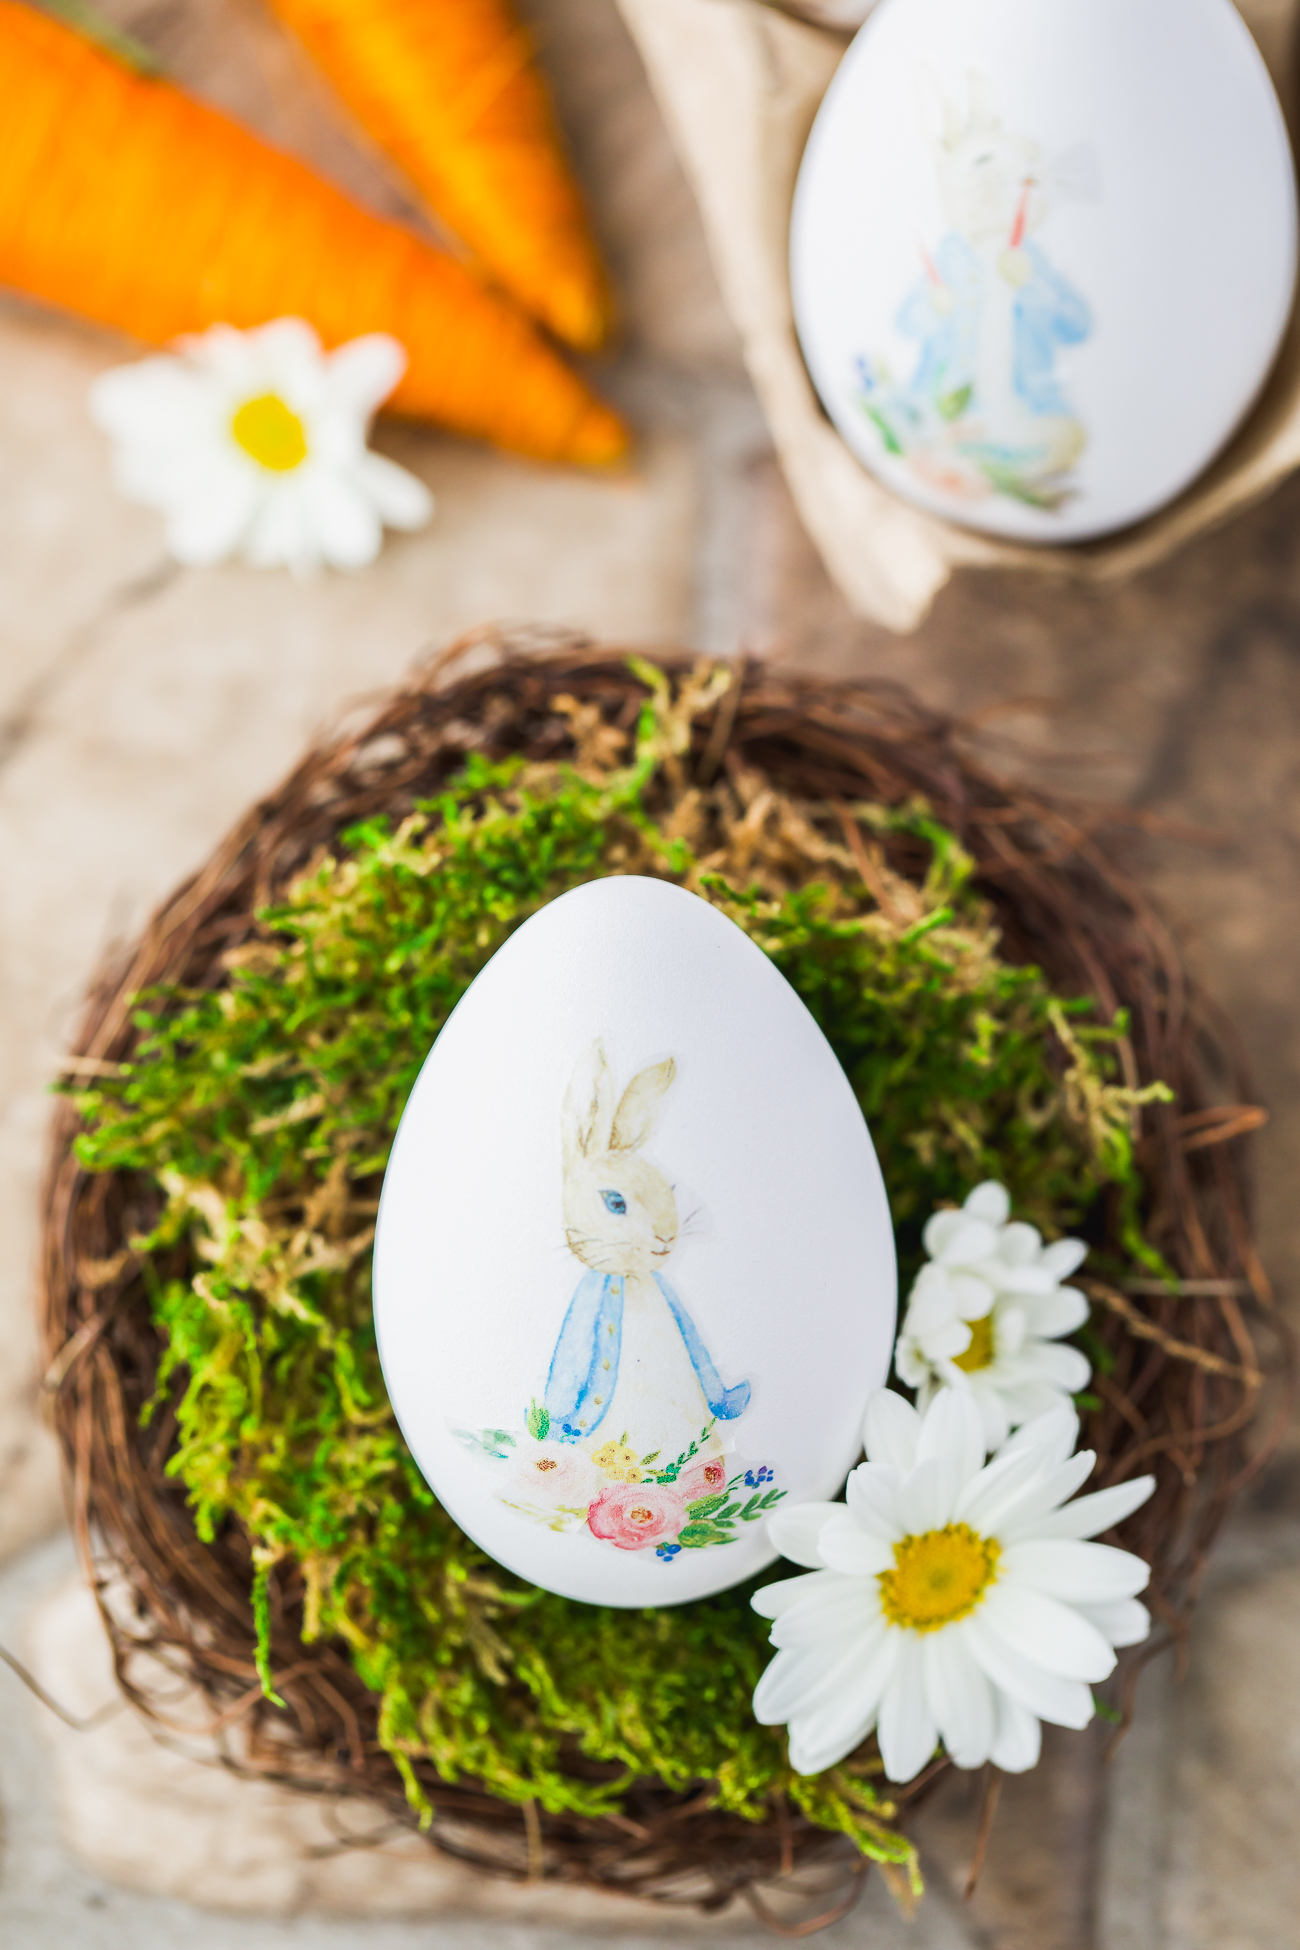
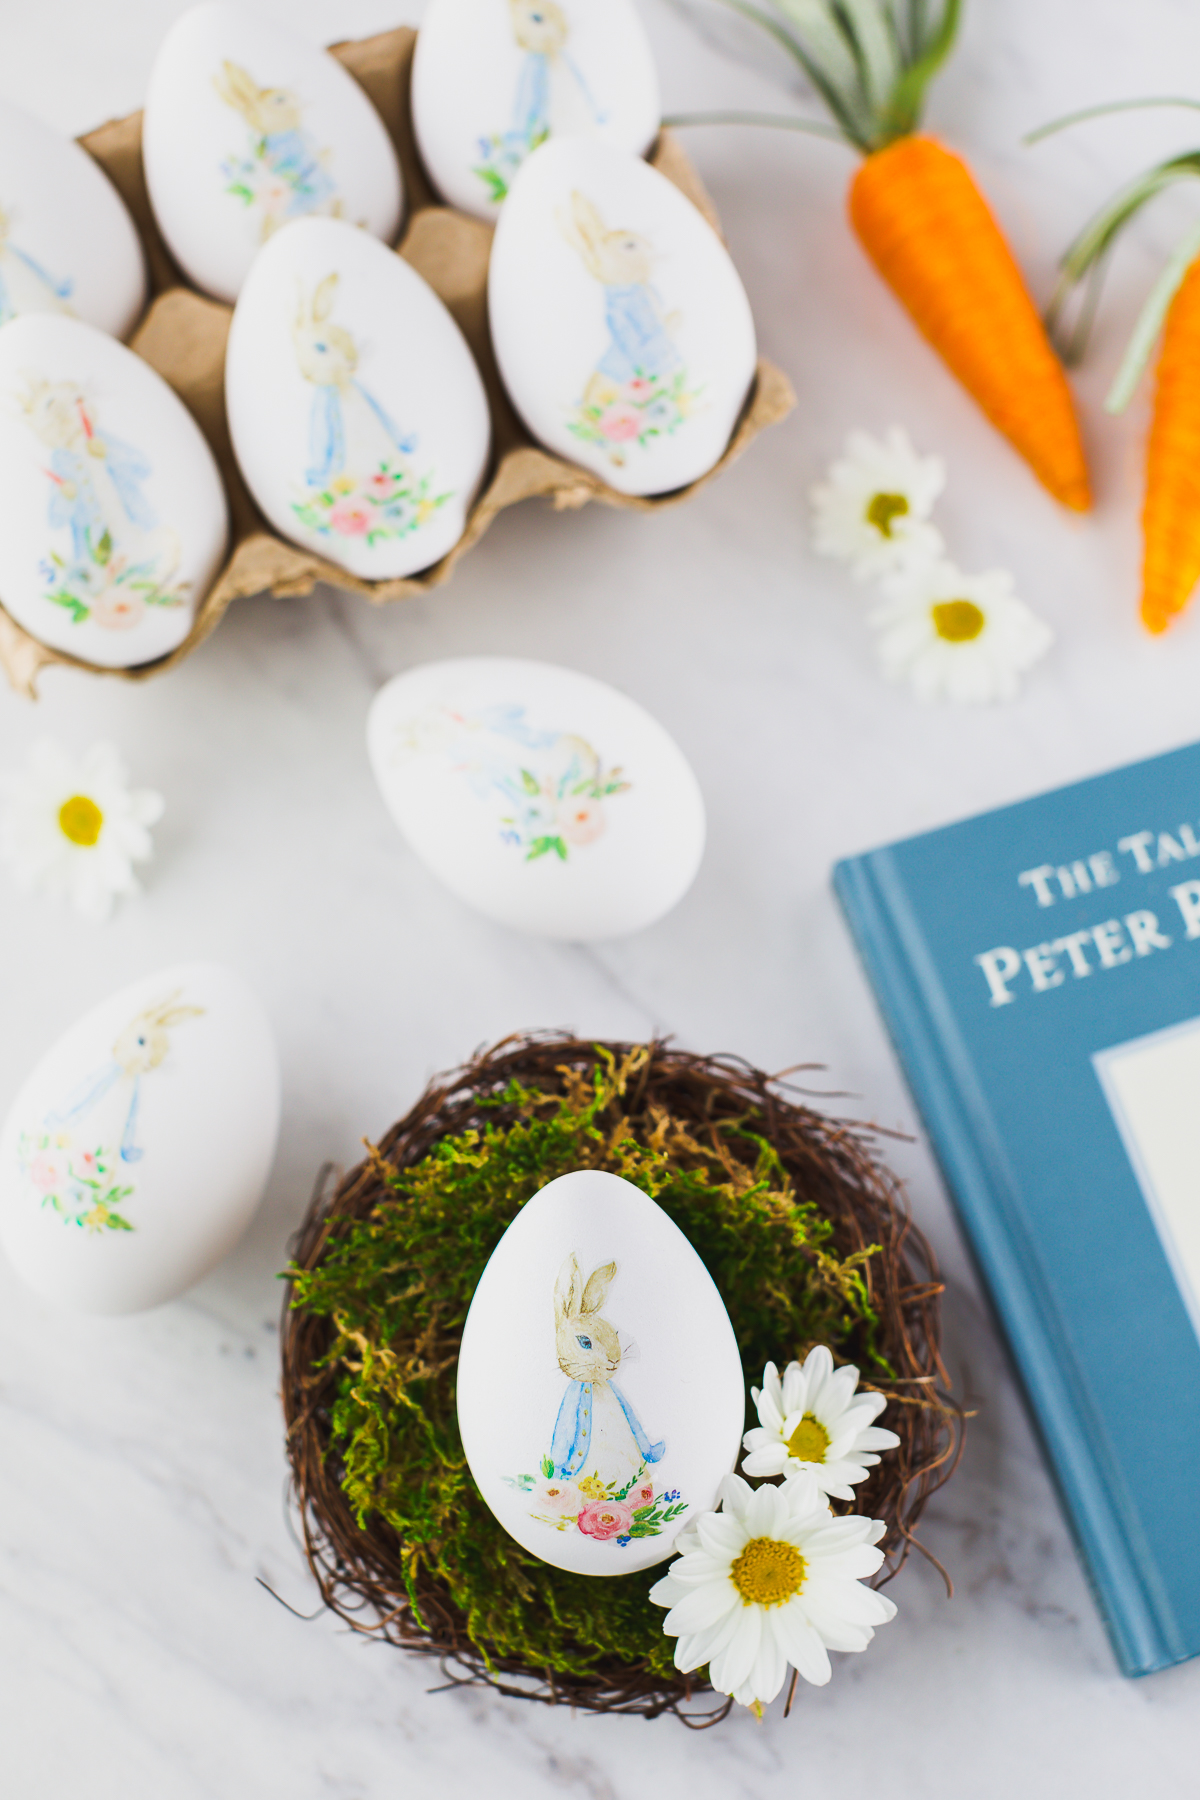
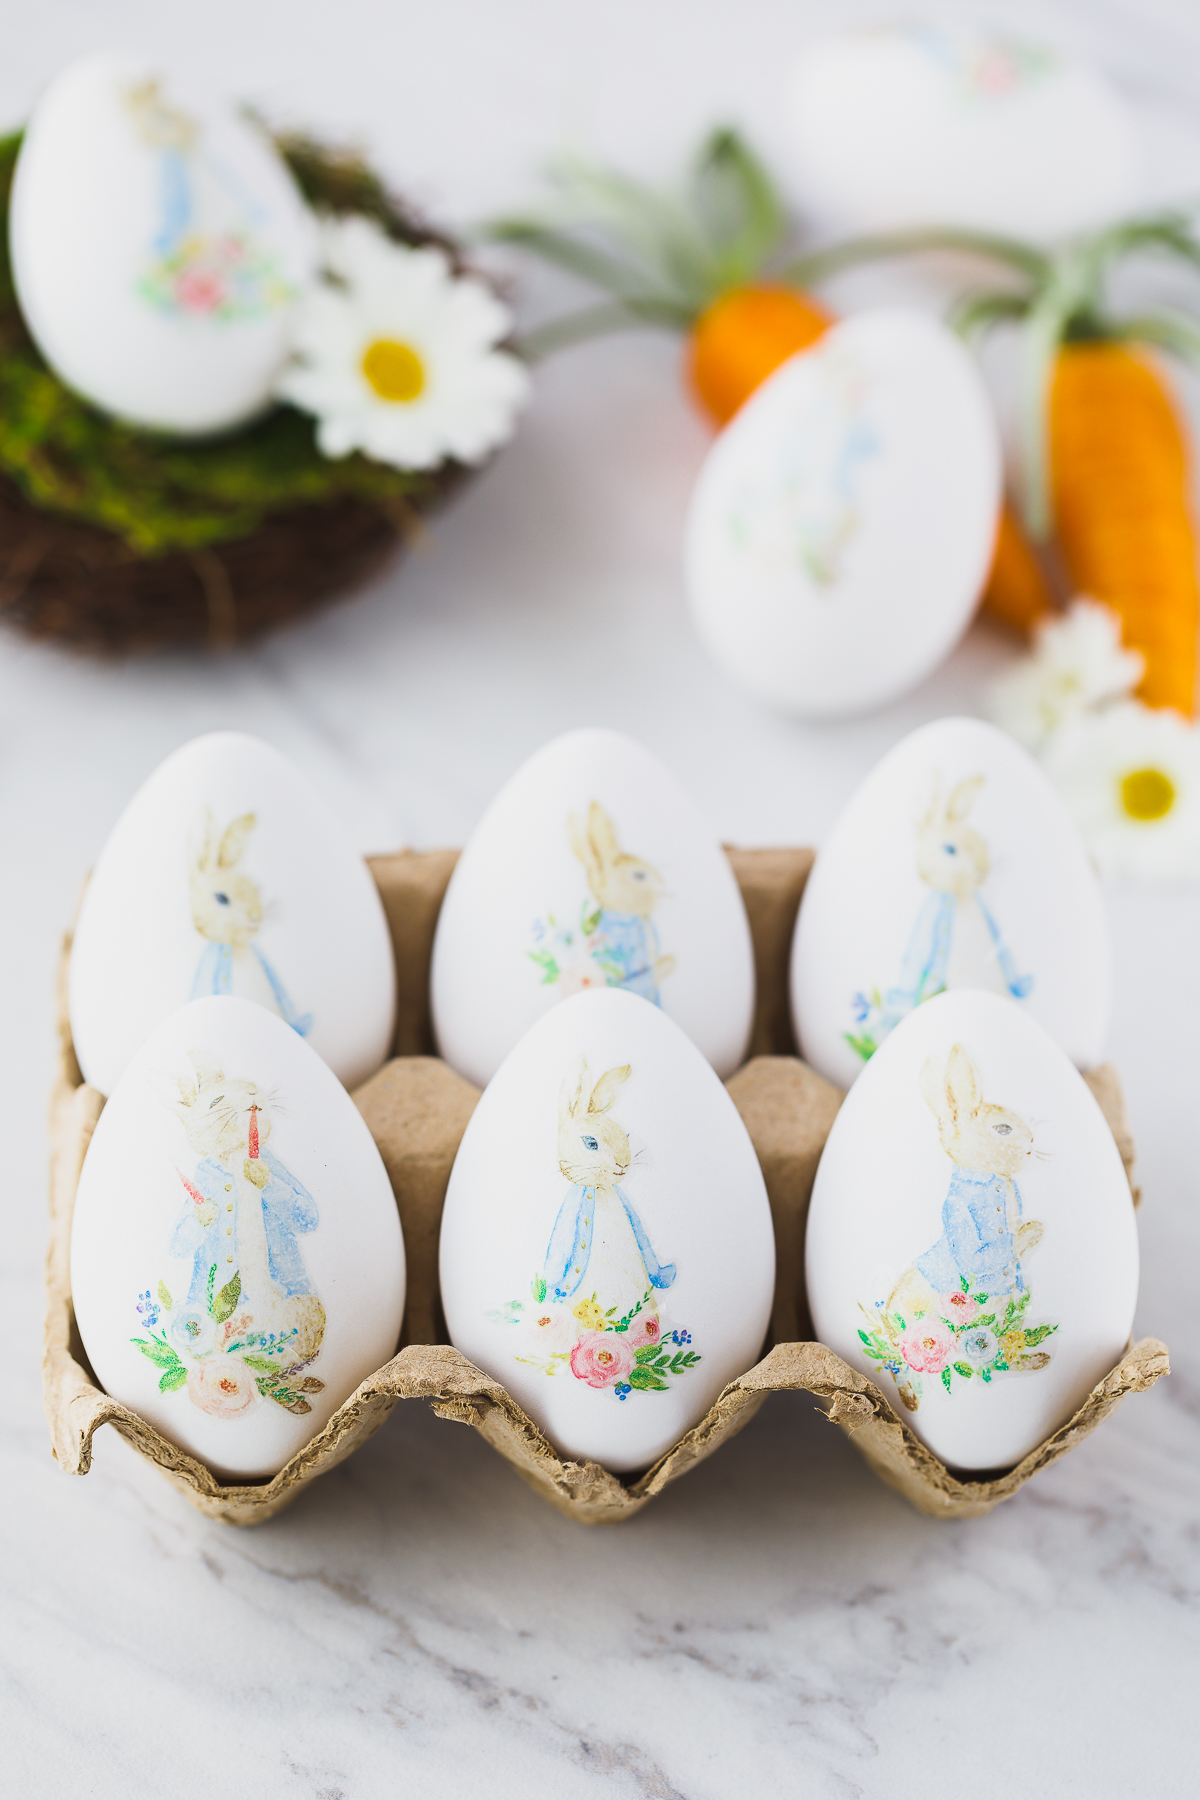
Peter Rabbit Easter Egg craft made with waterslide decal paper. Create beautiful Beatrix Potter Peter Rabbit inspired Easter eggs for your home décor with this simple tutorial.
My kids have always loved the story of Peter Rabbit. We look forward to reading it every spring. The illustrations in Peter Rabbit are simply adorable. There’s something so charming about the simple, yet classic watercolor illustrations. This inspired me to make Peter Rabbit Easter Eggs that I can reuse in our spring décor for years.
Find more of our favorite DIY Easter egg crafts here:
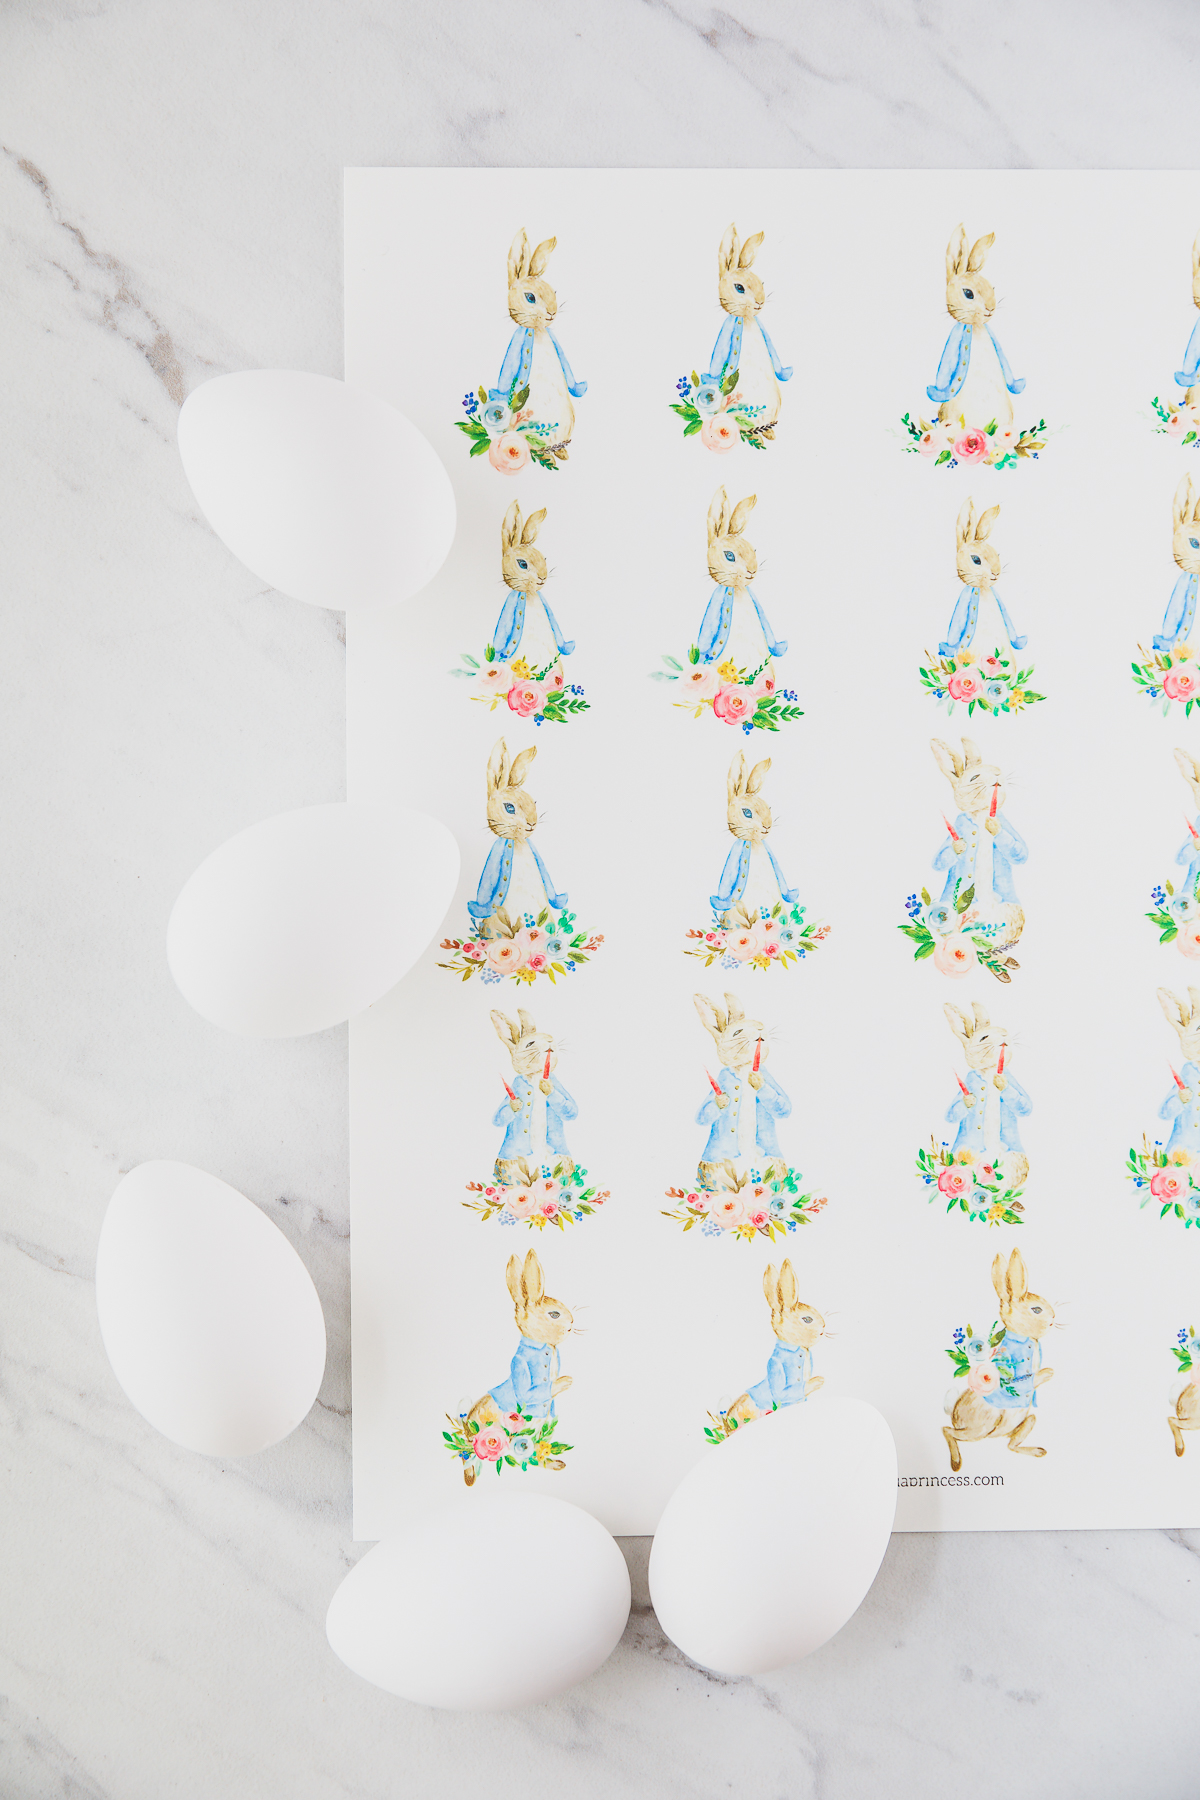
To make this Easter egg craft I used white craft eggs and printable waterslide decal paper.
What is waterslide decal paper?
Waterslide decal paper is similar to tattoo paper, except it can be applied to surfaces like ceramic, wood, and plastic.
The decal paper works by printing an image on the glossy side, then spraying a protective varnish. Once the topcoat is dry you will trim the image out and soak it in water. Then simply adhere to the Easter eggs and smooth out the edges to remove air bubbles.
Materials to make Peter Rabbit Eggs:
- Craft eggs
- Inkjet waterslide decal paper (clear) or Inkjet waterslide decal paper (white background)
- Topcoat spray
- Bowl of water
- Peter Rabbit Printable
How to make Peter Rabbit Easter Eggs
- Print the Peter Rabbit printable on Waterslide Decal Paper. Check the printer to ensure the paper is inserted in the correct direction. The image will print on the glossy side.
- Spray three thin even coats of acrylic varnish over the printer image (in a well-ventilated area) Lay the paper flat to dry.
- Cut the Peter Rabbit decals out, trimming as close to the image as possible.
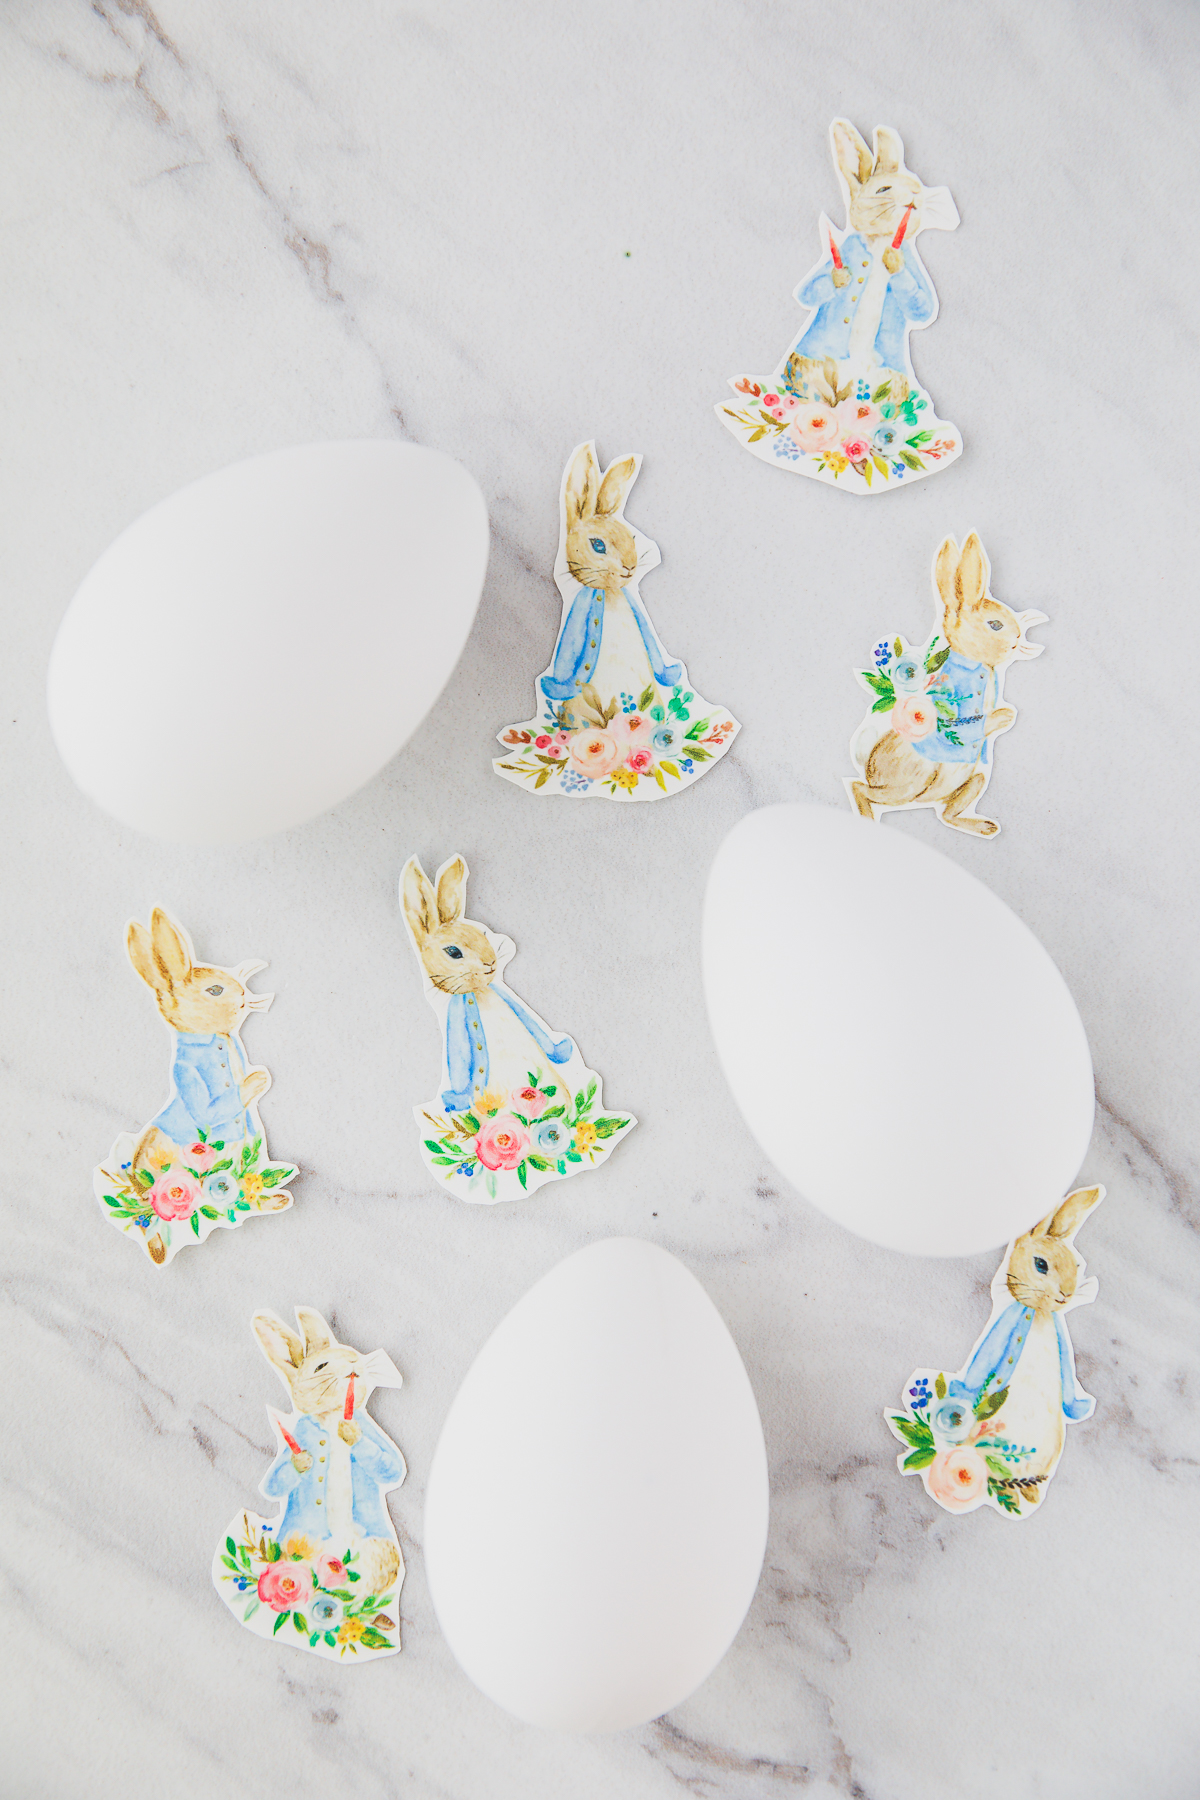
- Soak the decal in water for about 15-20 seconds. If the top and bottom layer begin to separate, quickly remove from water.
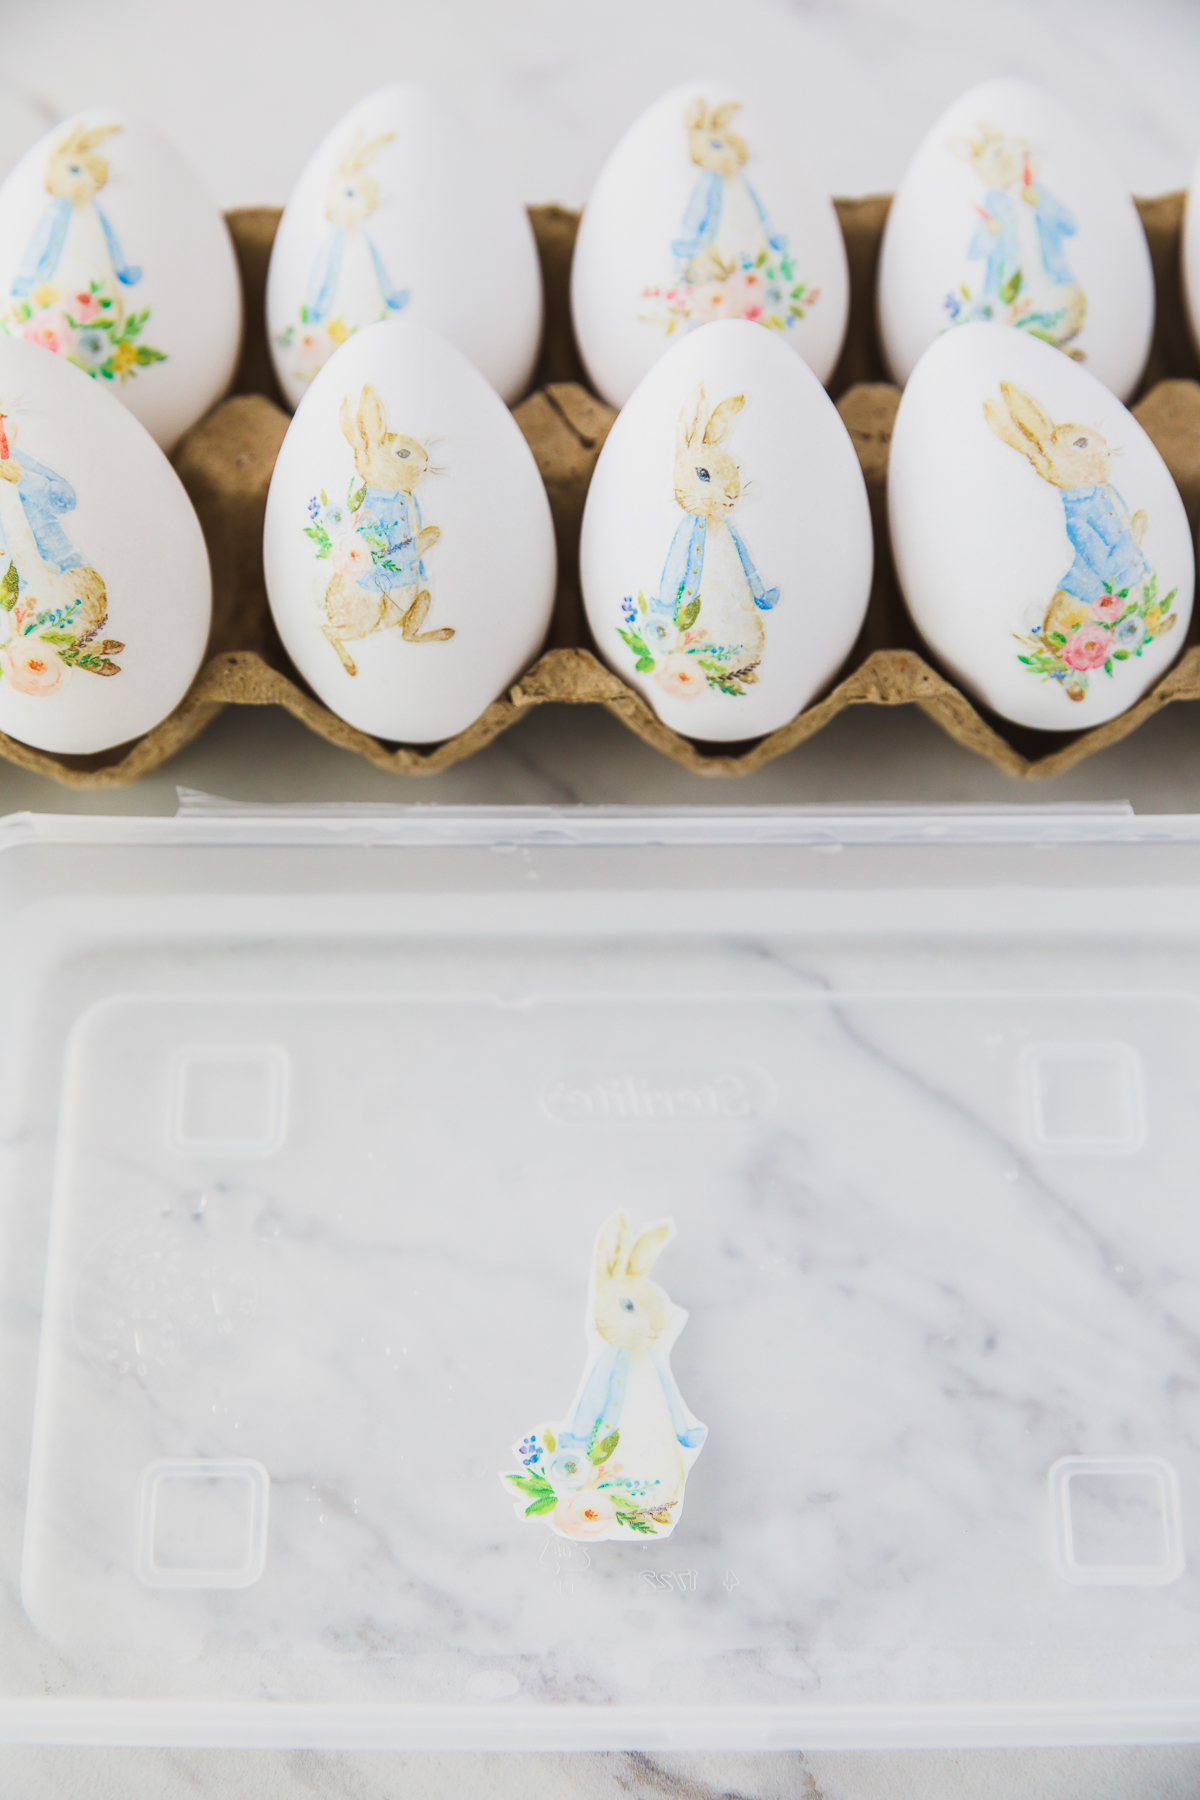
- Adhere to the center of the craft egg by gently removing one section of the decal paper off. Once it’s positioned correctly, remove the backing. Carefully smooth out air bubbles. Allow the eggs to dry for a couple of hours.
- Seal with a clear varnish.
Waterslide decal paper
- There are a couple of different options depending on the type of printer you have and the background color you prefer. First, check to see if your printer is an inkjet or laser printer.
Find the inkjet waterslide paper here and the laser printer waterslide decal paper here. - The waterslide paper is available in clear and white. I used the clear option for plain white eggs. If you prefer to use colored eggs, then you will want to use white background paper. The clear paper works best on light surfaces and the white background paper works best on darker surfaces. If using white decal paper, you will want to trim as much of the border around the Peter Rabbit image as possible. The image will have a white border. The clear paper is a little more forgiving if adhering to a white surface.
Tips for using waterslide paper on Easter eggs
- Don’t skip spraying the topcoat on the printable. The spray varnish will help seal the ink to protect it from the water.
- If you notice the image cracking on the surface, reduce the amount of time the decal is in the water. You want it to be easy to slide the backing off but not start to crackle from the water.
- If your image is slightly off-centered don’t panic. Gently move it around with a drop of water and your fingertips. While the decal is wet it will glide around the egg surface.
- After the decal is centered, don’t mess with it too much. The water may start to break down the ink over time.
- Work quickly, one egg at a time. Only set one decal in the water at a time. Overall, it takes about 30 seconds to make each egg.
Note: the printable was made with this beautiful Peter Rabbit watercolor clipart