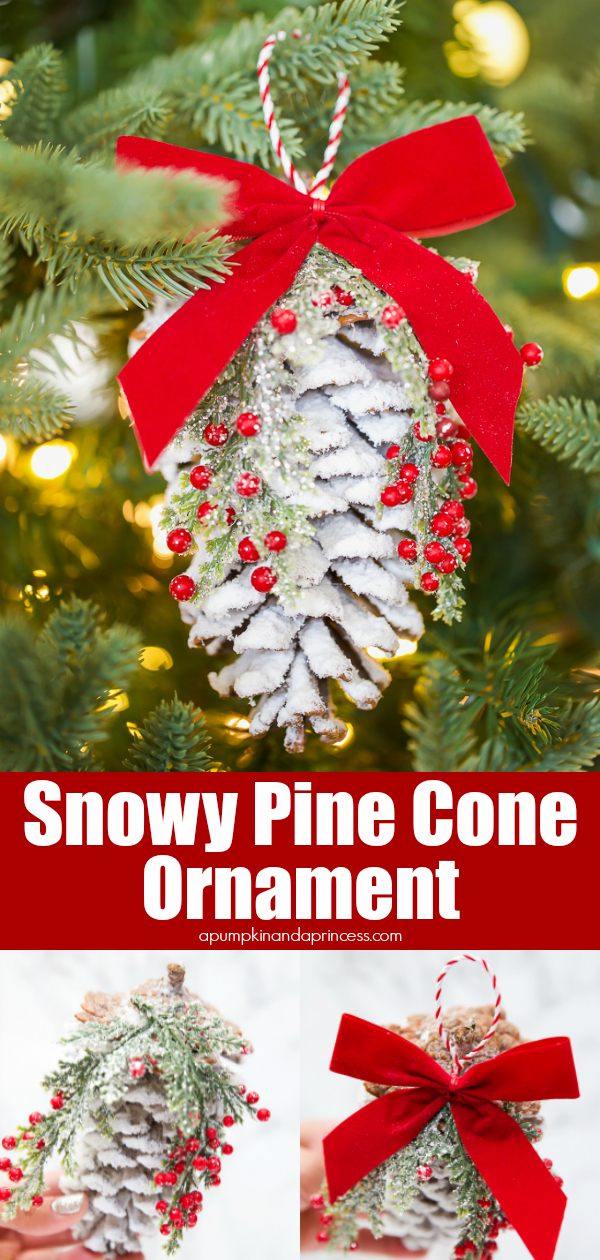
How to make pine cone Christmas ornaments in a few easy steps. Create a flocked snow-covered pine cone ornament with beautiful greenery and red berries, finished with a red velvet bow to add to your Christmas décor.
I love the look of snowy pine cones. There’s something so beautiful about freshly fallen snow on trees and pine cones. Of course, I say this coming from a place that never snows and oh how I long to look out my front window to enjoy a white Christmas for once. Since there isn’t a chance of that happening in our area in California, the next best thing is creating faux snow-covered pine cone craft to use in my holiday décor.

Snowy Pine Cones DIY
Over the years I’ve shared several snowy Christmas crafts, including my favorite SNOWY MASON JAR, and HOW TO FLOCK A CHRISTMAS TREE. If I can’t have the real thing, then I’m going to enjoy creating the winter wonderland feel in our Christmas decorations. Today I’m sharing how to turn plain pine cones into snowy pine cone ornaments.
Flocking pinecones is quick and easy, check out the DIY SNOW COVERED PINE CONES post for a full tutorial.
Pine Cone Ornament Materials
- Flocked Pinecones
- Christmas greenery with berries
- Red bow or ribbon
- Twine
- Hot glue gun

More DIY Christmas Ornaments:
- DIY Glitter Ornaments {best glue to use}
- Harry Potter Ornaments
- Star Wars Ornaments
- Bath Salts Ornaments
How to make Pine Cone Christmas Ornaments
- For this project, you will flock a pine cone with flocking powder and water. Once it’s dry, we’ll start decorating with beautiful Christmas greenery and berries.
- Once your pine cone is covered in snow flocking, you will need to gather some Christmas greenery. I like to use a glittery green pick with red berries for my Christmas décor. Check local craft stores for something similar. Trim a few pieces to fit your pine cone, then glue on top.
- Tip: add a small dot of hot glue to a few pieces of the greenery to lay flat along the pine cone. This is optional and depends on your preference for how the greenery drapes along the pine cone.

How to hang pine cone ornaments
- Make a small loop with twine or thin Christmas ribbon to hang the pine cone. Glue the ends to the top of the pine cone and then cover with a bow.
- For the bow, create your own using ribbon or pick up a pack of small red velvet bows. You can find these in the Christmas aisle of most craft and big stores like Target and Walmart.


Pine Cone Ornament DIY
Ingredients
- Flocked pine cones
- Red velvet bows
- Christmas greenery with berries
- Red twine
Instructions
- Begin by flocking pine cones to create a snowy finish.
- Trim real or faux greenery to cascade down the sides of the pine cone. Hot glue the greenery on top of the pine cone.
- Add a small loop of twine or string with hot glue. Finish with a bow on top.

Looking for more holiday inspiration? I’m participating in a blog hop with a group of creative bloggers to share 7 DIY Christmas ornaments. Be sure to check out these crafty ideas below!

Thrifty and Chic | Remodelando La Casa |
Delightfully Noted | Lolly Jane | Stacy Risenmay | Honeybear Lane
Wow these are awesome!