DIY Disney Frozen Easter Eggs – create Elsa inspired eggs with double-sided adhesive, glitter, and rhinestones.

DIY Disney Frozen Easter Eggs
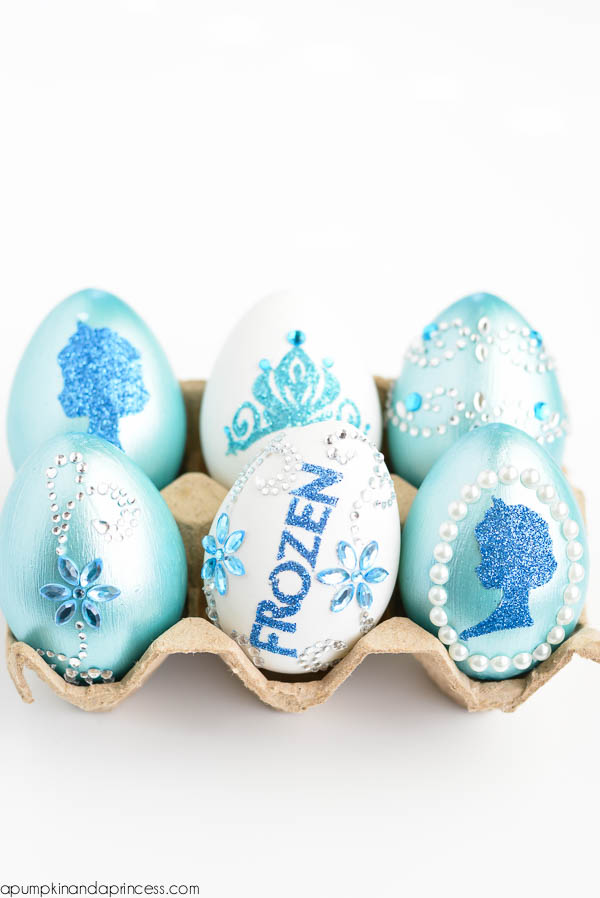
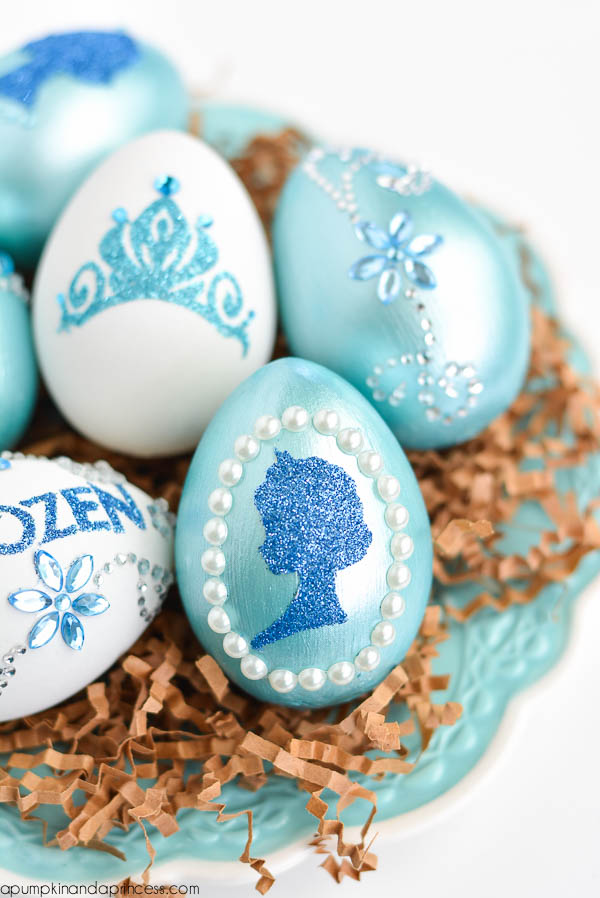
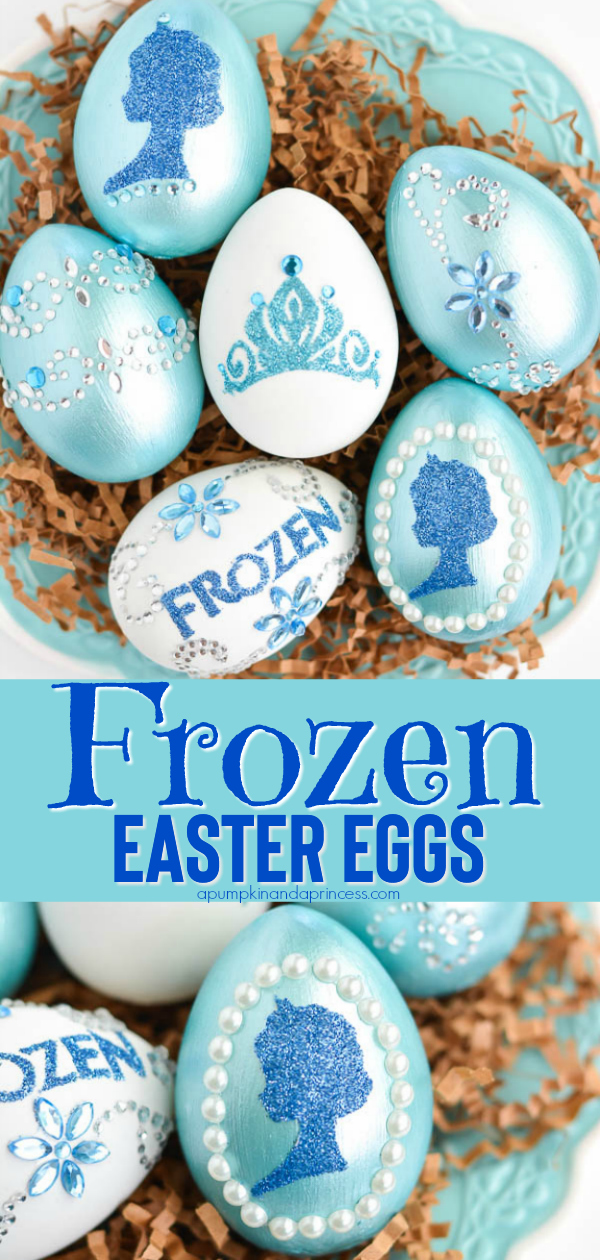
Hi crafty friends! Easter is only a few weeks away so we’ve been busy making an assortment of Easter egg crafts. Last week we shared our Dyed Minion Easter Eggs and we have several character egg decorating ideas in store. Today I’m sharing Disney frozen Easter Eggs I made for my daughter’s Easter basket. Every year I like to make special eggs based on their favorite characters.
If you’ve been a reader for a while you may have noticed that we have a slight Frozen obsession in our home and I couldn’t resist making these for Madilynn. Our inspiration for this project came from our glitter Elsa pumpkin. So while you may be singing, “Let it Go” for other reasons we’re still in love with the Frozen phenomenon and can’t wait for the sequel! The best part about this craft is that they’re made with faux eggs so they’ll last for years.
How to make Elsa inspired Easter Eggs
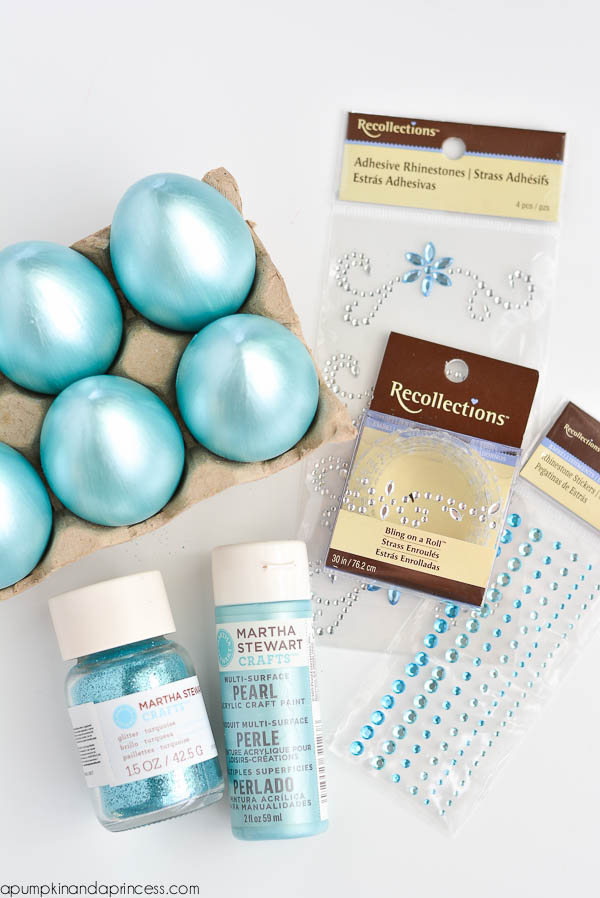
- Craft eggs
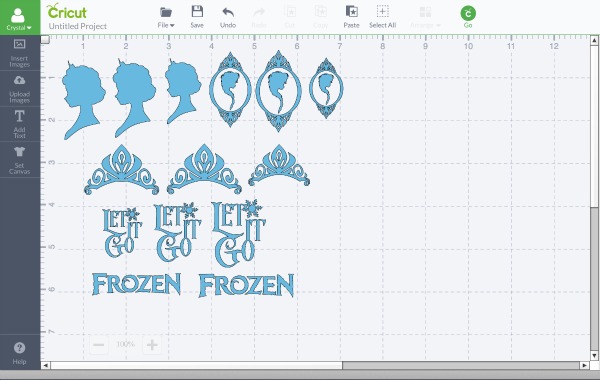
- Cricut machine
- Double-Sided Adhesive Paper
- Blue Paint
- Glitter
- Rhinestones and pearl embellishments
- Paint eggs with multi-surface paint (apply 2-3 coats to fully cover the eggs). I found these faux eggs at Target and Michaels in packs of 12. They’re great for using them for years and applying non-edible decorations.
- Use a Cricut machine and double-sided adhesive sheets to cut Disney Frozen shapes. Since the Cricut Explore doesn’t have a setting for adhesive sheets it was a lot of trial and error on my part. I found that the best setting was cardstock and I sized them around 1.5 x 2 inches.
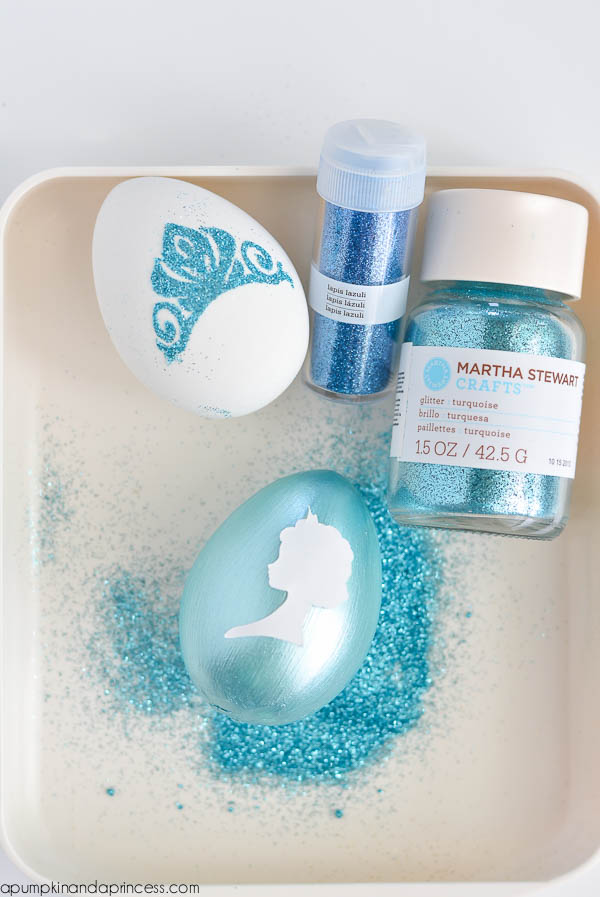
- apply double-sided adhesive shapes and glitter with Martha Stewart fine glitter – I used the colors turquoise and lapis lazuli.

- add some bling! I used an assortment of rhinestone.
 More Easter ideas:

How do I find the Disney frozen shapes?
CUTE!!! Oh, my goodness these are adorable. What an amazing idea.