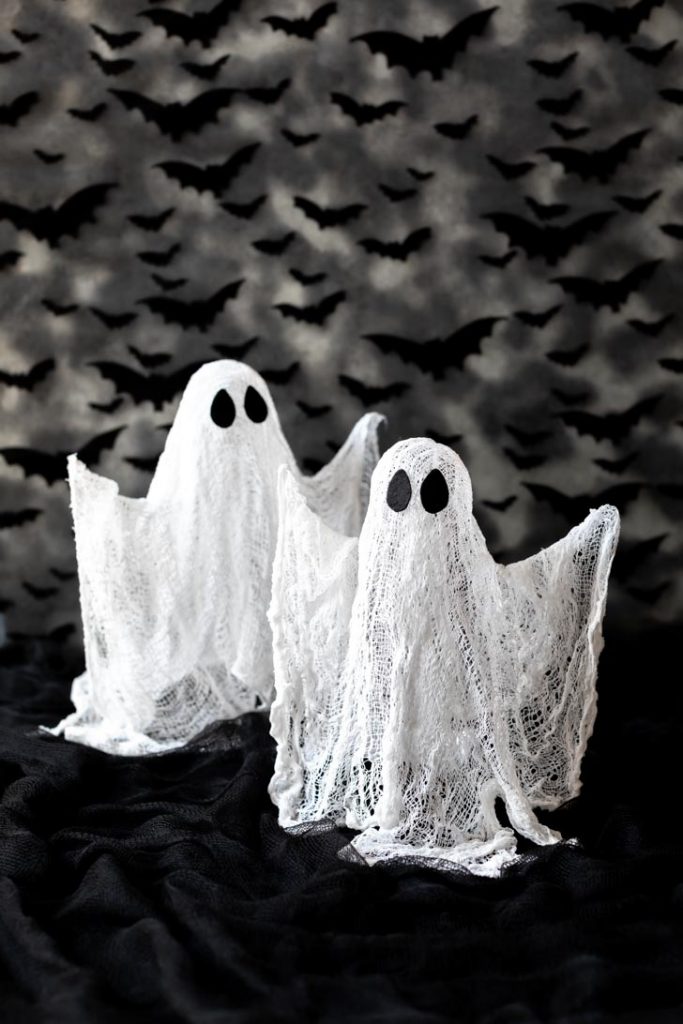
How to make cheesecloth ghosts using glue, cheesecloth, and black felt. This spooky Halloween craft is easy to make and can be used to decorate a mantel, table, or hang as flying ghosts.
My love for Halloween crafts started at an early age. I remember making cheesecloth ghosts in elementary school and being excited to show my mom. Now I enjoy making them with my children and it brings me so much joy.
DIY Cheesecloth Ghosts (VIDEO TUTORIAL)
Over the years the kids and I have made cheesecloth ghosts many times. It’s one of those crafts that is easy for kids to make and fun to decorate with for Halloween. Those are the best, in my opinion!
Today I’m sharing a quick video tutorial on how to make cheesecloth ghosts to hang or decorate your tablescape with this Halloween.
If you enjoy DIY Halloween crafts check out our Halloween Candy Jar and Cauldron Pumpkin Candy Holder.
Supplies to make Halloween cheesecloth ghosts
- Cheesecloth
- White glue
- Water
- Black felt
- Bottle or vase
- Floral wire
- Foam ball, craft egg, foil, or balloon
To make mini hanging ghosts
- Small foam balls
- Dowels/craft sticks
- Styrofoam block
- Fishing wire
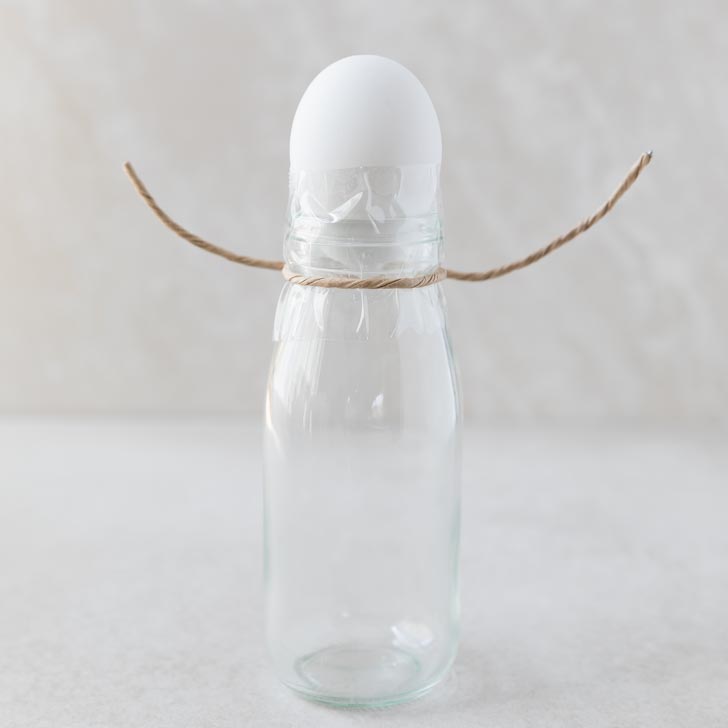
Making the ghost form
- Reuse old bottles in different sizes to make a ghost form. Tape a foam ball or craft egg (upside down) to the top of the bottle. A ball of foil or small balloon will also work.
- Wrap floral wire around the jar, bending the ends up creating arms for the ghost shape.
- Measure and cut the cheesecloth long enough to cover the size of the bottle with excess length at the bottle to help it stand.
- Protect the surface area with a plastic tablecloth or garbage bag.
Preparing the cheesecloth glue mixture
- Combine glue and water in an old jar or disposable container. Note: Fabric Stiffener will also work!
- Soak the cheesecloth in the glue mixture. Shake off the excess but the more glue the cloth has the better it will hold its shape once its dried.
- Place over the bottle, covering the arms and draping the cloth as desired. Lay the ends flat on the surface. Dry overnight then gently remove the bottle.
- Cut eyes out of black felt and glue (or stick on with adhesive felt) to the ghost.

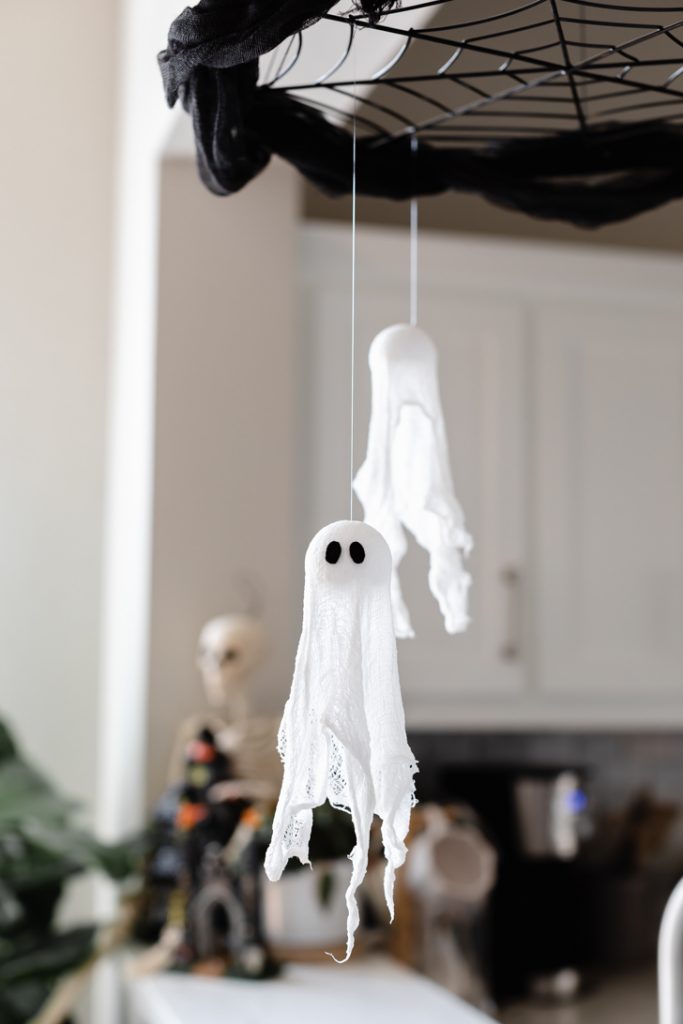
For the mini flying ghosts:
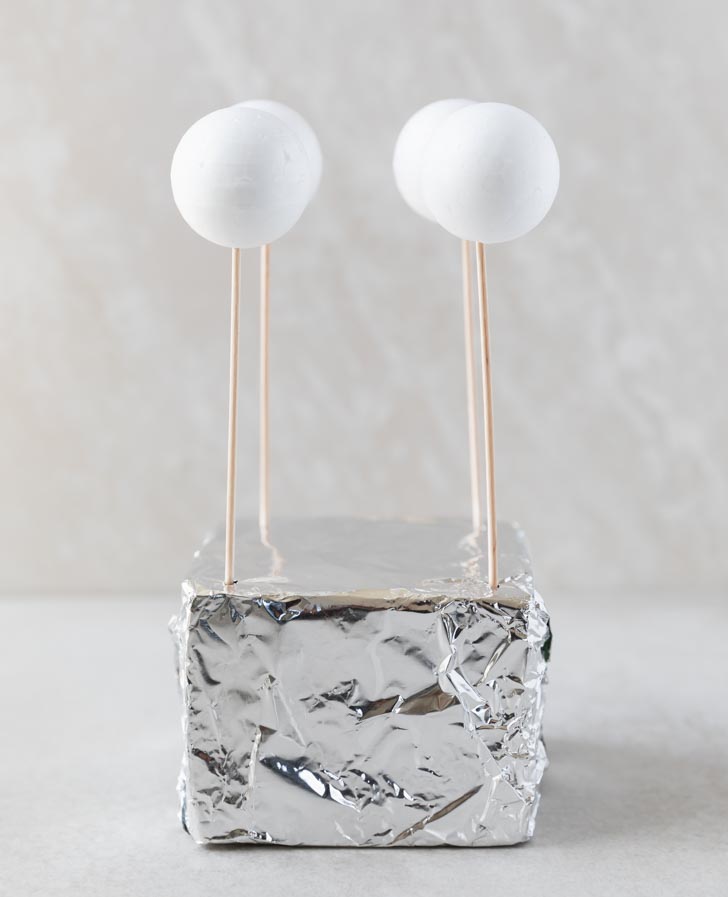
- Insert a dowel or craft stick into a small foam ball. Place on a Styrofoam block. Tip: cover the Styrofoam to reuse for another craft project.
- Dip the cheesecloth in the glue mixture and drape over the Styrofoam ball. Arrange the cheesecloth to drape in swirls and at different lengths.
- Dry overnight before carefully removing dowel or craft stick from the bottom of the Styrofoam ball.
- Decorate with black felt or googly eyes.
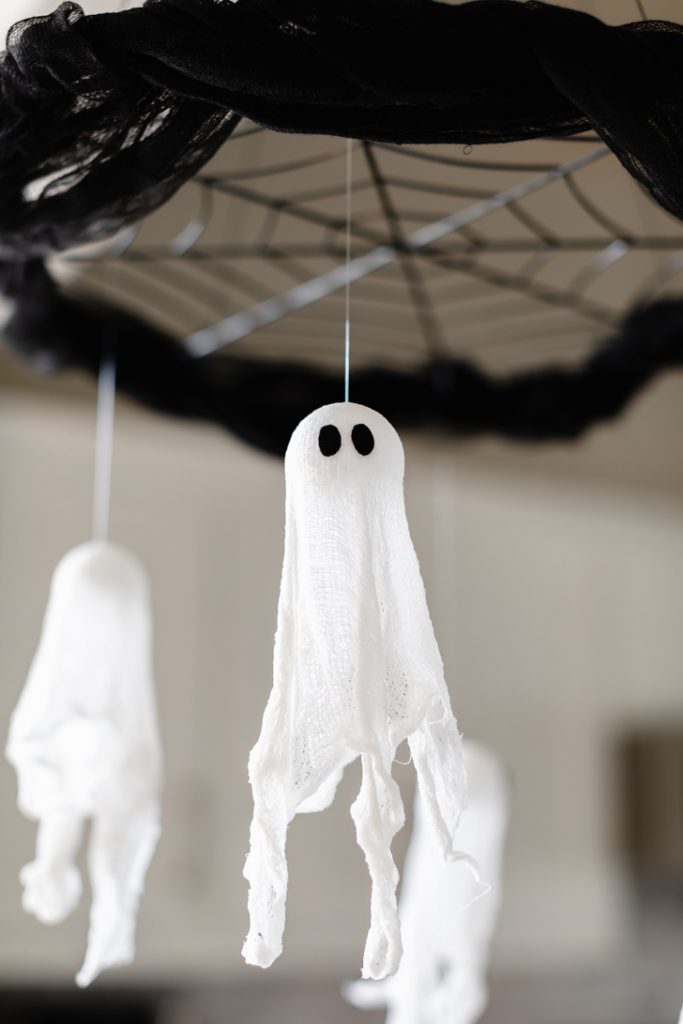
- Thread fishing line through the top of the ghost and hang from a chandelier or ceiling.
Can you make cheesecloth ghosts with balloons?
Yes! Another method is to blow up a balloon to the size of your liking and tape it to bottom of a bottle or vase. Once the cheesecloth is dry, pop the balloon and remove any pieces inside the ghost shape.
Alternative fabric stiffener method
Drape cheesecloth over ghost form and cover with fabric stiffener spray or liquid starch. Make sure the entire cheesecloth is coated to help the shape stiffen. Dry overnight before removing from ghost form shape.
More Halloween Ideas:

Cheesecloth Ghost Decoration
Ingredients
- 8 oz white glue
- 4 oz water
- cheesecloth
- styrofoam ball or balloon
- bottle or vase
- wire
Instructions
- Combine glue and water in a bowl or jar.
- For standing ghost: tape a styrofoam ball or balloon to the top of a vase. Add floral wire to create arms.For the hanging ghosts: insert a craft stick in a styrofoam ball and block.
- Measure and cut the cheesecloth around the vase and styrofoam ball. Allow the cloth to drape on the ends to lay flat on the a covered surface.
- Soak the cheesecloth in the glue mixture and lightly squeeze out the excess. The more glue the cloth absorbs the better.
- Drape over styrofoam ball ghost form. Arrange the ends to lay flat. Dry overnight before removing from vase. Note: for the mini flying ghosts, leave the styrofoam ball attached to the cheesecloth.
- Cut black felt to create eyes for the ghost. Display standing ghost on table or mantel. Thread fishing wire through the top of the mini ghosts to hang from the ceiling or a chandelier.