Witch hat ice cream cones filled with surprise treats inside are the perfect no-bake dessert for a Halloween party or Hocus Pocus movie night. This simple, kid-friendly treat is made with ice cream cones, cookies, melted chocolate, candy, and Halloween sprinkles.
Halloween is my favorite time to make fun treats with the kids! We love simple treats we can make in minutes. October is extra fun for Friday family movie nights because we try to create a treat based on the Halloween movie we are watching.
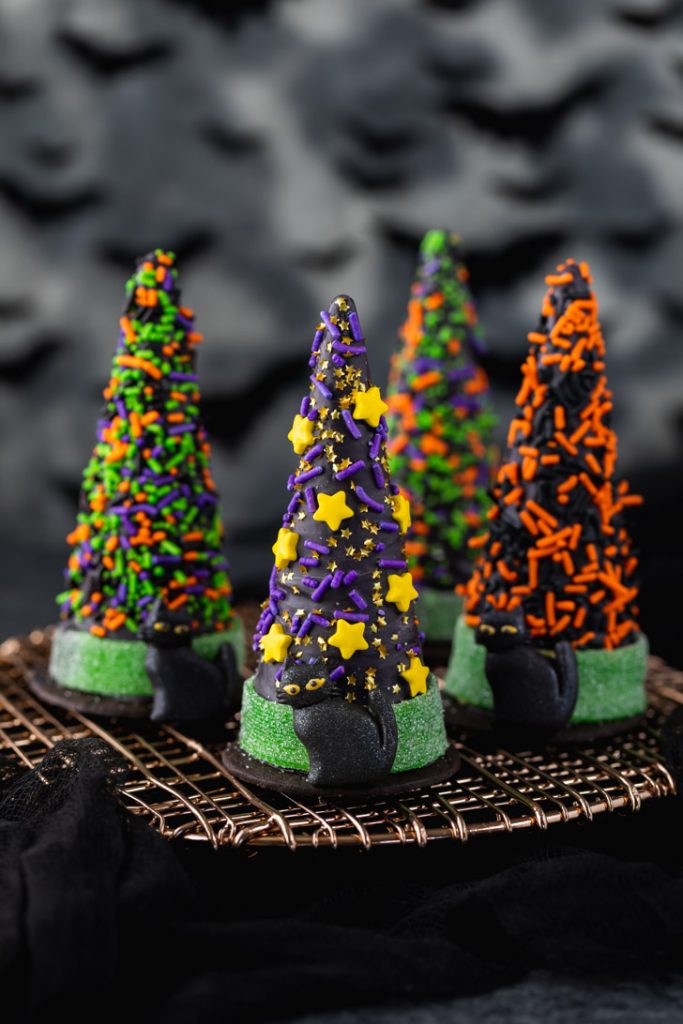
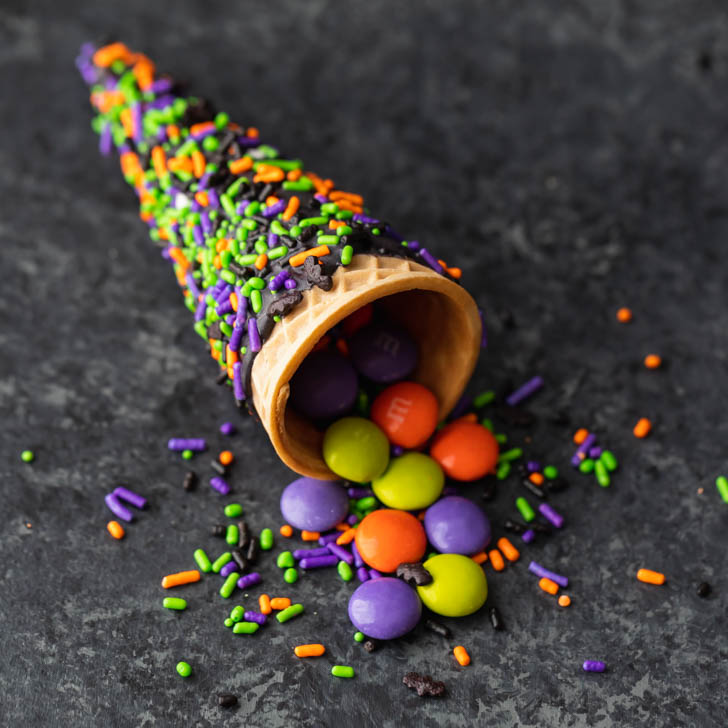
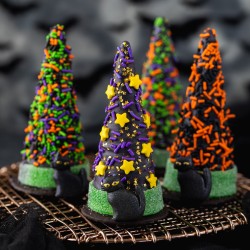
Candy-filled witches’ hats covered in dark chocolate and decorated with festive Halloween sprinkles were the perfect treat for a Hocus Pocus movie night! Halloween and witch themed food are always fun to make, and this is a treat the entire family enjoyed.
Witch hat candy cones can be enjoyed on their own, with an ice cream sundae bowl, or on top of Halloween cupcakes.
To make this Halloween treat you will need
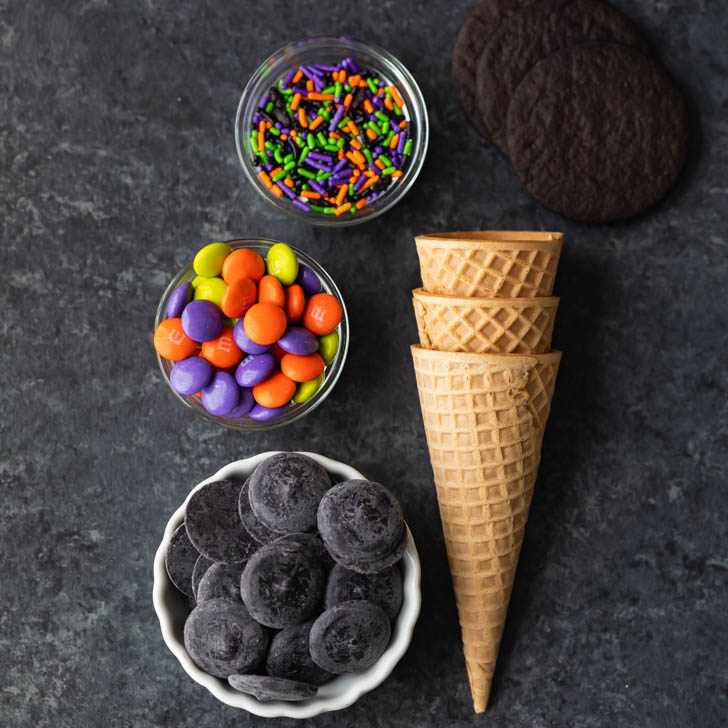
- Ice cream cones – regular or chocolate ice cream cones if you can find them locally.
- Chocolate cookies – the bigger the cookie the wider the brim of the witch hat will be. We used thin chocolate wafer cookies.
- Chocolate melting wafers – dark chocolate or black melting wafers work best.
- Halloween sprinkles – we used a variety of colorful sprinkle mixes.
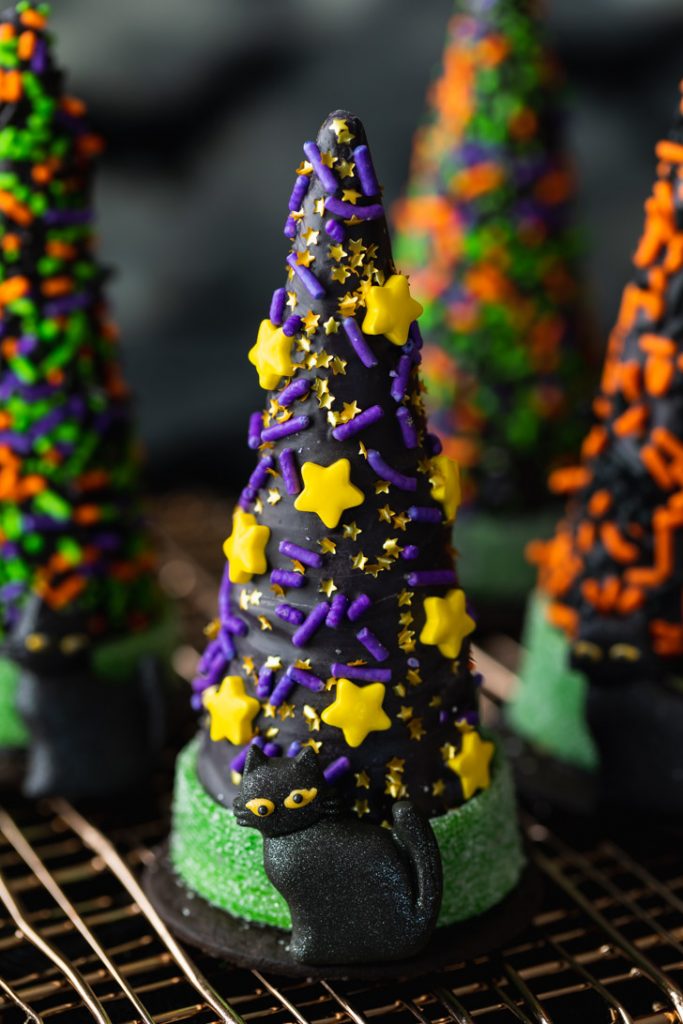
- Candy & icing decorations – the inside is filled with Halloween M&M’s and sprinkles. The cones are decorated with green sour belts and black cat icing decorations.
How to make candy-filled witches hat cookies
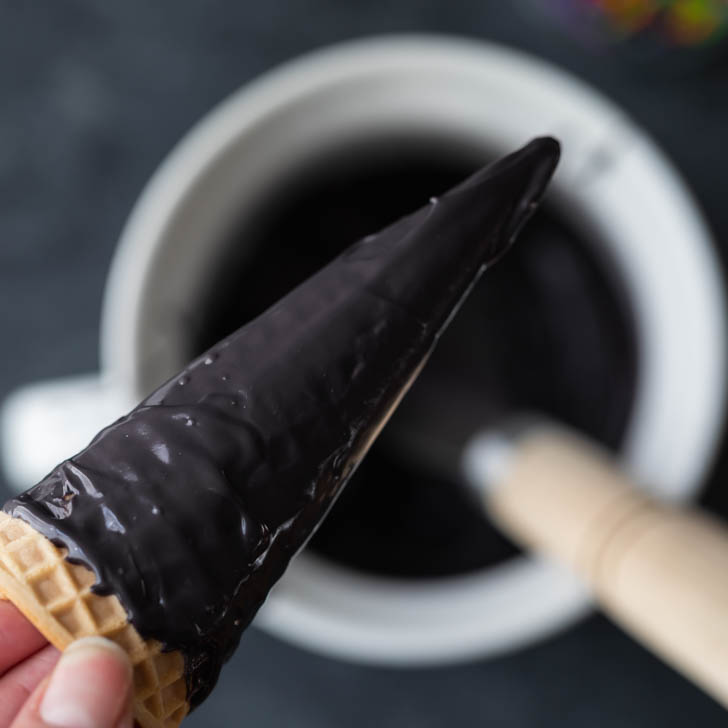
- Melt the chocolate wafers.
- Cover the ice cream cone with melted chocolate. Remove any excess chocolate. Optional: avoid covering the bottom half inch of the cone with chocolate. If applied directly onto the melted chocolate, the green sour belt will darken and not be as vibrant. Instead wait for the chocolate to set before adding a small drop of melted chocolate on the back to hold the sour belt in place.
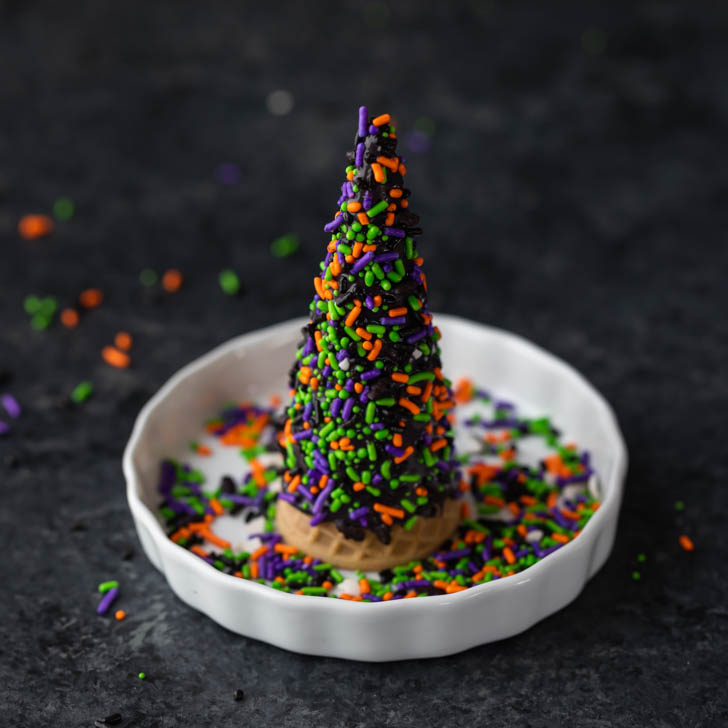
- Decorate with sprinkles, then allow the chocolate to set.
- Fill the cones with Halloween candy.
- Add a layer of melted chocolate to the bottom of the cone and press a cookie in the center.
- Optional: add a black cat icing decoration to the front of the witch hat cone using a small amount of melted chocolate. Press the icing decoration to the center, holding the cat in place until the chocolate sets.

Tips for decorating witches’ hats
- Decorate with sprinkles to match your Halloween party theme. Have fun creating color combinations like black & orange, green & purple, or opt for a celestial witch theme with gold stars.
- Use dark chocolate or black melting wafers to get as close to a black hat as possible.
- If you can find them, some stores carry chocolate ice cream cones. I was unable to find them locally, but my kids really enjoyed the chocolate covered ice cream cones. If you can find chocolate cones, try drizzling melted chocolate and decorating with sprinkles instead of covering the entire cone with chocolate.
- Another option is to paint the ice cream cones with black edible spray.
- For a vibrant black hat, try decorating with black sanding sugar instead of sprinkles. Use a homemade chocolate cookie, chocolate wafers, Fudge strip cookies, OREO cookies, or Pizzelle cookies for the brim of the hat.
What to fill the ice cream cones with:
- M&M’s
- Sprinkles
- Candy Corn
- Chocolate chips
- Mini marshmallows
- Gummy worms
- Licorice

If you enjoy easy Halloween treats, try some our favorite recipes:
Candy-filled Witch Hats
Ingredients
- 12 waffle ice cream cones
- 12 oz chocolate melting wafers
- 12 chocolate cookies
- 12 green sour belts
- 12 black cat icing decorations
- Halloween sprinkles
- candy
Instructions
- Melt the chocolate wafers according to package directions. Cover the ice cream cone with chocolate, using a spatula to smooth and remove any excess chocolate.
- Decorate the cones with sprinkles and place on a parchment covered baking sheet.
- Add a small amount of chocolate to the bottom edge of the cone to adhere the green sour belts. Optional: add a black cat icing decoration to the front.
- Fill the cones with Halloween candy and sprinkles. Cover the bottom of the cone with chocolate, being careful not to drop chocolate inside the cone. Then place a chocolate cookie on top. Flip the cone over and let the chocolate set before transferring to an airtight container until ready to eat.